The Ultimate Coffee Equipment Guide 2026: What You Need, What You Don't
Affiliate disclosure: Sweeter Grind is a participant in the Amazon Services LLC Associates Program. We may earn commissions on qualifying purchases at no extra cost to you.
Coffee forums will tell you that you need a $1,200 grinder, a temperature-controlled kettle, a refractometer, and a scale accurate to hundredths of a gram. You do not. Most people making the best coffee you have ever tasted started with a $30 dripper, a $60 grinder, a basic scale, and a lot of practice.
Four pieces of equipment do 90% of the work in home coffee — and the order you buy them in matters more than any individual upgrade. What follows is where to spend money first, what to put off for later, and what to skip entirely.
For a parallel view of the brewing methods themselves, pair this with our Complete Guide to Coffee Brewing Methods.
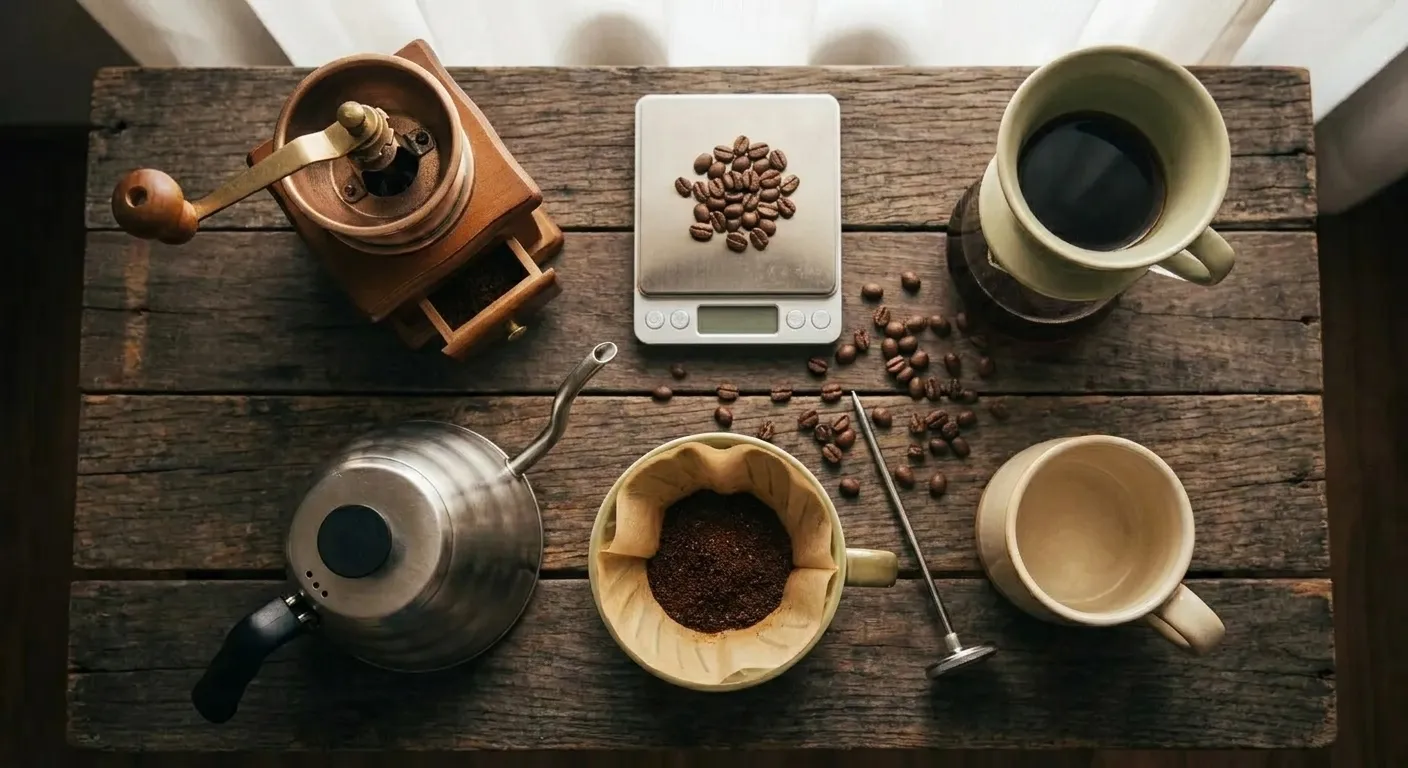
The Four Pieces That Actually Matter
If you remember nothing else, remember this: four pieces of equipment do 90% of the work in home coffee brewing. In order of impact:
- A burr grinder — controls grind size and, more importantly, grind consistency
- A kettle — controls water temperature and (for pour over) the pour itself
- A brewer — the dripper, press, or machine where extraction happens
- A scale — the difference between guessing and brewing
Notice what is not on the list. Fancy water filtration, distribution tools, thermometers, cupping bowls — all useful, none essential. The four items above produce the single biggest jump in cup quality, and the order matters. An expensive brewer paired with a cheap blade grinder will still make mediocre coffee. A $20 dripper with a quality burr grinder will embarrass it.
Where to Spend Your Budget First
The most common mistake beginners make is spending most of their budget on the brewer (especially espresso machines) and the least on the grinder. Reverse that instinct.
| Priority | Equipment | Why |
|---|---|---|
| 1 | Grinder | Inconsistent particles lead to uneven extraction — the biggest flavor killer in home coffee |
| 2 | Scale | Brewing by weight, not volume, is the easiest upgrade you will ever make |
| 3 | Brewer | Any decent brewer performs well when grind and ratio are dialed in |
| 4 | Kettle | Temperature matters, but any kettle produces good coffee with attention |
Take the same $200 and spend $120 on a grinder, $25 on a scale, $20 on a dripper, and $35 on a kettle. Your coffee will be dramatically better than the version where you spend $170 on an espresso machine and $30 on a blade grinder.
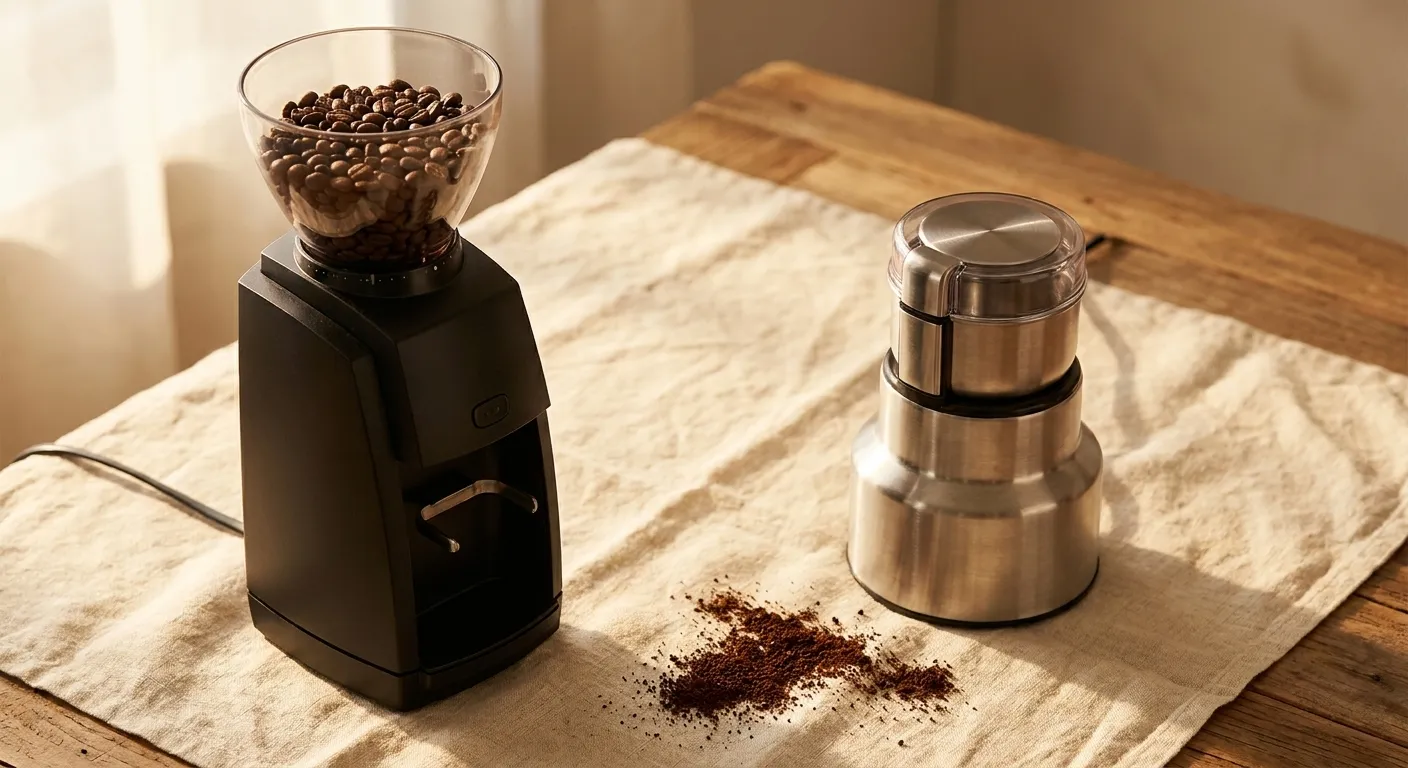
The Grinder: The Most Important Piece
Grind size determines extraction speed, and grind consistency determines whether your cup tastes balanced or muddled. A grinder that produces wildly uneven particles — a mix of dust and boulders — simultaneously over-extracts the fines (bitterness) and under-extracts the large pieces (sourness). You cannot dial in your way out of bad grind distribution.
This is why burr grinders exist. Burrs crush beans between two abrasive surfaces at a set distance, producing a narrow distribution of particle sizes. Blade grinders, by contrast, chop beans randomly with a spinning propeller, and the result is highly uneven. Our deep dive on burr grinder vs blade grinder covers the mechanism difference in detail, including the taste impact and when a blade is acceptable (hint: very rarely, and usually for something other than brewed coffee).
Manual or Electric?
The next decision is whether to buy a manual hand grinder or an electric one. Manual grinders offer surprisingly good quality per dollar — a $50–$80 hand grinder will out-grind a $150 electric in many cases — but they require physical effort every brew. Electric grinders are faster and more convenient but start expensive for quality. Our manual vs electric coffee grinder comparison lays out the tradeoff so you can pick the right side for your daily routine.
What to Look For in a Grinder
- Burr material — steel or ceramic; both work well for home use
- Grind adjustment — stepless (infinite positions) is ideal; 30+ stepped positions is fine
- Grind range — must cover at least French press coarse to espresso fine if you want flexibility
- Hopper and grounds cup — static can be annoying; look for reviews that mention it
- Noise — electric grinders can be loud; manual grinders are quiet
If your budget is tight, our roundup of coffee grinders under $50 covers the small number of affordable grinders that actually perform.
The Kettle: Temperature and Control
The job of a coffee kettle is twofold: heat water to the right temperature and deliver it where you want, how you want. Different brewing methods demand different amounts of each.
Do You Need a Gooseneck?
A gooseneck kettle has a long, curved spout that produces a thin, controlled stream of water. For pour over — where water placement and pour rate directly affect extraction — a gooseneck is close to mandatory. For French press or drip machines, it is pointless. Our gooseneck kettle vs regular kettle guide walks through which methods need one and which methods do not.
Electric or Stovetop?
Electric kettles heat faster, turn off automatically, and — in the premium category — offer precise temperature control. Stovetop kettles are cheaper, work during a power outage, and look great on a burner, but most have no temperature control at all. For coffee, temperature control matters: SCA-certified brewers must deliver water at 197.6–204.8°F (92–96°C), and water straight off a rolling boil is already too hot for the brew bed. Our stovetop vs electric kettle for coffee comparison covers the safety, speed, and precision tradeoffs.
If you know you want the full pour over experience, skip ahead to our roundup of the best electric kettles for pour over coffee — any of those will serve you for years.
What to Look For in a Kettle
- Temperature control — ideally 1-degree increments between 140°F and 212°F
- Hold function — keeps the water at target temperature while you prep
- Spout shape — gooseneck for pour over, standard for everything else
- Build quality — stainless steel interior (no plastic touching hot water)
- Capacity — 1 liter is standard; 1.7L is nice for larger batches
The Brewer: Where Extraction Happens
The brewer is the component most people focus on, but it matters less than most people think. A Hario V60 is fifteen dollars. A Chemex is about fifty. A French press starts at twenty. Even the extraordinary is not expensive.
That said, the brewer you pick shapes the cup. Different brewers produce fundamentally different coffee from the same beans — paper filters remove oils, metal mesh keeps them, immersion creates body, percolation creates clarity. For a framework on choosing between them, see our coffee brewer buying guide, which covers material, filter type, thermal vs hot plate carafes, SCA certification, and pre-infusion behavior.
Brewer Categories at a Glance
| Category | Typical price | Best for |
|---|---|---|
| Pour over dripper (V60, Chemex, Kalita) | $15–$50 | Clean, bright, single-cup brewing |
| French press | $20–$60 | Full-bodied, forgiving, 1–4 cups |
| AeroPress | $35 | Versatile, fast, travel-friendly |
| Drip machine (SCA-certified) | $200–$350 | Consistency, larger batches, set-and-forget |
| Moka pot | $25–$45 | Strong, stovetop, espresso-adjacent |
| Espresso machine (entry) | $400–$700 | True espresso at home |
| Cold brew maker | $25–$50 | Smooth, low-acid, make-ahead |
Most home brewers end up with two: one method for daily use and a second for variety. The combinations vary — a V60 plus a French press is common, as is an AeroPress plus a drip machine — but the budget does not have to balloon to support it. Two quality brewers cost less than one mediocre espresso machine.
The Scale: Precision Without Fuss
Brewing by weight instead of volume is the single smallest effort, single biggest flavor upgrade in home coffee. Scoops are imprecise — a tablespoon of coffee can vary from 5g to 8g depending on bean density, roast level, and how tightly you pack it. Water measured in cups is no better. A scale removes the guesswork and lets you reproduce a good cup tomorrow.
Our do you need a coffee scale? article makes the full case, including the specific recommendations to look for in an inexpensive gram-accurate scale. Use it with our brew ratio calculator to nail your water-to-coffee ratio on the first try, every time.
What to Look For in a Coffee Scale
- 0.1g precision — any coarser and you lose the point
- Tare function — zeroes out the brewer weight
- Fast response — lag makes it useless for pouring
- Timer (built in) — not essential if you use our brew timer, but convenient
- Waterproof or splash-resistant — coffee gear gets wet
Expect to spend $20–$50 for a solid coffee scale. You do not need to spend more unless you are pulling espresso shots, in which case a dedicated espresso scale with auto-start adds convenience.
Nice to Have (But Not Required)
Once the four fundamentals are in place, the following upgrades actually add something:
Thermometer
An instant-read thermometer (~$15) lets you verify kettle temperature. Not needed if your kettle has built-in temperature control. Useful if you use a stovetop kettle or one without a readout.
Proper Storage
Coffee stales quickly once ground and gradually once roasted. An airtight, opaque canister keeps beans fresher than the bag they came in. Vacuum-sealed canisters (with a manual pump) extend freshness further. Cost: $20–$80.
Kettle Scale Descaler
If you have hard water, limescale will build up in your electric kettle over months. A bottle of citric acid or a dedicated descaler ($10) restores it. Ignore it and heating efficiency drops and water picks up off-flavors.
Dedicated Water Filtration
Basic carbon-filtered tap water is fine for most home brewing. If your tap water tastes unpleasant, a Brita-style pitcher is enough. If you want to truly optimize, mineral-balanced brewing water products exist (look for Third Wave Water packets or similar). Skip reverse osmosis or distilled water — they produce flat, under-extracted coffee.
Cupping Tools
If you want to taste multiple beans side-by-side, a set of small cupping bowls, a cupping spoon, and a timer let you evaluate origin and roast differences methodically. Nice hobby upgrade; unnecessary for daily use.
Milk Frother or Steamer
If you drink lattes and cappuccinos, a milk frother or steam wand matters. Entry espresso machines (Breville Bambino Plus, Gaggia Classic) include steam wands. Stand-alone electric frothers ($30–$80) produce microfoam for cappuccinos at home without an espresso machine. Hand-pump frothers work on a budget but produce airier, less textured foam.
Knock Box
For espresso, a knock box ($20–$40) is a rubber-lined container that lets you tap used pucks out of the portafilter without damaging it. Not strictly required — you can knock pucks into the trash — but a dedicated knock box is cleaner and protects the portafilter's metal edge.
Distribution and Tamping Tools
For espresso again: a tamper, distribution tool (WDT), and puck screen are the accessories that separate a dialed-in home espresso setup from a mess. These are espresso-specific upgrades, not general coffee tools. Skip them entirely if you are brewing filter coffee.
The Grinder-Brewer Pairing
Matching your grinder to your brewer matters. A grinder that cannot go coarse enough for French press or fine enough for espresso limits what brewers you can use well. Before buying a grinder, know which brewing methods you plan to use — and check the grinder's range.
| Brewer | Grind setting | Typical range description |
|---|---|---|
| Espresso | Fine | Like table salt, slightly finer |
| Moka pot | Medium-fine | Finer than table salt, coarser than espresso |
| AeroPress (standard) | Medium | Like coarse sand |
| Drip machine | Medium | Like coarse sand |
| Pour over (V60, Kalita) | Medium | Like coarse sand, slightly coarser for V60 |
| Chemex | Medium-coarse | Between coarse sand and sea salt |
| French press | Coarse | Like sea salt or breadcrumbs |
| Cold brew | Extra coarse | Like peppercorns, noticeably chunky |
Many entry-level grinders cannot hit both ends of this spectrum. Espresso-capable grinders often don't go coarse enough for French press (and vice versa). If you want flexibility across methods, look for grinders with at least 30+ adjustment positions spanning "extra fine" to "extra coarse."
Our grind size guide has visual references for what each setting should look like. Getting the grind wrong is the single most common reason home brews taste off — and a quick glance at a reference image is usually enough to fix it.
Water Matters More Than Most Equipment
An underrated piece of "equipment" that is not equipment: water. Coffee is 98–99% water, and what comes out of your tap can make or break the cup. We cover this in detail in why water quality matters for coffee, but the short version for this guide:
- Carbon-filtered tap water (Brita-style pitcher) works for most home brewing. This is the cheapest effective fix for bad tap water.
- Third Wave Water packets (or similar mineral-balance products) offer professional-level water optimization. Pour a packet into a gallon of distilled water, shake, brew. Used by cafes and competition brewers.
- Hard water shortens kettle life via limescale and changes extraction (usually toward bitterness). Soft water can under-extract.
- Distilled or reverse osmosis water is too pure — coffee needs minerals (particularly magnesium and calcium) to extract well. Avoid both.
Check your local water report if flavor is off. You might find your tap water has high chlorine or very hard mineral content that is working against every other upgrade you have made.
Espresso Equipment: A Separate Game
Espresso demands a different tier of every piece of equipment, and it is worth separating from the rest of this guide.
Espresso machine. True espresso requires 9 bars of working pressure, a capable boiler or heat exchanger, and tight temperature control. Entry machines start around $400–$500 (Breville Bambino Plus, De'Longhi Stilosa). $700–$1,000 gets you a real home machine with better temperature stability and a proper steam wand (Breville Barista Express, Gaggia Classic). Serious enthusiast setups start around $1,500 and climb from there.
Espresso grinder. An espresso-capable grinder is a different animal from a filter grinder. You need very fine adjustment (stepless or 50+ steps near the fine end) because espresso is sensitive to grind changes that are invisible to the eye. Expect to spend $300+ on a dedicated espresso grinder; the Eureka Mignon Specialita (~$650) is a common entry-level home espresso grinder that will keep up with a Barista Express or Gaggia. Cafe-level grinders start around $1,000.
Scale. A 0.1g scale with auto-start timer makes espresso brewing dramatically easier. The shot is 18g in, 36g out, in 25–30 seconds — a scale tells you when to cut the shot.
Tamper, distribution tool, knock box, portafilter, basket. Accessories add up. Budget $100–$200 on top of the machine for a complete espresso station.
For a deeper dive on where to start, see our Best Espresso Machines for Beginners 2026 roundup. Espresso is the most expensive path into home coffee, but also the most rewarding for people who love cafe drinks.
Common Equipment Mistakes
Patterns we see over and over in home coffee setups:
Buying the machine before the grinder. The single most common mistake: spending $300 on a fancy espresso machine and using pre-ground supermarket coffee or a blade grinder with it. The machine can only be as good as its inputs. Buy the grinder first. Always.
Paying for features over fundamentals. Blinking lights, branded Bluetooth apps, carafe "smart" temperature displays — none of these make better coffee. Features matter less than: temperature accuracy (kettle), burr quality (grinder), filter type (brewer), and precision (scale).
Ignoring the kettle's temperature control. Boiling water and pouring it immediately is too hot for most brewing (212°F vs the ideal 195–205°F). Without a temperature-controlled kettle, you are either waiting and guessing or brewing hotter than ideal. This is a bigger deal than most beginners realize.
Storing beans wrong. Coffee stales quickly. Pre-ground goes stale in days. Whole beans last 3–4 weeks after roast in a proper container. Buy whole beans, grind immediately before brewing, store in an airtight opaque canister. Skip the freezer unless you are storing more than a month's supply.
Using grocery-store pre-ground coffee with expensive equipment. Freshness is the biggest single variable. A $30 dripper with freshly roasted, freshly ground beans produces better coffee than a $300 machine with pre-ground coffee from the grocery store. Freshness first, equipment second.
Cleaning infrequently. Oils and residue build up on brewing equipment and actively hurt flavor. Rinse after every use; deep clean weekly; descale kettles and espresso machines monthly (hard water) or quarterly (soft water). Ignoring cleaning is a silent flavor killer.
Chasing the brewer, ignoring the beans. Coffee is an agricultural product. The beans matter more than any piece of equipment. A great grinder and brewer with mediocre beans produces mediocre coffee. Spend time on sourcing fresh, specialty-grade beans from local roasters or direct-trade sellers. Our Coffee Bean Finder is a good starting point.
Upgrade Path: When to Level Up
If you are already running a basic home setup and wondering what to upgrade next, the order goes roughly:
- Blade grinder to burr grinder. The first upgrade, always. Biggest single quality jump possible.
- Kitchen scale with 1g precision to coffee scale with 0.1g precision. Cheap, transformative.
- Basic kettle to temperature-controlled kettle. Stops the guessing game on water temperature.
- Regular kettle to gooseneck (if pour over). Unlocks pour control for V60/Chemex/Kalita.
- Manual grinder to quality electric grinder (if brewing at volume). Speed and ease at multi-cup doses.
- Add a second brewer for variety. Often: primary V60 plus backup French press, or vice versa.
- Improve water. Filter or mineral-balanced water elevates everything else.
- Upgrade to espresso (if that's your goal). Separate journey, significant investment.
Most home brewers spend 1–2 years on steps 1–4 before considering anything further. That's a reasonable pace. Each upgrade reveals the next weak link.
Sample Setups by Budget
Real-world starter setups to copy:
The $100 Starter Kit
- Manual hand grinder — Timemore Chestnut C2, ~$70
- Hario V60 plastic dripper + filters — ~$15
- Basic digital kitchen scale — ~$15
- Standard electric kettle (no temperature control) — ~$25
- Total: ~$125 (or ~$95 if you skip the kettle and use a stovetop pot)
This setup makes better coffee than most cafes if you use good beans and practice your pour. It is where most serious home brewers start. If the Chestnut C2 is out of stock, the Kingrinder K6 ($120) and 1Zpresso Q2 ($100) are direct alternatives.
The $250 Enthusiast Kit
- Entry burr grinder — OXO Brew Conical Burr (
$100) or 1Zpresso JX manual ($160) - Hario V60 or Chemex 6-cup — ~$30
- Gooseneck electric kettle with temperature control — Bonavita 1L BV07001US (
$80) or Cosori Original ($90) - Gram-accurate coffee scale with timer — Hario V60 Drip Scale (
$50) or Timemore Black Mirror Basic Plus ($80) - Total: ~$240–$300
This is the setup where variables become controllable and consistency locks in. Most home brewers who stay in the hobby for two or more years converge near this price point.
The $600 Full Build
- Mid-range electric burr grinder — Baratza Encore (
$170), Fellow Opus ($195), or Baratza Virtuoso+ (~$250) - Gooseneck kettle with precise temperature control — Fellow Stagg EKG (
$195) or Brewista Smart Pour 2 ($140) - V60 + Chemex + French press — ~$90
- Quality coffee scale with timer — Felicita Arc (
$140) or Acaia Pearl S ($160) - Thermometer, cupping tools, storage canisters — ~$50
- Drip machine (SCA-certified, optional) — Bonavita Connoisseur (
$180) or OXO Brew 9-Cup ($200), swapped in for one of the above - Total: ~$600 (flexible)
At this budget, you have everything you need for any manual method and room to experiment across methods without compromising on the grinder.
Manual vs Electric: A Quick Framework
Most equipment decisions reduce to a manual vs electric question. The answer depends on how often you brew and how much time you have.
| Criterion | Manual wins when... | Electric wins when... |
|---|---|---|
| Budget | You want quality per dollar | You want convenience |
| Daily usage | You brew 1–2 cups per day | You brew 3+ or for multiple people |
| Morning time | You enjoy the ritual | You need speed |
| Travel | You travel frequently | You brew only at home |
| Noise | You live with light sleepers | Noise is a non-issue |
A manual grinder paired with an electric kettle is one of the most common enthusiast setups, and it is not a compromise — it is the right tool for each job. The grinder only runs for 30 seconds; the effort is low. The kettle runs longer and benefits more from automation.
Frequently Asked Questions
Do I really need a burr grinder if I only drink one cup in the morning?
Yes, and here is why: the difference between a blade grinder and an entry-level burr grinder is larger than the difference between an entry-level burr grinder and a $500 one. The biggest jump in quality is the first one — from random chopping to actual grinding. Whether you drink one cup or ten, you will taste it.
Can I use my regular kitchen scale for coffee?
Probably. Check the precision — many kitchen scales only go to 1g increments, which is too coarse. Look for 0.1g precision and a fast response time. If your scale meets those, use it. If not, a dedicated coffee scale is $20–$30.
Does the brand of my kettle matter?
Not much, as long as temperature control is accurate. Established brands are slightly more reliable long-term, but most failures in electric kettles are heating element issues that happen regardless of brand. Buy one with good reviews and a reasonable warranty.
Is a drip machine worse than pour over?
Not automatically. A low-end drip machine brews at the wrong temperature and produces mediocre coffee. An SCA-certified drip machine — Technivorm Moccamaster KBGV Select ($350), Breville Precision Brewer Thermal ($300–$350), OXO Brew 9-Cup ($200), or Bonavita Connoisseur 8-Cup ($180) — matches a skilled pour over almost exactly and does it in 6 minutes without supervision. For volume and consistency, high-end drip is legitimately excellent.
How long does coffee equipment last?
A burr grinder with steel burrs lasts 500+ pounds of coffee (years for a home user) before burr replacement. A good kettle lasts 5–10 years. A ceramic or glass brewer lasts indefinitely unless dropped. Scales last until the battery compartment corrodes. Buy once, cry once.
Is it worth buying used coffee equipment?
Carefully. Manual grinders and brewers (V60, Chemex, French press) are safe used purchases — they have no electronics to fail and you can inspect for wear. Electric kettles are usually fine used if they look clean and the temperature control works. Electric grinders and espresso machines are riskier used because motors, seals, and boilers wear in ways that are not always visible. Read reviews of the specific model's failure modes before buying used.
Can I use the same grinder for espresso and filter coffee?
You can, but consistently switching between very fine (espresso) and coarse (French press) settings is tedious and wears the grinder faster. Most serious home brewers who do both keep two grinders — one set for espresso, one set for filter. If you only occasionally switch, a single grinder with a wide adjustment range works.
What coffee equipment is a waste of money?
Grinders under $30 (invariably blade), drip machines that aren't SCA-certified, scales that don't offer 0.1g precision, kettles without temperature control if you care about pour over, gimmicky "smart" brewers with apps but no improvement in brewing, and any non-induction stovetop kettle marketed as "precision" if your stovetop has no precise low-heat settings. The common thread: paying for marketing rather than for the fundamentals.
Related reading
- Complete Guide to Coffee Brewing Methods
- Burr Grinder vs Blade Grinder
- Do You Need a Coffee Scale?
- Gooseneck Kettle vs Regular Kettle
- Stovetop vs Electric Kettle for Coffee
- Manual vs Electric Coffee Grinder
- Coffee Brewer Buying Guide: What to Look For
- Coffee Grinders Under $50
- Best Electric Kettle for Pour Over Coffee
- Brew Ratio Calculator
- Brew Timer
Matching Equipment to Your Coffee Style
Different drinkers need different setups. Read through these profiles and pick the one closest to how you actually drink coffee day to day.
The single-cup morning drinker. You drink one cup every morning, black or with a splash of milk. Best setup: a manual burr grinder, a V60 or AeroPress, a gooseneck electric kettle with temperature control, and a coffee scale. Total cost: around $200. This stack produces cafe-quality single cups in under 5 minutes of active attention.
The weekday-convenience drinker. You drink 1–2 cups on weekdays and want something you can schedule the night before. Best setup: an SCA-certified drip machine with a thermal carafe (Bonavita Connoisseur ~$180, OXO Brew 9-Cup ~$200, or Breville Precision Brewer Thermal ~$300), a decent burr grinder (Baratza Encore ~$170 or OXO Brew Conical ~$100), and a scale for dosing. Total cost: ~$300–$500. The drip machine handles everything; you grind, dose, pour water, and push start.
The household brewer. You brew for multiple people most mornings. Best setup: an SCA-certified drip machine with a thermal carafe at 8-cup capacity or larger (Technivorm Moccamaster KBGV Select ~$350 is the volume workhorse), an electric burr grinder for speed (Baratza Encore ~$170 or Virtuoso+ ~$250), and a scale. Total cost: ~$550–$650. Avoid manual brewers at household volumes — the effort adds up fast.
The weekend ritualist. You brew on weekdays with a drip machine and on weekends you want to explore manual methods. Best setup: a drip machine for weekdays plus a V60 or Chemex, a gooseneck kettle, and an electric burr grinder that covers both. Total cost: $500–$700. The second brewer is for hobby time, not efficiency.
The light-roast enthusiast. You drink single-origin light roasts, want to taste origin character, and brew one cup at a time. Best setup: a high-quality burr grinder (this matters more than anything else for light roast), a V60 or Origami dripper, a temperature-controlled gooseneck kettle set to 205°F, and a 0.1g scale. Total cost: $400–$600. Light roasts punish bad equipment; you need the grind consistency.
The dark-roast, heavy-body drinker. You drink darker roasts, prefer full-bodied coffee, and want minimal fuss. Best setup: a French press (34 oz), a manual or basic electric burr grinder at coarse setting, any kettle, and a scale. Total cost: under $150. Dark roasts and French press are forgiving; the setup does not need to be premium.
The espresso home barista. You want real espresso drinks. Separate buying category. Budget minimum $1,000 for a real setup including machine, grinder, scale, and accessories. Read our Best Espresso Machines for Beginners 2026 guide before starting.
The traveler. You are on the road often and need coffee wherever you are. Best setup: an AeroPress (travel version or regular), a manual hand grinder, and a portable scale if you are particular. Total cost: under $200. Hot water from wherever you are staying; instant coffee equipment anywhere on earth.
Your stack should match how you brew, not how a YouTube reviewer brews. Copy the profile that sounds like you — or mix features from two — and you will land on a setup that actually fits your mornings.
Where to Start
Start where it matters most: the grinder. Add a scale. Pick a brewer that matches the cup you want. Get a kettle appropriate to your method. Everything else is optional, and most of it is optional for years.
Build for the setup you will actually use every morning without thinking about it.

, scale, [WDT tool](https://www.amazon.com/s?k=WDT%20tool&tag=sweetergrind-20), and [knockbox](https://www.amazon.com/s?k=knockbox&tag=sweetergrind-20)](/images/espresso-accessories-you-actually-need-hero.webp)