The Complete Guide to Coffee Brewing Methods (2026)
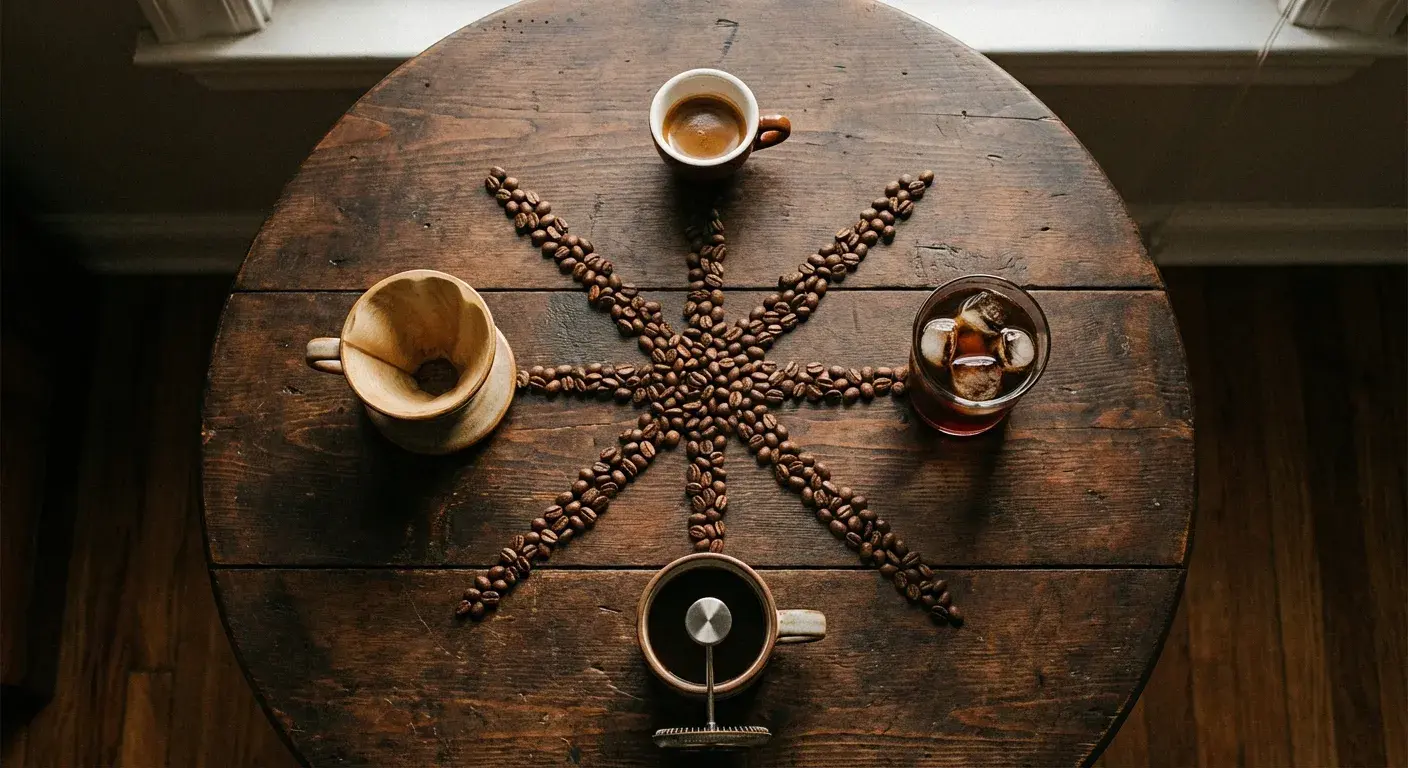
You can buy the most expensive single-origin beans on the planet, grind them fresh, and use perfectly filtered water — and still end up with a mediocre cup of coffee. The reason? Brewing method is the single biggest factor in how your coffee actually tastes. The same beans brewed in a French press, a V60, and an espresso machine will produce three wildly different cups.
That is great news. It means you don't need to spend more money to drink better coffee. You just need to understand what's happening inside your brewer and how to control it.
This article contains affiliate links. We may earn a commission if you make a purchase through our links, at no extra cost to you.
Below: every major brewing method — pour over to cold brew, espresso to Turkish — with the ratios, temperatures, grind sizes, and timing you need to get each one right.
Not sure about your ratios yet? Our Brew Ratio Calculator takes the guesswork out of measuring coffee and water for any method.
What Makes a Great Cup of Coffee?
Four variables control every cup of coffee you will ever make. Master these, and you can produce excellent coffee with almost any brewer.
1. Grind Size
Grind size determines how quickly water can extract flavor from your coffee. Finer grinds have more surface area exposed to water, so extraction happens faster. Coarser grinds slow things down.
Every brewing method has a target grind size. Use the wrong one, and you will either over-extract (bitter, harsh) or under-extract (sour, thin) your coffee no matter what else you do right.
Here is a quick reference:
| Brewing Method | Grind Size | Looks Like |
|---|---|---|
| Turkish Coffee | Extra Fine | Powdered sugar |
| Espresso | Fine | Table salt |
| Moka Pot | Fine-Medium | Slightly coarser than table salt |
| Pour Over (V60) | Medium-Fine | Sand |
| Drip Machine | Medium | Sea salt |
| Kalita Wave | Medium | Sea salt |
| Chemex | Medium-Coarse | Coarse sand |
| AeroPress | Medium (varies) | Sand to sea salt |
| French Press | Coarse | Raw sugar |
| Cold Brew | Coarse | Peppercorns |
For a detailed breakdown, check out our Grind Size Guide, which matches grind settings to specific brewers and grinder models.
2. Water Temperature
According to the Specialty Coffee Association (SCA), the optimal water temperature for brewing coffee is 195 to 205 degrees Fahrenheit (90 to 96 degrees Celsius). Within that range, water has enough thermal energy to dissolve the soluble compounds that give coffee its flavor — sugars, acids, and aromatic oils — without pulling out the harsh, bitter compounds you want to leave behind.
Research published in Scientific Reports found that while water temperature significantly affects the extraction process, the brew temperature at a fixed strength and extraction level has surprisingly little impact on the sensory profile. In practical terms, staying within the SCA range matters more than obsessing over a specific degree.
As a general guideline:
- Light roasts: 200 to 204 degrees Fahrenheit — higher temps help develop delicate fruity and floral notes
- Medium roasts: 198 to 202 degrees Fahrenheit — the sweet spot for balanced extraction
- Dark roasts: 195 to 199 degrees Fahrenheit — lower temps prevent over-extraction of bitter compounds
The obvious exception is cold brew, which uses room-temperature or cold water and compensates with a much longer brew time.
3. Brew Time
Brew time is how long water stays in contact with your coffee grounds. It works hand-in-hand with grind size: fine grinds need less time, coarse grinds need more.
- Espresso: 25 to 30 seconds
- AeroPress: 1 to 2 minutes
- Pour Over: 2.5 to 4 minutes
- Drip Machine: 4 to 6 minutes
- French Press: 4 minutes
- Cold Brew: 12 to 24 hours
Want a hands-free way to nail your timing? Try our Brew Timer — it has preset countdowns for every method.
4. Coffee-to-Water Ratio
The SCA recommends a starting ratio of roughly 1:17 — that is 1 gram of coffee for every 17 grams of water, or about 60 grams of coffee per liter. This produces a balanced cup for most brewing methods.
But ratios vary by method and personal taste:
| Method | Ratio (Coffee:Water) | Example |
|---|---|---|
| Espresso | 1:2 | 18g coffee, 36g yield |
| Moka Pot | 1:7 | 20g coffee, 140ml water |
| Pour Over | 1:16 to 1:17 | 18g coffee, 300ml water |
| French Press | 1:15 to 1:16 | 30g coffee, 450ml water |
| AeroPress | 1:12 to 1:16 | 15g coffee, 200ml water |
| Drip Machine | 1:16 to 1:17 | 60g coffee, 1000ml water |
| Cold Brew Concentrate | 1:5 to 1:8 | 200g coffee, 1000ml water |
Our Brew Ratio Calculator lets you plug in any method and serving size to get exact measurements.
Drip vs. Immersion: The Two Fundamental Approaches
Every coffee brewing method falls into one of two categories, and understanding the difference helps explain why each method tastes the way it does.
Drip (percolation) methods pass water through a bed of coffee grounds. Gravity pulls the water down, and it contacts fresh grounds along the way. Pour over, Chemex, drip machines, and espresso (under pressure rather than gravity) all work this way. Drip methods tend to produce a cleaner, brighter cup because the paper or metal filter separates the liquid from the grounds continuously.
Immersion methods soak the grounds in water for a set period. The coffee and water sit together, extracting simultaneously, and then you separate them. French press, AeroPress (in some recipes), cold brew, and Turkish coffee are immersion methods. They tend to produce a fuller-bodied, more rounded cup because the grounds are in constant contact with the water.
Some methods blend both approaches. The AeroPress, for example, can be used as a steep-and-press immersion brewer or a pressure-assisted drip brewer, depending on your recipe. The Clever Dripper is another hybrid that immerses grounds, then releases through a paper filter.
Understanding this distinction helps you predict how a new brewing method might taste before you even try it.
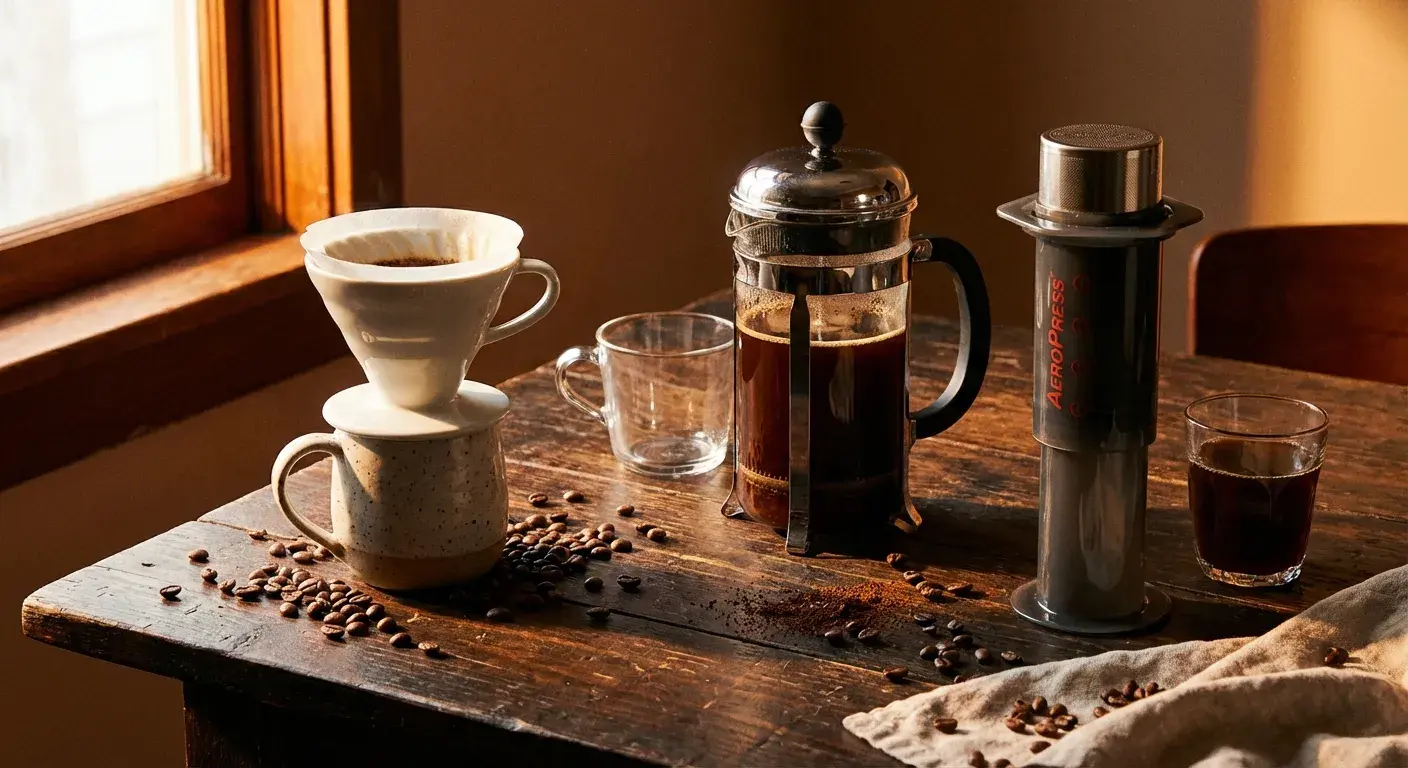
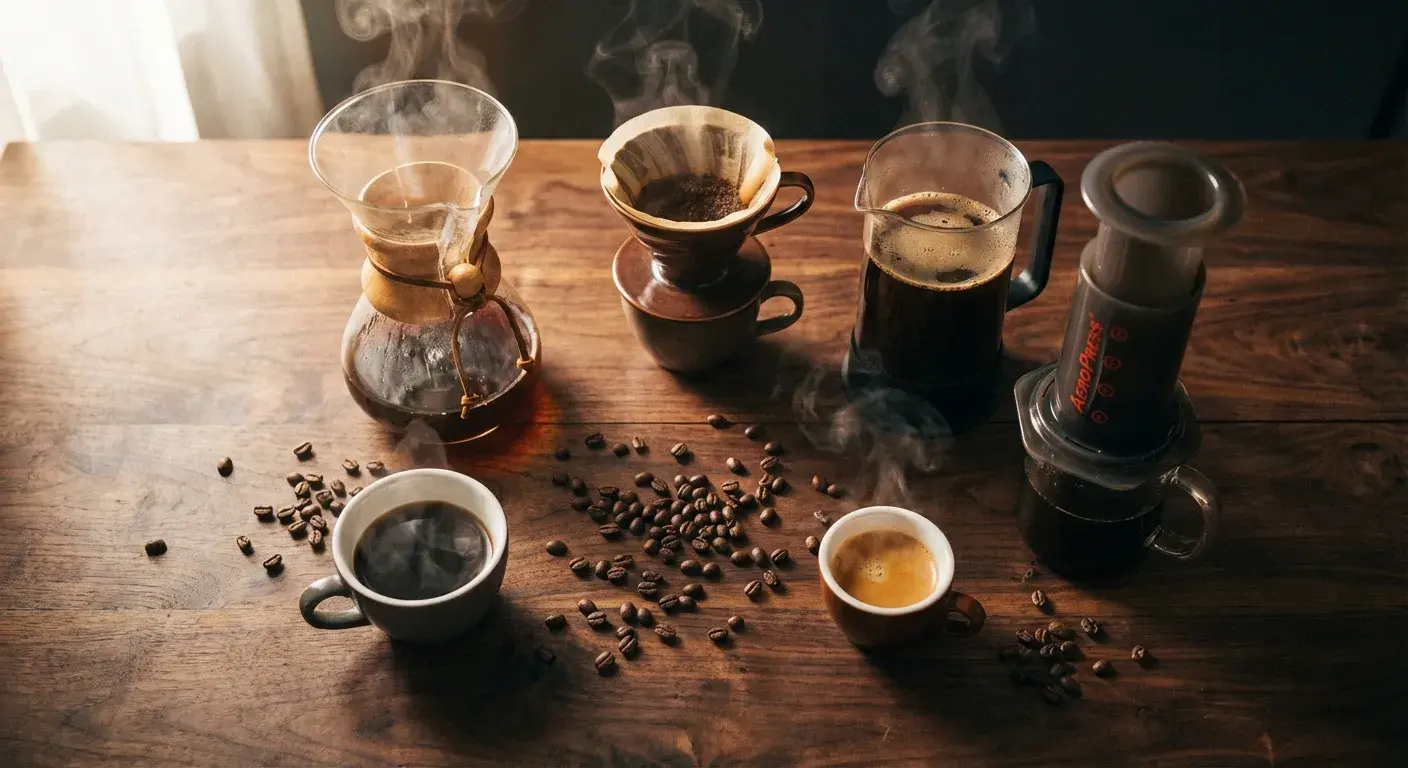
Pour Over Methods
Pour over coffee is manual drip brewing at its most controlled. You pour hot water over a bed of grounds in a filter, and gravity draws the brewed coffee into a carafe or mug below. What makes pour over special is the degree of control you have over every variable: pour rate, water distribution, total brew time, and water temperature.
The result, when done well, is a clean, nuanced cup that highlights a coffee's origin flavors — the berry notes in an Ethiopian, the chocolate in a Colombian, the citrus in a Kenyan.
The Bloom
Before we cover specific pour over brewers, you need to understand the bloom. When hot water first hits fresh coffee grounds, you will see the bed swell and bubble. That is carbon dioxide escaping.
During roasting, chemical reactions — including the Maillard reaction and caramelization — produce significant amounts of CO2 that get trapped inside the bean's cellular structure. When you grind the beans and add hot water, that gas releases rapidly.
Why does this matter? Carbon dioxide is slightly sour-tasting and, more importantly, it repels water. If you skip the bloom and pour all your water at once, trapped CO2 will create air pockets that prevent even extraction. The result is an uneven, under-extracted cup.
How to bloom: Pour roughly twice the weight of your coffee dose in water (for 18 grams of coffee, pour 36 grams of water) over all the grounds. Wait 30 to 45 seconds for the bubbling to subside. Then begin your main pour.
A vigorous bloom is a sign of fresh coffee. If your grounds barely react, your beans may be stale.
Hario V60
The Hario V60 is the most popular pour over brewer in specialty coffee for good reason. Its cone shape and large single drain hole give you total control over flow rate — your pouring technique directly determines brew time.
What you need:
- V60 dripper and paper filters
- Gooseneck kettle
- Scale and timer
- Medium-fine grind (like sand)
V60 Recipe (1 cup):
| Parameter | Value |
|---|---|
| Coffee | 18g |
| Water | 300g |
| Ratio | 1:16.7 |
| Water Temp | 200 to 205 degrees Fahrenheit |
| Total Brew Time | 2:30 to 3:30 |
| Grind | Medium-fine |
Technique:
- Place the filter in the V60 and rinse it with hot water to remove paper taste and preheat the brewer. Discard the rinse water.
- Add 18 grams of coffee and shake gently to level the bed. Place on your scale and tare to zero.
- Start your timer. Pour 36 grams of water in a slow spiral to bloom. Wait 30 to 45 seconds.
- At 0:45, begin pouring in slow, concentric circles from the center outward, keeping the stream about the width of a pencil. Avoid pouring directly on the filter walls.
- Pour in stages (sometimes called pulse pouring) — add water to bring the slurry up, let it drain down a bit, and repeat. Aim to finish adding all 300 grams of water by about 2:00.
- Let the remaining water drain through. The total brew time should hit 2:30 to 3:30. If it drains too fast, grind finer. Too slow, grind coarser.
The V60 rewards practice. Small changes in pour speed and pattern will noticeably change your cup.
Ready to pick a pour over brewer? See our Best Pour Over Coffee Makers in 2026 for detailed reviews of the V60, Chemex, Kalita Wave, and more.
Chemex
The Chemex is as much a design icon as it is a coffee brewer. Invented in 1941, its hourglass shape and proprietary bonded paper filters produce an exceptionally clean, bright cup. The thick Chemex filters remove more oils and fine particles than standard pour over filters, which is why Chemex coffee tastes noticeably different from V60 coffee even with the same beans.
What you need:
- Chemex brewer (6 or 8 cup)
- Chemex bonded filters
- Gooseneck kettle
- Scale and timer
- Medium-coarse grind (coarser than V60)
Chemex Recipe (2 cups):
| Parameter | Value |
|---|---|
| Coffee | 34g |
| Water | 510g |
| Ratio | 1:15 |
| Water Temp | 200 to 205 degrees Fahrenheit |
| Total Brew Time | 4:00 to 5:00 |
| Grind | Medium-coarse |
Technique:
- Open the Chemex filter so three layers face the spout side. Place in brewer and rinse thoroughly with hot water. Discard rinse water through the spout.
- Add 34 grams of coffee. Level the bed, tare your scale.
- Bloom with 68 grams of water. Wait 30 to 45 seconds.
- Pour slowly in concentric circles in stages. The Chemex's thick filter means water drains more slowly, so pour more gently than you would with a V60.
- Aim to finish adding water by about 3:30. Total drawdown should complete by 4:00 to 5:00.
Chemex vs. V60: The Chemex produces a cleaner, lighter-bodied cup because its thick filters absorb more of the coffee's natural oils. The V60 lets more oils through, giving you a slightly richer mouthfeel. Neither is better — it depends on what you prefer in a cup.
Kalita Wave
The Kalita Wave is the most forgiving pour over brewer, which makes it an excellent choice for beginners or anyone who wants consistency without worrying about pouring technique.
Its flat-bottom design with three small drain holes creates a more even extraction bed than cone-shaped brewers. The patented wave filters sit away from the brewer walls, which helps maintain a stable temperature during brewing.
Kalita Wave Recipe (1 cup):
| Parameter | Value |
|---|---|
| Coffee | 25g |
| Water | 400g |
| Ratio | 1:16 |
| Water Temp | 200 to 205 degrees Fahrenheit |
| Total Brew Time | 3:00 to 4:00 |
| Grind | Medium |
Technique:
- Place the wave filter in the dripper and rinse with hot water. Discard.
- Add 25 grams of coffee, level the bed, tare your scale.
- Bloom with 50 grams of water for 30 seconds.
- Pour in slow concentric circles in small pulses, bringing the slurry up and letting it drop before the next pour. Add all water by about 2:45 to 3:00.
- Give the slurry one gentle stir after your last pour to ensure even extraction.
The Kalita Wave's flat bottom means your pour technique matters less than with a V60. It is harder to mess up, and the results are reliably good.
Want the full walkthrough? Our step-by-step pour over guide covers bloom technique, pouring patterns, and troubleshooting in detail.
French Press
The French press (also called a press pot or cafetiere) is the most accessible full-immersion brewer. There is no paper filter, no special pouring technique, and no learning curve. You combine coffee and water, wait four minutes, and press.
What you get is a rich, full-bodied cup with noticeable texture. Because there is no paper filter to absorb them, all of the coffee's natural oils end up in your cup. Some people love this; others find it too heavy. If you have never tried French press coffee, it is worth experimenting to see where you land.
We have a full guide to choosing the right French press in our article on the best French press for making perfect coffee every time.
What you need:
- French press (any size)
- Coarse-ground coffee (like raw sugar)
- Kettle
- Timer
French Press Recipe:
| Parameter | Value |
|---|---|
| Coffee | 30g |
| Water | 450g |
| Ratio | 1:15 |
| Water Temp | 200 to 205 degrees Fahrenheit |
| Total Brew Time | 4:00 |
| Grind | Coarse |
Technique:
- Preheat your French press by filling it with hot water. Swirl for 10 seconds, then discard.
- Add 30 grams of coarsely ground coffee.
- Start your timer. Pour about half the water (225 grams) evenly over the grounds to bloom. Let sit for 30 seconds.
- At 0:30, pour the remaining water. Give the slurry a gentle stir for 5 seconds to break the crust and ensure all grounds are saturated.
- Place the lid on with the plunger pulled up. Do not press yet.
- At 4:00, press the plunger down slowly and steadily. The press should take about 20 seconds. If it feels like pushing through mud, your grind is too fine. If the plunger drops with no resistance, grind finer.
- Pour immediately. Coffee left sitting on the grounds will continue extracting and turn bitter.
Pro tip (the Hoffmann method): After your 4-minute steep, instead of pressing right away, use a spoon to scoop off the foam and floating grounds from the surface. Then wait another 5 to 8 minutes for the fine particles to settle. Press the plunger just to the surface — do not push it all the way down. Pour gently. This produces a dramatically cleaner French press cup with almost no sediment.
Common French Press Mistakes
- Grind too fine: The most frequent mistake. Fine grounds over-extract in four minutes and also clog the mesh filter, making the press hard to push.
- Leaving coffee in the press: Always pour out all the coffee immediately after pressing. Otherwise, it keeps brewing.
- Water too hot: Boiling water scorches coffee. Let it cool for 30 seconds off the boil, or use a thermometer.
- Not enough coffee: A weak ratio produces thin, watery coffee. Stick to 1:15 to start.
AeroPress
The AeroPress is one of the most versatile coffee brewers ever made. Invented in 2005 by Alan Adler (the same engineer behind the Aerobie frisbee), this unassuming plastic tube can produce everything from espresso-style concentrate to a clean cup that rivals pour over. It is portable, nearly indestructible, and costs around thirty dollars.
The AeroPress has its own world championship, and studying winning recipes reveals something telling: there is no single "right" way to use it. The 2025 World AeroPress Champion, Nemo Pop from Australia, used 18 grams of coffee at just 84 degrees Celsius with a paper filter — a recipe that would seem unconventional for most other brewing methods.
That flexibility is the AeroPress's superpower.
Standard Method:
| Parameter | Value |
|---|---|
| Coffee | 15g |
| Water | 200g |
| Ratio | 1:13 |
| Water Temp | 195 to 205 degrees Fahrenheit |
| Total Brew Time | 1:30 to 2:00 |
| Grind | Medium-fine |
- Place a paper filter in the cap and rinse with hot water.
- Attach the cap to the AeroPress chamber. Place on your mug, add coffee.
- Start your timer. Pour all the water in one go. Stir briefly (5 seconds).
- Insert the plunger to create a seal (this prevents dripping).
- At 1:00 to 1:30, press the plunger down slowly over 30 seconds. Stop when you hear a hiss.
Inverted Method:
The inverted method flips the AeroPress upside down so coffee steeps without dripping through. This gives you more control over brew time and produces a slightly fuller-bodied cup.
- Place the plunger in the bottom of the chamber (upside down), about one centimeter in.
- Add 15 grams of coffee and 200 grams of water at 200 degrees Fahrenheit.
- Stir gently and let steep for 1:30 to 2:00.
- Attach the filter cap (with a rinsed paper filter).
- Carefully flip the whole assembly onto your mug and press down slowly.
The AeroPress also works beautifully with metal mesh filters if you prefer a fuller body, or you can stack two paper filters for an ultra-clean cup.
For specific recipes — including championship-winning methods, iced AeroPress, and espresso-style concentrate — see our Best AeroPress Recipes and Techniques.
Espresso
Espresso is not a type of bean or a roast level — it is a brewing method. Specifically, it is coffee brewed by forcing hot water through finely ground coffee at approximately 9 bars of pressure (about 130 PSI). That pressure is what creates espresso's defining characteristics: a concentrated, syrupy body and a layer of golden crema on top.
A standard espresso shot uses about 18 grams of finely ground coffee to produce 36 grams of liquid in 25 to 30 seconds. That is a 1:2 ratio of coffee to yield — dramatically more concentrated than any other brewing method.
Key Espresso Parameters:
| Parameter | Value |
|---|---|
| Coffee (dose) | 18g |
| Yield | 36g |
| Ratio | 1:2 |
| Pressure | 9 bars |
| Water Temp | 195 to 205 degrees Fahrenheit |
| Extraction Time | 25 to 30 seconds |
| Grind | Fine (like table salt) |
How Extraction Works in Espresso
During those 25 to 30 seconds, water under pressure extracts flavor compounds in a specific order. Acids come first, adding brightness. Sugars follow, bringing sweetness and body. Bitter compounds extract last. A well-pulled shot balances all three.
- Under-extracted (too fast, under 20 seconds): Sour, thin, lacking sweetness. Grind finer or increase dose.
- Over-extracted (too slow, over 35 seconds): Bitter, astringent, harsh. Grind coarser or decrease dose.
- Well-extracted (25 to 30 seconds): Sweet, balanced, with a pleasant aftertaste.
Getting Started with Home Espresso
Home espresso requires a bigger investment than other methods — both in equipment and in learning time. A capable espresso machine, a quality burr grinder, and a few accessories (tamper, scale, distribution tool) will set you back several hundred dollars at minimum.
But the payoff is significant. Once you dial in your process, you can make cafe-quality espresso, lattes, and cappuccinos at home every morning for the cost of beans.
If you are curious about how much caffeine is in your shots, our Caffeine Calculator can help you track your daily intake.
If you are ready to invest, our guide to the Best Espresso Machines for Beginners covers the top picks at every price point.
Espresso-Based Drinks
Once you can pull a consistent shot, a world of drinks opens up:
- Americano: Espresso diluted with hot water (similar strength to drip coffee, but different flavor profile)
- Latte: Espresso with steamed milk (roughly 1:3 espresso to milk)
- Cappuccino: Equal parts espresso, steamed milk, and milk foam
- Flat White: Espresso with microfoam milk (less foam than a cappuccino, stronger than a latte)
- Macchiato: Espresso "stained" with a small dollop of milk foam
Cold Brew
Cold brew flips the script on everything we have discussed about temperature. Instead of using hot water for fast extraction, cold brew uses room-temperature or cold water over an extended steep time — anywhere from 12 to 24 hours. The result is a smooth, low-acid, naturally sweet concentrate that you can drink black, dilute with water, or pour over ice.
Cold brew's low acidity is not just a taste preference. The cold extraction process pulls fewer of the chlorogenic acid compounds that contribute to bitterness and stomach irritation, making it a good option for people who find hot-brewed coffee too harsh.
Cold Brew Concentrate vs. Ready-to-Drink
There are two approaches:
Concentrate (dilute before drinking):
| Parameter | Value |
|---|---|
| Coffee | 200g |
| Water | 1000g (1 liter) |
| Ratio | 1:5 |
| Grind | Coarse |
| Steep Time | 16 to 20 hours |
| Storage | Refrigerate up to 2 weeks |
Dilute concentrate 1:1 with water or milk before drinking. Adjust to taste — some people prefer a 2:1 (water to concentrate) dilution for a lighter cup.
Ready-to-drink (no dilution needed):
| Parameter | Value |
|---|---|
| Coffee | 100g |
| Water | 800g |
| Ratio | 1:8 (ready-to-drink) |
| Grind | Coarse |
| Steep Time | 12 to 18 hours (room temp) or 18 to 24 hours (refrigerated) |
| Storage | Refrigerate up to 1 week |
For a longer-shelf-life concentrate that you dilute 1:1 with water or milk, use a 1:5 ratio (100g coffee, 500g water); see our how-to-make-cold-brew-coffee-at-home walkthrough for both versions.
Cold Brew Technique
- Grind your coffee coarse — about the size of raw sugar or peppercorns. Too fine a grind will over-extract during the long steep and produce a muddy, bitter result that is also difficult to filter.
- Combine coffee and room-temperature or cold filtered water in a jar, pitcher, or cold brew maker. Stir gently to make sure all grounds are saturated.
- Cover and steep for 16 to 20 hours. Room temperature extracts slightly faster than refrigerator temperature, but both work. Start with 18 hours and adjust from there.
- Strain through a fine-mesh sieve, then through a paper filter or cheesecloth for a cleaner result.
- Transfer to a sealed container and refrigerate.
Cold brew concentrate makes an excellent base for iced lattes, coffee cocktails, and even baking. Because it is already cold, it does not melt ice the way hot coffee does when poured over ice cubes.
Curious about how cold brew's caffeine compares to other methods? Check our Caffeine Calculator — cold brew concentrate can pack a serious punch.
For the full process, see our guide on How to Make Cold Brew Coffee at Home. And if you want a dedicated brewer instead of the mason jar method, check our Best Cold Brew Coffee Makers.
Drip Coffee Machines
For many people, automatic drip is the default way to make coffee — and for good reason. You add grounds and water, press a button, and come back to a full carafe. No technique required.
But not all drip machines are created equal. The difference between a cheap drip maker and an SCA-certified one is enormous. Certified machines maintain water temperature within the 195 to 205 degree Fahrenheit range throughout the entire brew cycle and distribute water evenly across the coffee bed. Cheaper machines often brew too cool (under-extracting) or heat unevenly.
If you are in the market for an upgrade, we have done extensive testing in our guide to the best automatic drip coffee makers.
Drip Machine Recipe:
| Parameter | Value |
|---|---|
| Coffee | 60g |
| Water | 1000ml (1 liter) |
| Ratio | 1:16.7 |
| Grind | Medium (like sea salt) |
| Brew Time | 4 to 6 minutes (automatic) |
Getting Better Drip Coffee
Even with a basic drip machine, these adjustments make a noticeable difference:
- Grind fresh. Pre-ground coffee goes stale within days of opening. A good burr grinder under fifty dollars will transform your morning cup.
- Use the right amount. The most common drip coffee mistake is using too little coffee. A ratio of 1:16 to 1:17 is the target — that is roughly 2 tablespoons (10 grams) per 6-ounce cup.
- Use filtered water. Tap water with high chlorine or mineral content will affect flavor. A simple pitcher filter works.
- Keep it clean. Run a brew cycle with equal parts water and white vinegar monthly to remove mineral buildup.
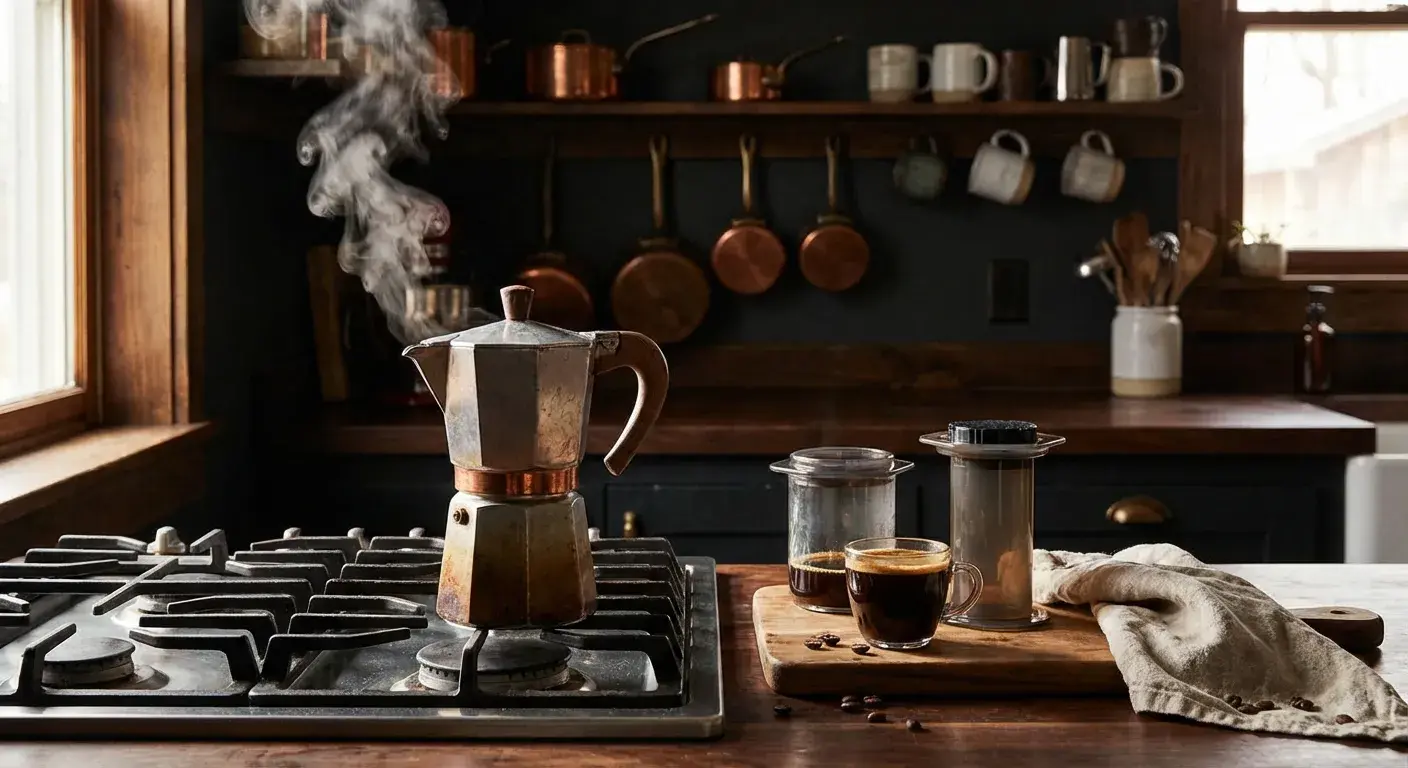
Moka Pot
The moka pot (often called a stovetop espresso maker) uses steam pressure to push hot water up through a basket of coffee grounds. Invented by Alfonso Bialetti in 1933, it is a fixture in Italian households and produces a strong, concentrated brew that sits somewhere between drip coffee and true espresso.
A moka pot generates roughly 1–2 bars of pressure — far less than an espresso machine's 9 bars — so it does not produce real espresso or crema. But it does make a bold, intense coffee that works beautifully as a base for milk drinks or enjoyed on its own.
Moka Pot Recipe (3-cup):
| Parameter | Value |
|---|---|
| Coffee | 15 to 17g |
| Water | Fill to just below the safety valve |
| Grind | Fine-medium (between espresso and pour over) |
| Heat | Medium-low |
| Brew Time | 3 to 5 minutes total |
Technique:
- Start with hot water. Fill the bottom chamber with pre-heated water up to just below the safety valve. Using hot water is critical — cold water forces the grounds to heat slowly during brewing, which causes over-extraction and bitter flavors.
- Fill the filter basket. Add finely ground coffee to the filter basket and level it off. Do not tamp or pack the grounds. Just level gently with your finger.
- Assemble carefully. Screw the top chamber on tightly (use a towel to hold the hot bottom chamber).
- Use medium-low heat. Place the moka pot on the stove. If you are using gas, make sure the flame does not extend beyond the base. Too much heat will push water through too fast and scorch the coffee.
- Listen for the signal. When you hear a gurgling, sputtering sound, the extraction is nearly complete. As soon as the stream of coffee turns pale and honey-colored, remove the pot from heat immediately.
- Cool the base. Wrap the bottom of the pot in a cold, wet towel or run it under cold water. This stops the extraction and prevents the harsh, burnt flavors that come from residual heat pushing steam through spent grounds.
Care tip: Clean your moka pot with hot water only — never use soap. Over time, coffee oils build up a seasoning layer inside the aluminum walls that actually improves flavor. Soap strips this layer and can leave a detergent taste.
Turkish Coffee
Turkish coffee (also called ibrik or cezve coffee) is one of the oldest brewing methods still in common use, with roots dating back to the 15th century Ottoman Empire. UNESCO recognized Turkish coffee culture as an Intangible Cultural Heritage of Humanity in 2013.
This method uses an extra-fine grind — finer even than espresso, almost like flour — and the grounds are never filtered out. You drink the coffee, grounds and all (they settle to the bottom of the cup).
What you need:
- Cezve (ibrik) — a small, long-handled pot, traditionally copper or brass
- Extra-fine ground coffee (powdered-sugar consistency)
- Cold water
- Sugar (optional, added before brewing)
Turkish Coffee Recipe (1 serving):
| Parameter | Value |
|---|---|
| Coffee | 7 to 10g |
| Water | 65 to 75ml |
| Grind | Extra-fine (powder) |
| Heat | Low |
| Brew Time | 3 to 4 minutes |
Technique:
- Add cold water and coffee (and sugar, if desired) to the cezve. Stir to combine.
- Place on low heat. Do not stir again after this point.
- Watch carefully. The coffee will begin to foam and rise. Just before it boils over, remove from heat.
- Some traditions call for returning it to heat two or three times, letting the foam rise each time. Others prefer a single rise with a brief rest.
- Pour slowly into a small cup (a demitasse), aiming to distribute the foam evenly.
- Wait 1 to 2 minutes for the grounds to settle before drinking. Do not drain the last sip — the thick sediment at the bottom is meant to stay in the cup.
Turkish coffee produces an intensely flavored, thick brew with heavy body. It is traditionally served with a glass of water to cleanse the palate and sometimes with Turkish delight or other sweets.
How to Choose the Right Brewing Method
With so many options, choosing a brewing method can feel overwhelming. The truth is, there is no universally "best" method — only the best method for your priorities. Here is how to narrow it down.
By Taste Preference
- Clean, bright, and nuanced: Pour over (V60, Chemex, Kalita Wave)
- Rich, full-bodied, and textured: French press, moka pot
- Concentrated and intense: Espresso, AeroPress (concentrated recipes)
- Smooth and low-acid: Cold brew
- Versatile (can go in any direction): AeroPress, drip machine
By Time Available
- Under 2 minutes: AeroPress, espresso
- 3 to 5 minutes: Pour over, French press, moka pot, drip machine (hands-off)
- Set it and forget it: Drip machine, cold brew (prep the night before)
By Budget
- Under $25: French press, AeroPress, moka pot
- $25 to $75: Pour over setup (dripper, filters, kettle), better French press
- $75 to $200: Quality drip machine, gooseneck electric kettle, good hand grinder
- $200 and up: Espresso setup, SCA-certified drip machine, electric burr grinder
By Skill Level
- Beginner-friendly: French press, drip machine, AeroPress, cold brew
- Intermediate: Kalita Wave, Chemex, moka pot
- Advanced (rewards practice): V60, espresso
Our Brew Timer includes step-by-step guided timers for each method if you want a hands-on walkthrough while you brew. And if you are still not sure which method matches your palate, our Coffee Bean Finder can help you discover beans that pair well with your chosen brewer.
For a more detailed decision framework, our guide on How to Choose the Right Brewing Method walks you through picking the best method based on taste, time, budget, and skill level.
Essential Equipment for Better Coffee
Regardless of which brewing method you choose, two pieces of equipment will improve your coffee more than anything else: a good grinder and a reliable kettle.
Grinders
A burr grinder produces uniform particles, which means even extraction and consistent flavor. Blade grinders chop beans into random sizes — some powder-fine, some chunky — which leads to a cup that is simultaneously over-extracted and under-extracted.
You do not need to spend a fortune. We have tested affordable options in our guide to coffee grinders under fifty dollars that will dramatically improve your coffee.
For espresso, you will need a grinder capable of very fine, stepless adjustments. For drip, French press, and pour over, any decent burr grinder will do the job well.
Kettles
For pour over methods, a gooseneck kettle is essential. The narrow spout gives you precise control over your pour rate and placement — something a standard kettle cannot do. Electric gooseneck kettles with variable temperature settings are even better because you can dial in the exact temperature for your brew.
Check out our guide to the best electric kettles for pour over coffee for our top picks.
Other Useful Tools
- Digital scale: Accurate to 0.1 grams. Measuring by weight (not scoops) is the single easiest way to improve consistency.
- Timer: Built into most scales, or use our Brew Timer.
- Filtered water: Coffee is 98 percent water. If your tap water tastes off, your coffee will too.
- Fresh beans: Buy whole beans from quality roasters and grind just before brewing. Explore local and specialty roasters on our roasters page for options beyond what you will find at the grocery store.
Frequently Asked Questions
What is the best brewing method for beginners?
The French press is the easiest method to learn. There is no special pouring technique, timing is straightforward (set a 4-minute timer), and the equipment costs under twenty dollars. The AeroPress is a close second — it is equally simple and more versatile, but the French press requires zero learning curve.
If you want fully hands-off brewing, a quality drip machine is the simplest option of all. Just measure your coffee and water, press a button, and walk away.
How does grind size affect coffee?
Grind size controls extraction rate — how quickly water pulls flavor from the coffee. Finer grinds have more exposed surface area, so water extracts faster. Coarser grinds extract more slowly.
Using a grind that is too fine for your method leads to over-extraction: bitter, harsh, astringent flavors. Too coarse leads to under-extraction: sour, thin, and flat. Each brewing method has an optimal grind range because of its unique brew time, water contact, and filtration. Our Grind Size Guide has recommendations for every brewer.
What temperature should water be for brewing coffee?
The Specialty Coffee Association recommends 195 to 205 degrees Fahrenheit (90 to 96 degrees Celsius) for hot brewing methods. A practical approach: bring your water to a boil and let it cool for 30 to 60 seconds. That will land you right in the ideal range.
The exception is cold brew, which uses room-temperature or refrigerator-temperature water. And some AeroPress championship recipes use temperatures as low as 175 to 185 degrees Fahrenheit for lighter, more delicate extraction.
What is coffee bloom and why does it matter?
The bloom is the rapid release of carbon dioxide gas from freshly ground coffee when it first contacts hot water. CO2 is a byproduct of the roasting process — it gets trapped in the bean's cellular structure and releases when the bean is ground and exposed to water.
Blooming matters because trapped CO2 repels water and creates uneven extraction. By pre-wetting your grounds with a small amount of water (about twice the coffee weight) and waiting 30 to 45 seconds, you allow the gas to escape so water can saturate the grounds evenly. This results in a more balanced, flavorful cup. A vigorous bloom is also a sign that your beans are fresh.
How long should coffee brew?
It depends entirely on the method:
- Espresso: 25 to 30 seconds
- AeroPress: 1 to 2 minutes
- Pour over (V60): 2:30 to 3:30
- Pour over (Chemex): 4:00 to 5:00
- French press: 4 minutes
- Drip machine: 4 to 6 minutes
- Moka pot: 3 to 5 minutes
- Cold brew: 12 to 24 hours
- Turkish coffee: 3 to 4 minutes
These are starting points. Adjust based on taste — if your coffee tastes bitter, it brewed too long (or your grind is too fine). If it tastes sour and thin, it did not brew long enough (or your grind is too coarse).
Is pour over coffee better than drip?
Pour over and drip are fundamentally the same process — hot water passing through a bed of grounds by gravity. The difference is control. With pour over, you manually control water temperature, pour rate, bloom time, and water distribution. A drip machine automates all of that.
A well-executed pour over will usually taste better than a cheap drip machine because you can optimize every variable. But a high-quality, SCA-certified drip machine can produce results that rival manual pour over with zero effort. The best choice depends on whether you enjoy the ritual of manual brewing or just want good coffee with the press of a button.
Can I use any coffee beans for any brewing method?
Yes, any coffee bean can be used with any brewing method. However, some pairings tend to work better than others:
- Light roasts shine in pour over methods, which highlight their complex origin flavors.
- Medium roasts are versatile and work well in drip machines, AeroPress, and French press.
- Dark roasts pair well with espresso, moka pot, and French press, where the fuller body complements the bolder roast flavors.
- Cold brew works with any roast, but medium and dark roasts produce the chocolate-and-caramel flavor profile most people associate with cold brew.
These are guidelines, not rules. Experiment freely — some of the best cups come from unexpected combinations.
How often should I clean my coffee equipment?
Clean your brewer after every use with warm water. For a deeper clean:
- French press and AeroPress: Disassemble and clean all parts weekly. Check the French press mesh filter for oil buildup.
- Pour over drippers: Rinse immediately after brewing. No oils accumulate because of the paper filter.
- Drip machines: Run a water-and-vinegar cycle monthly to descale.
- Espresso machines: Backflush daily if your machine supports it. Descale monthly.
- Moka pot: Rinse with hot water only (no soap). Replace the rubber gasket every 6 to 12 months.
Start Brewing
The best brewing method is the one that fits your life and makes you excited to drink coffee every morning. If you have been using the same method for years, try something new this week. Borrow a friend's AeroPress. Pick up a twenty-dollar French press. Order a V60 and a bag of single-origin beans.
Every method in this guide exists because someone, somewhere, figured out a slightly different way to combine coffee and water — and discovered something delicious. Your next favorite cup might be one method change away.
Not sure where to begin? Start with our Brew Ratio Calculator to get your measurements right, grab beans from a quality roaster, and follow the recipes in this guide. You will be surprised how quickly your morning coffee goes from routine to remarkable.