The Complete Home Espresso Guide (2026)
Affiliate disclosure: Sweeter Grind is a participant in the Amazon Services LLC Associates Program. We may earn commissions on qualifying purchases at no extra cost to you.
You can't button-press your way to espresso. Here's what actually matters — and what doesn't.
The marketing for home espresso has been catastrophic for new buyers. Box copy promises "café-quality espresso at the touch of a button." Super-automatics show smiling people pulling perfect shots in pajamas. The reality is harder and more interesting: real espresso requires four things working together — a 9-bar pump, a grinder fine enough to choke that pump, a scale, and a tamper. Take any one of those away and you're making strong drip coffee with crema on top.
This guide covers the whole territory. What espresso actually is, what the four-piece setup costs, the three categories of machine and how to pick between them, the dial-in workflow that turns "this tastes terrible" into "this tastes incredible," milk drinks at-a-glance, and the upgrade ladder for when you inevitably want more.
If you want machine-specific recommendations, our Best Espresso Machines for Beginners 2026 covers the four sub-$700 picks worth buying. If you're still deciding between brewing methods entirely, the Complete Guide to Coffee Brewing Methods is the broader hub. For where espresso fits in the larger equipment puzzle, see the Ultimate Coffee Equipment Guide 2026.
What Espresso Actually Is
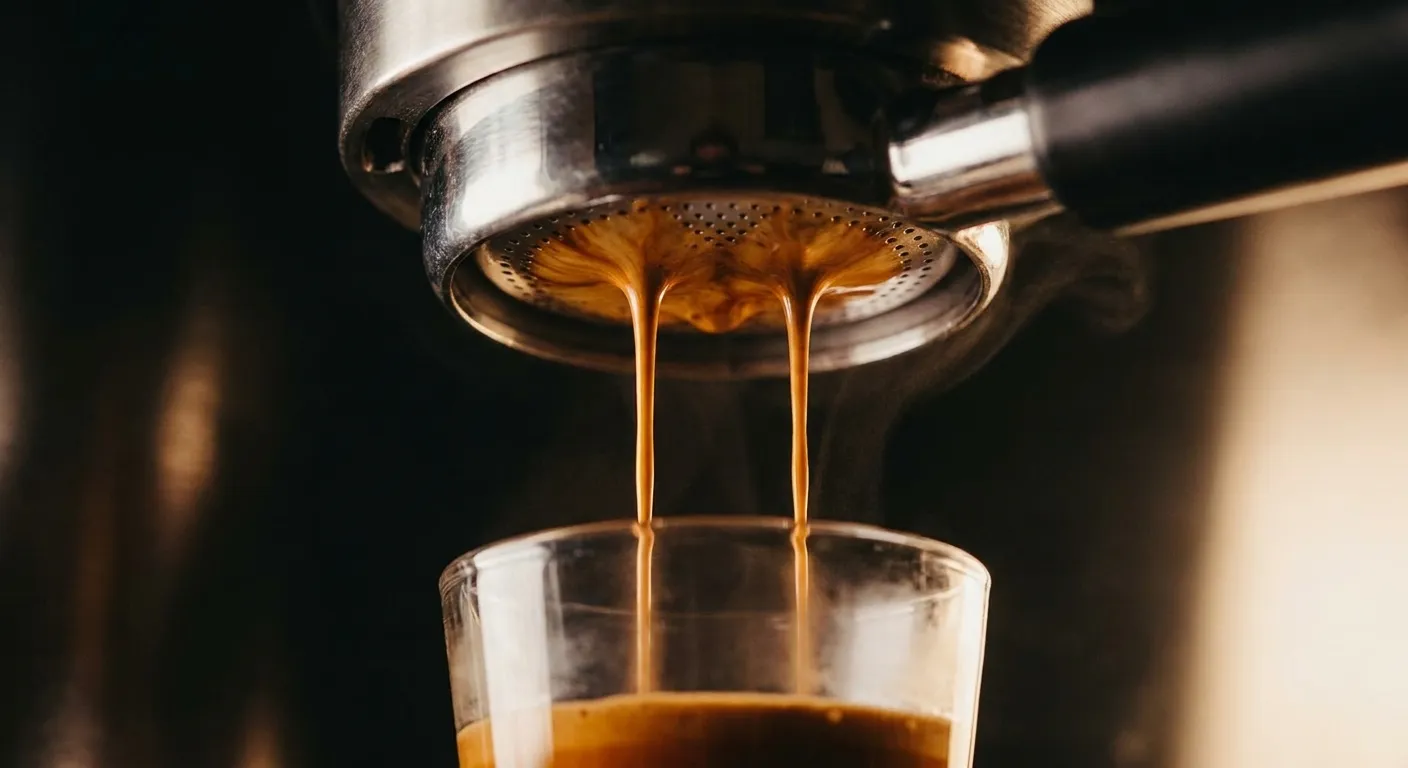
Espresso is not a roast level. It is not a bean. It is not "really strong coffee." Espresso is a brewing method defined by three numbers:
- 9 bars of pressure. This is roughly 130 psi — about 9x atmospheric pressure. That pressure is what extracts soluble compounds quickly enough to produce concentrated coffee in 25–30 seconds, and what creates crema (the emulsified oil-and-CO2 foam on top).
- Roughly 25–30 seconds of contact time between water and the puck.
- Roughly 200°F (93°C) brew water at the puck.
The standard modern recipe is the normale (also called a "double" or "espresso doppio"):
| Variable | Target |
|---|---|
| Dose | 18g coffee in |
| Yield | 36g espresso out |
| Ratio | 1:2 |
| Time | 25–30 seconds |
| Pressure | 9 bars |
| Water temp | 200°F (93°C) |
You'll also see ristretto (1:1, more intense), normale (1:2, the default), and lungo (1:3, longer). 99% of what you make at home will be a normale. Start there.
The single most-misunderstood thing about espresso: the pressure is what makes it espresso, not the bean or the roast. You can pull a beautiful espresso from a light-roast Ethiopian or a dark-roast Italian blend. The bean changes the flavor; the 9 bars makes it espresso.
The Four-Piece Setup (and Why You Need All Four)
Real espresso requires:
1. A 9-bar machine. That's the floor. Cheap "espresso machines" under $80 are usually 4-bar steam machines that produce concentrated coffee with no real crema. They are not espresso machines. The real entry point is around $99 (the De'Longhi Stilosa) and the sweet spot for most beginners is around $485 (the Breville Bambino Plus).
2. A burr grinder fine enough for espresso, with stepless adjustment. This is where most home setups fail. Espresso grind sits at the very fine end of the grinder's range — finer than table salt, just coarser than flour. Most "espresso-capable" grinders under $200 are too coarse on their finest setting OR have stepped adjustment with gaps too wide for espresso dial-in. You need infinite micro-adjustments. See Best Espresso Grinders for Home 2026 for the tiered picks.
3. A scale that fits in the drip tray. You weigh the dose going in (18g) and the yield going out (36g). Eyeballing it does not work. A regular kitchen scale is too tall — your portafilter won't sit on it. You want something with a low profile: the Acaia Lunar 2021 ($250) is the gold standard; the Felicita Arc ($140) and Timemore Black Mirror Nano (~$80) are excellent cheaper alternatives. See Espresso Accessories You Actually Need for the full breakdown.
4. A calibrated tamper that matches your basket. Most prosumer baskets are 58mm; the Breville Bambino is 54mm; the De'Longhi Stilosa is 51mm. Use the wrong size and you can't apply even pressure across the puck. A flat, calibrated tamper (one that bottoms out at a fixed depth) takes the variability of "how hard did I press?" out of the equation.
The cost reality: A working home espresso setup starts around $800. Roughly $100–$500 on the machine, $300–$650 on the grinder, $80–$250 on the scale, $25–$50 on the tamper. Trying to do it for $200 total — a cheap machine plus a blade grinder — produces drinks that are demonstrably worse than a $30 AeroPress. Don't fight that math.
If your total budget is under $400, How to Make Espresso Without an Espresso Machine is the more honest path — moka pot, AeroPress, or French press techniques get closer to espresso than a bad machine ever will.
The Three Machine Categories
Choosing a category is more important than choosing a model. The category determines what kind of barista you'll be — how much skill the daily routine demands, how much time each drink takes, and what the cup-quality ceiling looks like.
For a deeper category-by-category buying decision tree, see Espresso Machine Types: Manual, Semi-Automatic, Super-Automatic. The summary version follows.
Manual Lever
Examples: La Pavoni Europiccola, Flair 58, Cafelat Robot, Rok.
You apply the 9 bars yourself by pulling a lever. Some have no electrical component at all — you bring your own hot water and the lever does the rest.
Pros: Cheapest path to real 9-bar espresso (Flair 58 is ~$500, Cafelat Robot is ~$400). No boiler, no electronics, almost nothing to break. Travel-friendly. Pulls you fully into the craft.
Cons: Physical effort each shot. No temperature stability without practice — you preheat, time the pour by feel, and accept that early shots will be inconsistent. No built-in steam wand on most models (Flair offers an add-on; Cafelat Robot does not). Steep learning curve.
Who it's for: People who want to learn espresso as a craft, low-volume drinkers (1–2 shots/day), and anyone who wants to understand pressure profiling viscerally.
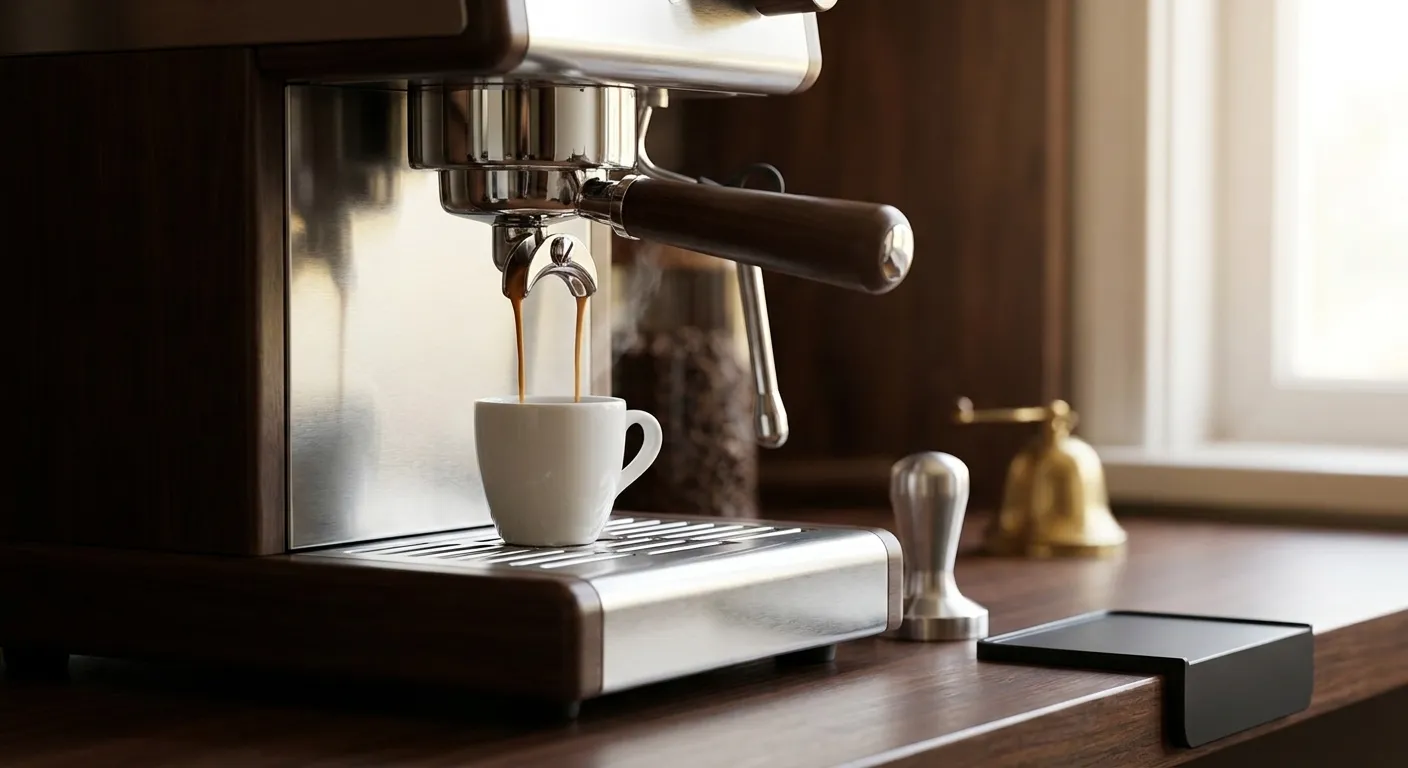
Semi-Automatic
Examples (single-boiler): Breville Bambino Plus ($485), De'Longhi Stilosa ($99), Rancilio Silvia (~$800).
Examples (dual-boiler / heat-exchange): Lelit Bianca ($3,500), ECM Synchronika ($3,000), Profitec Pro 600 (~$2,000).
The machine handles temperature and pressure. You handle dose, grind, tamp, time, and milk. This is what 95% of home baristas use and what most people mean when they say "espresso machine."
Pros: Consistent temperature once warmed up. Real 9-bar pump pressure. Steam wand for milk drinks. Wide price range — entry at $99, ceiling above $5,000.
Cons: Single-boilers (the cheap ones) can't brew and steam at the same time — you wait 30–60 seconds between pulling a shot and steaming milk. Dual-boilers and heat-exchange machines solve this but cost 4–10x more.
Who it's for: Almost everyone. If you don't have a strong reason to pick another category, you want a semi-auto.
Super-Automatic
Examples: Jura, Philips, De'Longhi automatic line, Breville Oracle Touch, Saeco.
You add beans and water, press a button, and the machine grinds, doses, tamps, brews, and (sometimes) steams milk automatically.
Pros: Genuine button-press convenience. Good for offices, vacation rentals, households where one person makes "real" espresso and others want a hot caffeinated drink. No skill required.
Cons: Be honest about what these are: they make convenient coffee, not espresso. The built-in grinders are weak. The doses are small (typically 7–9g, not 18g). Pre-infusion is non-existent. The milk frothers produce textured-but-not-microfoam milk. The drinks are fine — they're just not what you'd get from a $99 Stilosa with a real grinder. They're also $1,500–$3,500 to do the same job.
Who it's for: People who want hot caffeinated drinks at the press of a button and don't care about the difference. Households where most users won't engage with a real machine. Offices.
For a deeper look at the category decision tree — including whether you make milk drinks, how often you brew, and how much counter space you have — see Espresso Machine Types: Manual, Semi-Automatic, Super-Automatic.
Pod Machines: A Quick Honest Take
You'll see Nespresso, Lavazza Modo Mio, and Keurig K-Café marketed as "espresso machines." They aren't. Pod machines push 19 bars of pressure (a higher number than 9, used as marketing) but only as a short spike — the sustained 9-bar plateau that defines real espresso isn't there. The beans are stale (pods sit in warehouses for 6–24 months). You can't grind, dose, or technique-tune anything.
The drinks aren't bad. They're just not espresso. They're "pressurized coffee with crema." If your alternative is no espresso at all, a Nespresso is fine. If your alternative is a $99 De'Longhi Stilosa + a hand grinder, the home-espresso path produces dramatically better drinks.
The Dial-In Workflow at 30,000 Feet
Dialing in is what separates "I bought an espresso machine" from "I make espresso." Here's the loop, every shot:
- Weigh your dose. 18g for a standard double basket. 20g for a VST-style competition basket.
- Distribute and tamp. WDT (Weiss Distribution Technique) tool to break up clumps, then tamp flat.
- Lock in. Start the shot. Start a timer. Watch the scale.
- Stop when the scale reads 36g. Don't stop based on time. Time is a diagnostic, not a target.
- Read the time:
- Under 20 seconds: grind too coarse. Grind finer.
- 20–30 seconds: dial-in zone. Taste it.
- Over 35 seconds: grind too fine OR you have a clog/channel. Grind coarser.
- Inspect the puck. Smooth and dimpled = good. Cracks, holes, or wet spots = channeling. Fix distribution.
- Taste. Sour = under-extracted (grind finer or extend yield). Bitter = over-extracted (grind coarser or shorten yield). Balanced = stop touching it.
- Adjust ONE variable. Pull the next shot. Repeat.
Bag-by-bag, you re-dial. New beans always need a new grind setting. This is the workflow, every day, forever. After a month it takes 60 seconds.
Full tutorial in How to Pull the Perfect Espresso Shot — the four levers, what to change first, and the puck-inspection ritual.
The Four Levers
Every espresso problem is solved by adjusting one of four things. Memorize these:
1. Grind size. The biggest lever. Coarser = faster shot, less extraction. Finer = slower shot, more extraction. This is what you change first when something's wrong.
2. Dose. The amount of coffee in. 18g is standard. Going up to 20g extracts more (slower flow); dropping to 16g extracts less (faster flow). Change dose only after you've stabilized everything else.
3. Yield. The amount of espresso out. 36g is standard for a 1:2 normale. Pulling longer (1:2.5 = 45g out) extends extraction; pulling shorter (1:1.5 = 27g out) compresses it. Useful for fine-tuning intensity once grind is dialed.
4. Time. Diagnostic, not a target. Stop the shot at yield (36g) and read the time. Time tells you whether grind is right.
Most beginners flail by changing two or three of these per shot. Don't. Change one. Read the new shot. Keep going.
For the deeper extraction theory behind why all this works, see Coffee Extraction 101 — the 18–22% yield window applies to espresso just like it does to pour over.
Milk Drinks at a Glance
Once you're pulling consistent shots, milk doubles the menu. The drinks are defined by ratio, milk volume, and foam character — not by espresso recipe. The shot is the same.
| Drink | Espresso | Milk | Foam | Glass | Total |
|---|---|---|---|---|---|
| Espresso (normale) | 1 double (36g) | none | none | 2oz demitasse | 1.2oz |
| Macchiato (Italian) | 1 double | 1 tsp foamed | thick dollop | 2oz demitasse | 1.5oz |
| Cortado | 1 double | 2oz steamed | minimal | 4oz glass | 4oz |
| Cappuccino | 1 double | 2oz steamed | 2oz foam | 5–6oz cup | 5–6oz |
| Flat white | 1 double | 4oz steamed | microfoam only | 5–6oz cup | 5–6oz |
| Latte | 1 double | 6–10oz steamed | thin top | 8–12oz glass | 8–12oz |
| Americano | 1 double | none | none (water) | 6–8oz cup | 6–8oz |
| Long black | 1 double | none | crema preserved | 6oz cup | 6oz |
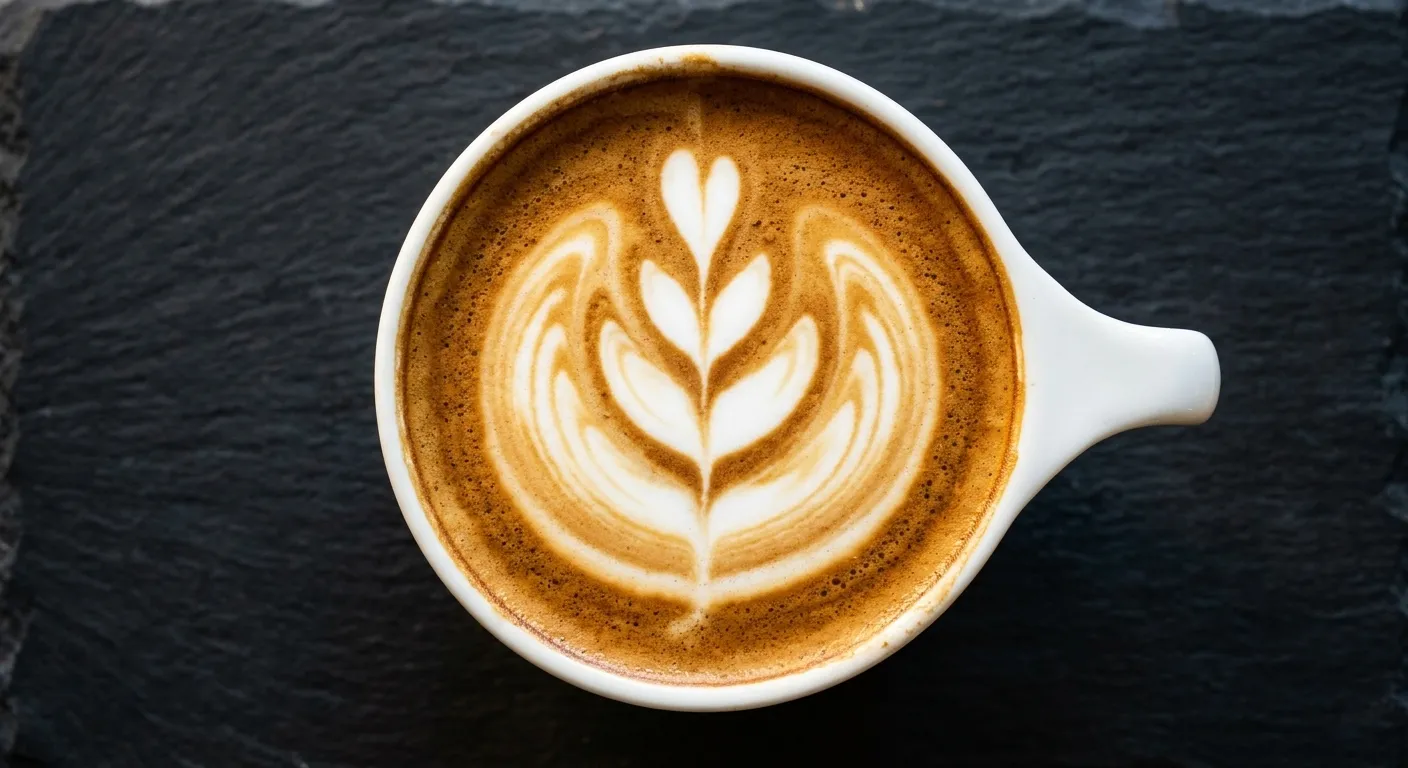
Cappuccino vs flat white is the most-asked question: a cappuccino has 1cm+ of dry foam on top; a flat white has only microfoam (silky, paint-like, no visible bubbles). Same milk pitcher, different stretch technique.
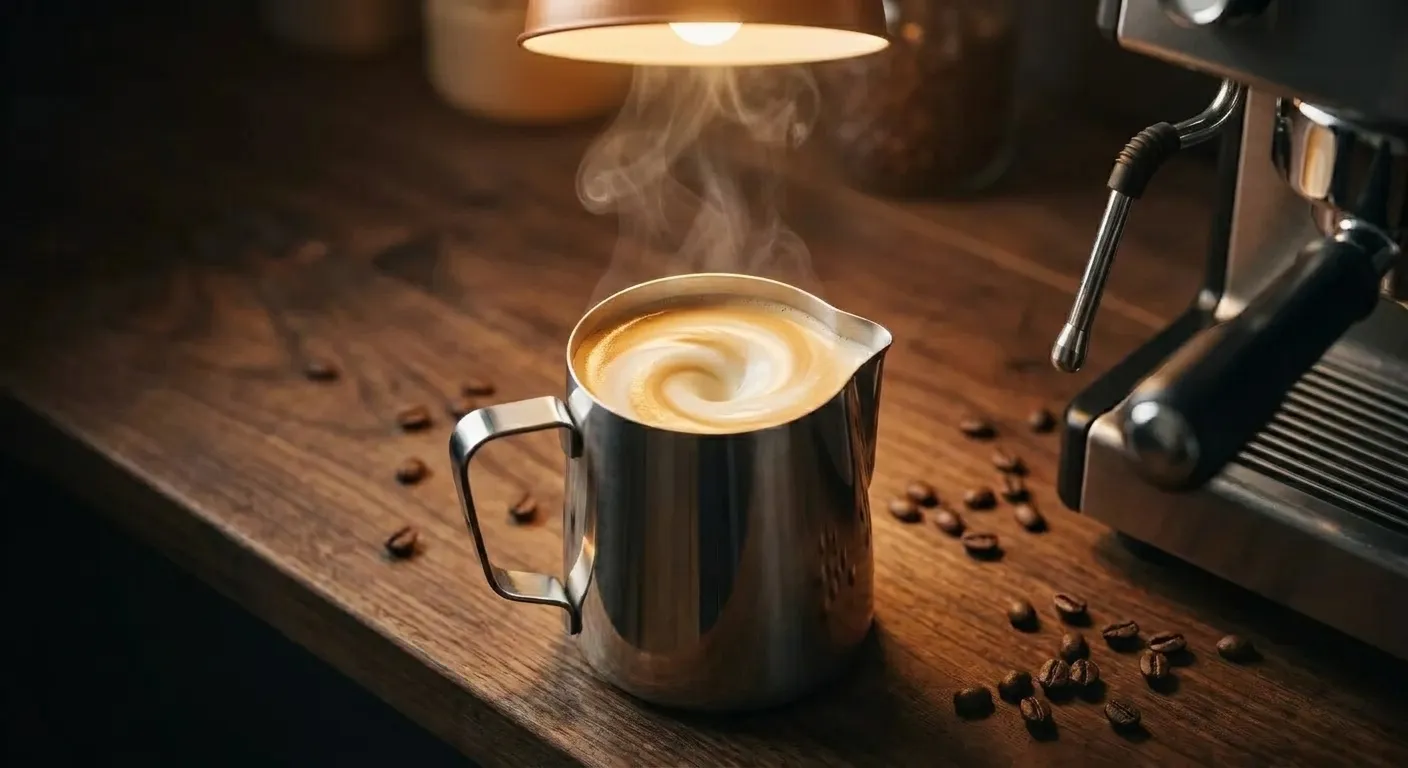
The two skills that gate every milk drink: steaming milk to microfoam (the technique that makes a $500 machine produce a $7 cafe drink) and pouring (the technique that turns microfoam into latte art). Both are learnable in a week of daily practice.
- How to Steam Milk Like a Barista — the silent-stretch rule and the 140°F target
- Latte Art Basics: Hearts, Rosettas, and Tulips — the three patterns to learn first
- Espresso Drink Recipes: Cortado, Macchiato, Americano — every drink, defined
The Daily Workflow
Espresso done right takes about 4 minutes per drink, start to finish, after your machine is warm. Here's a typical morning sequence for a single flat white:
| Minute | Action |
|---|---|
| 0:00 | Machine on (already preheated 15 min ago for stability) |
| 0:00 | Lock empty portafilter to group head; pull a hot rinse shot |
| 0:30 | Tare scale; grind 18g into portafilter |
| 1:00 | WDT distribute; tamp level |
| 1:15 | Lock in; start shot; start steaming milk simultaneously |
| 1:45 | Shot ready (36g); milk reaching 140°F |
| 2:00 | Pour the shot, pour the milk into espresso |
| 2:30 | Drink served |
| 4:00 | Wipe steam wand, knock puck, rinse portafilter, return to docked group |
The single-boiler version of this workflow has a brew-steam wait between minutes 1:15 and 1:45 — start the shot, finish the shot, switch to steam mode (30-60s), then steam milk. About a minute longer per drink. For 1–2 drinks a day, the wait is acceptable. For 4+ drinks back-to-back, it's painful.
After 2–3 weeks of daily practice, every step compresses. Most home baristas land on a 3-minute total routine.
Beans, Water, and Freshness
Espresso punishes bad inputs harder than any other brewing method. The 9 bars accelerate everything — including off-flavors.
Beans. Almost any bean can be pulled as espresso, but the easiest results come from medium to medium-dark roasts in the 7–21 day post-roast window. Light-roast espresso is achievable but requires finer grinds, hotter water, and more practice — the harder-to-extract acids in light roasts mean you'll fight your dial-in for longer. Medium-dark and traditional Italian-style espresso blends are forgiving and give the classic crema-rich, chocolatey profile most beginners associate with espresso.
Avoid anything past 30 days post-roast — staling in espresso is brutally obvious. The crema collapses fast, the body goes flat, and the cup tastes papery. Pre-ground espresso from supermarket shelves is essentially always over 60 days old. Whole beans, fresh, every time.
For where to find good espresso beans: most specialty roasters sell at least one espresso-suited blend (Counter Culture's Big Trouble, Stumptown's Hair Bender, Onyx's Monarch). Use the Coffee Bean Finder to pick beans matched to your machine and palate. Good single-origin coffees also pull as espresso — Brazilian and Colombian washed lots are reliable starting points.
Water. Espresso machines are more sensitive to water than drip is, in two directions. Soft, low-mineral water under-extracts and tastes flat. Hard tap water builds limescale that destroys boilers — the most common preventable cause of espresso machine death is scale buildup from hard tap water on machines that should have been on filtered water. The SCA target — TDS ~150 mg/L, calcium hardness 50–175 mg/L — is the sweet spot.
Practical fixes:
- Carbon filter pitcher (Brita or similar, ~$30) — Removes chlorine and large particulates; preserves minerals. Best for cities with moderate-mineral tap water.
- Third Wave Water packets ($30/12 pack) — Mineral packets you add to a gallon of distilled water. Produces SCA-ideal water from scratch. Best for cities with hard or very soft water, or anyone who wants total control.
- Reverse osmosis filtration ($150–$400 install) — For households running daily espresso volume; eliminates scale risk entirely.
See Why Water Quality Matters for Coffee for the full SCA water standards and city-by-city tap water characterization.
Freshness. Pre-ground espresso is unusable. CO2 trapped in fresh beans interferes with even extraction (you'll see this as wild bursts of flow during the first 5 seconds — sometimes called "spritzing" or geyser-ing), but stale beans don't have enough CO2 to bloom at all and produce flat, hollow shots with collapsed crema. The 7–21 day window after roast is the sweet spot. Beans 1–6 days post-roast pull "actively" — bigger spritzing, finer grind needed. Beans 22+ days post-roast pull "tired" — flatter crema, hollower body. Beyond 35 days, espresso quality drops fast.
If you brew a lot of espresso, develop a relationship with a local specialty roaster who roasts to order. Most ship Tuesday-Thursday so beans arrive fresh.
Tools That Help
- Brew Ratio Calculator — covers espresso (1:2 normale), ristretto, lungo
- Brew Timer — preset timers for 25–30 second espresso shots
- Coffee Bean Finder — espresso-friendly bean recommendations
The Upgrade Ladder
Most home baristas follow this rough trajectory. You don't have to climb every rung.
Rung 0 — Starter ($800): Breville Bambino Plus + Eureka Mignon Specialita + Felicita Arc + 54mm calibrated tamper. This combination produces genuinely good espresso and milk drinks.
Rung 1 — First upgrade ($500–$800): Better grinder. The grinder bottlenecks everything; upgrading from a $300 entry-level grinder to a $650 Eureka or a $950 Niche Zero is the single most-obvious flavor jump in home espresso. Keep the same machine.
Rung 2 — Dual-boiler machine ($2,000–$3,500): Lelit Bianca, Profitec Pro 600, ECM Synchronika. Brew and steam simultaneously. Better temperature stability. PID control of brew water with degree-level precision. This is the rung you stop at unless you're chasing.
Rung 3 — Lever or commercial-grade ($3,000+): La Marzocco Linea Mini, Slayer Single Group, Decent DE1. Diminishing returns, but real differences in shot quality and steam power.
Rung 4 — Diminishing returns ($5,000+): You're now buying for aesthetics, ergonomics, and prosumer hobby satisfaction. The cup-quality difference between a $3,500 Lelit Bianca and an $8,000 La Marzocco GS3 is small.
The honest take: most home baristas are happiest at Rung 1 or 2. Rung 3+ is for people deeply into espresso as a hobby, not as a way to drink coffee.
What "Good" Espresso Tastes Like
A lot of beginners don't know what they're aiming for. The cup taste targets, in plain language:
Sweetness. Properly extracted espresso is naturally sweet. Without sugar. The sweetness comes from caramelized sugars in the bean and from the balanced extraction window. If your espresso is never sweet — only bitter, sour, or hot-bitter — your dial-in is off, your grinder isn't fine enough, or your beans are stale.
Body. Espresso should feel viscous, syrupy, weighty in the mouth. Not thin or watery. Body comes from emulsified oils that 9 bars of pressure pulls out of the puck. A thin, watery shot means under-extraction, stale beans, or a pressure problem.
Balance. No single flavor should dominate. Acidity (a brightness, not sourness) should be present but not aggressive. Bitterness should be low. Sweetness should be the dominant impression.
Finish. A good espresso lingers — the aftertaste is sweet and faintly chocolate or fruit-forward. Bitter finishes mean over-extraction; sour finishes mean under-extraction.
Crema. Reddish-brown, thick (3–5mm), persistent (lasts 1–2 minutes before collapsing). Pale white crema means stale beans. Quickly collapsing crema means thin extraction or stale beans. Tiger striping (darker streaks through the crema) is the hallmark of fresh, well-extracted espresso.
If you can pull a shot that's sweet, balanced, viscous, and topped with persistent reddish crema — congratulations, you're making espresso. Keep that recipe and dial in everything else from there.
Common Beginner Mistakes
Buying the machine before the grinder. A $1,500 machine with a $200 grinder is worse than a $400 machine with a $1,000 grinder. Grinder first, machine second.
Pre-ground espresso. It doesn't exist as a real product. "Espresso grind" pre-ground from the supermarket is too coarse for most machines and stale by the time you open the bag. Whole beans, fresh, every time.
Eyeballing dose and yield. "About a scoop" gives you 14–22g spread depending on the day. Weigh in, weigh out, every shot.
Skipping the bloom/preheat. Pull a hot rinse shot through a bare portafilter before your first real shot of the day. The group head needs to be warm. Cold espresso machines pull cold-tasting espresso.
Tamping too hard. Past about 20 lbs of pressure, more pressure doesn't compress the puck further — the coffee is already as dense as it'll get. What matters is level and consistent. A calibrated tamper takes the variability out.
Not cleaning the machine. Backflush with detergent (espresso-specific tablets like Cafiza) every 1–2 weeks for daily users. Old coffee oils oxidize and produce bitter, rancid flavors that no recipe adjustment will fix.
Following YouTube espresso advice from non-baristas. A flood of YouTube content from non-specialty backgrounds promotes wrong information — "press the tamper as hard as you can," "always pull a 35-second shot," "fine espresso grind looks like flour." Cross-reference any espresso advice against established sources: James Hoffmann, Lance Hedrick, European Coffee Trip, Whole Latte Love. Most Reddit subreddits (r/espresso, r/cafe) are good. Random TikTok espresso content is unreliable.
Buying a used machine without knowing the maintenance history. Used espresso machines are great deals — if you know they've been backflushed regularly and descaled per spec. A neglected used machine has gunked-up boilers, leaky group head gaskets, worn pump valves. The fix is often $300+ in parts and labor — frequently more than the buy. Buy used only from sellers who can document maintenance.
Maintenance: The 30-Minute-Per-Month Routine
Espresso machines need active maintenance. Skip it and you'll buy a new machine in 3 years instead of 10.
Daily:
- Wipe the steam wand immediately after every steam (within 5 seconds of finishing)
- Purge the steam wand briefly into the drip tray after every steam
- Knock out used pucks; rinse the portafilter
- Empty the drip tray daily; rinse with hot water
Weekly:
- Backflush with plain water (no detergent) — pull blank shots through a blind basket to clear the group head of oils
- Wipe down all surfaces; remove and rinse the drip tray and grate
- Clean the bean hopper if hopper-fed (oils accumulate)
Bi-weekly to Monthly:
- Backflush with espresso machine cleaning tablets (Cafiza, Urnex, JoeGlo) — pull 5 cycles of pressurized blanks with detergent, then 5 cycles of plain water rinse
- Clean the steam wand internally — soak the tip in hot water with cleaning tablets
Quarterly:
- Descale per machine manual (citric acid solution or commercial descaler) — this is the single most important maintenance task. Hard water builds scale fast; descale skipping is the #1 cause of premature machine death.
- Inspect group head gasket for wear; replace if cracking
Annual:
- Replace group head gasket
- Inspect and clean the OPV (over-pressure valve)
- For dual-boilers: have a tech inspect both boilers, pump pressure, PID calibration
A machine that's been on filtered water and gets monthly maintenance can last 15+ years. A neglected machine on hard tap water is dead in 3.
Frequently Asked Questions
Can I make real espresso for under $500?
Yes — barely. The De'Longhi Stilosa ($99) plus a budget grinder like the DF54 ($300) plus a basic scale ($50) plus a tamper (~$30) gets you to about $480. The shots will be drinkable but not great; the Stilosa's pressure delivery is inconsistent compared to the Bambino Plus, and the DF54 has more retention than ideal. For around $300 more, the Bambino Plus + Eureka Mignon Specialita combo is dramatically better.
Do I really need 18g for a double shot?
For a standard double basket, yes. Some smaller machines (the De'Longhi Stilosa) ship with double baskets that only fit 14g; some VST competition baskets hold 20–22g. Match your dose to your basket — overdosing causes the basket to choke against the screen and channel; underdosing creates a loose puck that channels the other way.
How long does it take to learn home espresso?
Pulling a drinkable shot: a week. Pulling a consistent shot: a month. Steaming milk to microfoam: 1–2 weeks of daily practice. Pouring a recognizable rosetta: 1–3 months. Most people stall not on technique but on grinder limitations — a coarse, retention-heavy grinder makes consistency impossible regardless of skill.
Is espresso healthier than drip coffee?
It contains roughly the same caffeine per ounce of finished drink. A double shot (1.2oz) has ~120mg caffeine; an 8oz drip has ~95mg. Per ounce, espresso is much more concentrated, but you're drinking less. Health profile is otherwise similar — both are mostly water with caffeine, antioxidants, and trace acids.
Should I get a super-automatic if I just want morning lattes?
Honest answer: probably not. A super-automatic at $1,500 makes a worse latte than a $485 Bambino Plus + $650 Mignon Specialita. The convenience gap is real (45 seconds vs 4 minutes for a latte), but the cup quality gap is bigger. If convenience truly trumps quality, get a Nespresso. If quality matters at all, get a real semi-auto and a grinder.
What's the single biggest factor in espresso quality?
Grinder. By a large margin. The machine sets a ceiling; the grinder determines whether you reach it.
Where to Go Next
Pick the next read based on where you are:
- Haven't bought a machine yet? Espresso Machine Types: Manual, Semi-Automatic, Super-Automatic is the buying-decision article. Then Best Espresso Machines for Beginners 2026 for specific picks.
- Bought the machine, choosing the grinder? Best Espresso Grinders for Home 2026 tiers them by budget.
- Have the gear, learning to pull shots? How to Pull the Perfect Espresso Shot.
- Pulling shots, ready for milk drinks? How to Steam Milk Like a Barista → Latte Art Basics → Espresso Drink Recipes.
- Filling out the rest of the bench? Espresso Accessories You Actually Need.
Related reading
- Best Espresso Machines for Beginners 2026
- Best Espresso Grinders for Home 2026
- How to Pull the Perfect Espresso Shot
- How to Steam Milk Like a Barista
- Latte Art Basics: Hearts, Rosettas, and Tulips
- Espresso Drink Recipes: Cortado, Macchiato, Americano
- Espresso Machine Types: Manual, Semi-Automatic, Super-Automatic
- Espresso Accessories You Actually Need
- Complete Guide to Coffee Brewing Methods
- The Ultimate Coffee Equipment Guide 2026
- Coffee Extraction 101
- Why Water Quality Matters for Coffee
- Brew Ratio Calculator
- Brew Timer
- Coffee Bean Finder