Espresso Accessories You Actually Need (and the 5 to Skip)
, scale, [WDT tool](https://www.amazon.com/s?k=WDT%20tool&tag=sweetergrind-20), and [knockbox](https://www.amazon.com/s?k=knockbox&tag=sweetergrind-20)](/images/espresso-accessories-you-actually-need-hero.webp)
Affiliate disclosure: Sweeter Grind is a participant in the Amazon Services LLC Associates Program. We may earn commissions on qualifying purchases at no extra cost to you.
Espresso accessory marketing is a full-time industry. Open any home-espresso forum and you'll see threads dedicated to puck screens, dosing funnels, blind shakers, magnetic tampers, naked portafilters, custom baskets, and a hundred other small purchases marketed as "essentials." The collective price tag of "what the home espresso community says you need" exceeds $1,500 in accessories alone.
Most of it is theatre. Four accessories genuinely change cup quality or workflow. Five popular accessories don't, regardless of what the marketing says. This guide separates them — what to buy, what to skip, and why.
If you're earlier in the espresso setup decision: The Complete Home Espresso Guide 2026 covers the four-piece setup; Best Espresso Grinders for Home 2026 tiers the grinder picks. If your money is tight, prioritize machine + grinder over any accessory below.
The Four That Genuinely Matter
1. Calibrated Tamper (Sized to Your Basket)
Why it matters: Tamping is the variable that introduces the most shot-to-shot variability in home espresso. "Press hard, level" sounds simple. In practice, "hard" varies by 5–10 lbs between morning shots. "Level" varies by 5–10 degrees. A calibrated tamper bottoms out at a fixed depth and only allows you to apply the correct pressure (around 20 lbs) — past that, the click stops you.
The sizing rule. The tamper diameter must match your portafilter basket diameter exactly. Common sizes:
- 58mm — Most prosumer machines (Lelit, ECM, Profitec, La Marzocco, Gaggia Classic)
- 54mm — Breville Bambino Plus, Barista Express
- 51mm — De'Longhi Stilosa, some entry-tier machines
- 53mm — Some specific De'Longhi and older Saeco models
- 58.4mm — Specific to some VST baskets; check your basket spec
A 58mm tamper in a 54mm basket leaves a gap that water bypasses through. A 54mm tamper in a 58mm basket compresses unevenly. Match exactly.
What to buy: A $25–$50 calibrated tamper from any reputable brand (Normcore, MHW-3Bomber, Decent, Espro) does the job. The $150 designer tampers (Pesado, Scotts) aren't functionally better; they're prettier. For learning, get the cheap one and spend the difference on better beans.
Skip if: Your machine ships with a tamper (Bambino Plus, some others) AND you're confident in your tamping pressure. Most beginners aren't. Most upgrade.
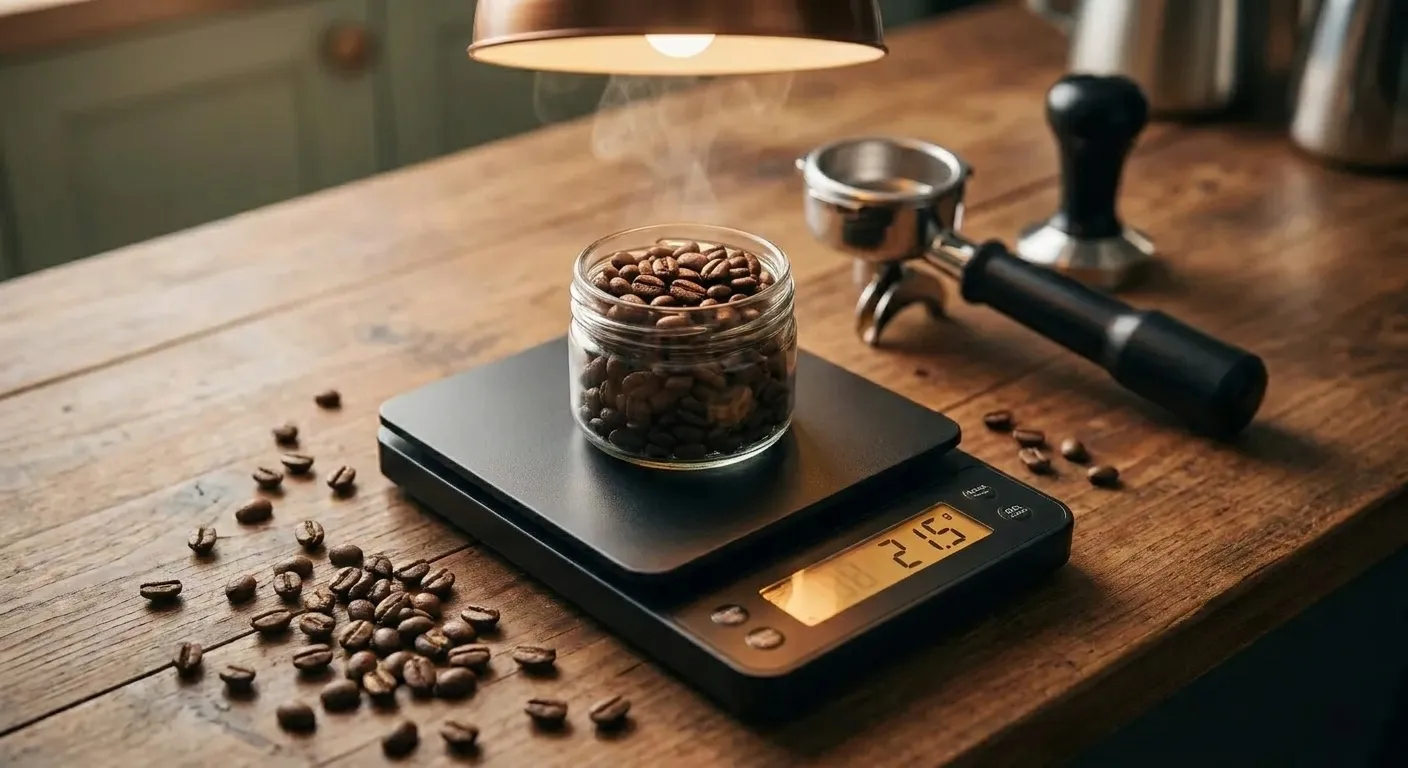
2. Scale That Fits the Drip Tray
Why it matters: You weigh dose in (18g) and yield out (36g). Eyeballing "about a double shot" gives 14–22g of yield variance. Without weighing yield, you cannot dial in espresso. Time alone is not enough — you need to know whether 28 seconds gave you 32g or 40g, because the answer determines what to change next.
The footprint problem. A regular kitchen scale is 1–2 inches tall. Your portafilter sits 2–4 inches above the drip tray. There's no room. Espresso scales have a low profile (1/4 to 1/2 inch tall) so they fit under the spout.
The picks:
- Acaia Lunar 2021 (~$250) — Gold standard. Built-in shot timer that auto-starts when liquid hits the pad. 0.1g resolution. Splash-resistant. App connectivity. The pro choice.
- Felicita Arc (~$140) — Excellent budget alternative. Same auto-timer feature, same 0.1g resolution, slightly less polished software. Genuinely 90% of the Lunar at 60% of the price.
- Timemore Black Mirror Nano (~$80) — Smaller footprint than the regular Black Mirror, fits drip trays on Bambino Plus and similar small machines. No auto-timer; manual start. Great budget pick for anyone with a Bambino-sized machine.
Skip if: Honestly, never. The scale is non-negotiable. If you don't weigh yield, you're not really making espresso — you're guessing.
3. WDT Tool (Weiss Distribution Technique)
Why it matters: Coffee from a grinder lands in clumps. Clumps cause channeling — water finds the path of least resistance through gaps between clumps and bypasses tightly-packed coffee. A channel-y shot tastes both sour and bitter (the worst combination) and looks ugly on the puck.
A WDT tool is a small handle with 4–8 thin needles. You insert the needles into the grounds in the basket and stir gently in small circles for 5–10 seconds. The needles break up clumps and create a uniform, slightly fluffy bed of grounds before you tamp. Channeling decreases dramatically.
Why this isn't optional: Even high-end grinders produce some clumping. Eureka Mignon Specialita, Niche Zero, Lagom P64 — all produce coffee that benefits from WDT. The Niche has slightly less clumping than budget grinders, but still some. WDT is universal good practice.
What to buy: A $5–$15 WDT tool from Amazon. The cheap ones with 6–8 acupuncture needles work as well as the $80 designer versions. The technique is what matters; the tool is identical.
If you're handy: a needle-and-cork WDT tool is a free DIY. Glue six 0.4mm sewing needles into a wine cork. Functions identically.
Skip if: You have a Niche Zero AND a near-zero retention workflow AND careful technique with the dosing process. Even then, WDT improves consistency. There's no real "skip" case.
4. Knockbox
Why it matters: After every shot, you have to get the spent puck out of the portafilter. Without a knockbox, you smack the portafilter against your sink, garbage can, or counter — which damages the portafilter, ruins your cabinets, and sprays grounds everywhere.
A knockbox is a small container (usually plastic or stainless) with a padded crossbar. You strike the portafilter against the bar; the puck pops out into the box; coffee grounds stay contained. The bar is padded so you don't damage the portafilter spring or the basket.
The picks:
- Rattleware knockbox (~$30) — The standard. Sturdy plastic, good padded bar.
- Cafelat Tubbi knockbox (~$50) — Premium silicone build, near-silent.
- Generic stainless knockbox (~$25) — Functional, occasionally noisy.
Skip if: You have a separate dedicated coffee-grounds composting setup AND you're committed to scrap-tapping pucks into a paper-towel-lined bowl. Most people aren't. A knockbox costs $30 and is the small kind of upgrade that quietly improves your daily workflow forever.
Tools That Help (Optional, Not Mandatory)
These aren't on the "you need this" list, but they meaningfully improve workflow if you've got the basics covered.
Bottomless (naked) portafilter ($30–$80) — Shows the underside of the puck during extraction. You can visually see channeling (jets of espresso shooting out before the rest of the puck is wet), which helps diagnose distribution problems. Not a beginner accessory — until you know what good looks like, the visual feedback is just confusing. Add this in month 3+, not month 1.
Espresso-cleaning tablets (Cafiza) ($15–$30) — For backflushing the machine. Most prosumer machines need monthly backflushing with detergent to clean oils from the group head. Not optional for long-term machine health, but it's a maintenance item, not an accessory. Buy when needed.
Group head brush ($5) — A dedicated brush for cleaning the group screen between bean changes. Cheap; useful.
Cleaning microfiber towels ($10) — Dedicated towels for the steam wand and machine surfaces. Don't share with kitchen towels (cross-contamination + odor). Buy a 6-pack.
The Five to Skip
Now the list nobody else writes. The accessories that are popular, expensive, and don't matter as much as marketing claims.
1. Puck Screen
The pitch: A thin metal mesh disc placed on top of the puck before brewing. Marketed as "improves shot quality by distributing water more evenly" and "keeps the screen clean."
The reality: Cup-quality difference is negligible. Multiple specialty cafes have done blind tests; tasters can't reliably distinguish puck-screen vs no-puck-screen shots. The "screen cleanliness" claim is real but minor — you'll backflush the screen anyway during regular cleaning.
The hidden cost: Puck screens become a cleaning headache. Coffee oils build up between the mesh layers. After a few weeks, you have a saturated, oil-stained disc you have to soak and scrub regularly. Many users abandon them after 2–3 months for this reason alone.
Skip unless: You're optimizing every variable for competition espresso AND you enjoy maintaining gear. For 99% of home setups, ignore this category entirely.
2. Dosing Funnel
The pitch: A magnetic ring or funnel that sits on top of the portafilter basket while grinding, preventing grounds from spilling out the sides. $30–$80.
The reality: A paper-cup ring works the same. Cut the bottom off a small paper cup, flip the basket, and you have a free dosing funnel. The fancy magnetic ones look polished but functionally do nothing the paper cup doesn't.
The other reality: If you grind directly into the portafilter (the standard workflow with single-dose grinders like Niche Zero), you don't need a dosing funnel at all. The grinder's chute aims at the basket. No spillage.
Skip unless: You have a Eureka Specialita with a hopper and you grind into a separate cup, then funnel into the portafilter. In that case, a $5 cheap funnel is fine. The $80 magnetic versions are pure cosmetic spend.
3. Blind Shaker / RDT Spray Bottle (For Anti-Static)
The pitch: Static makes coffee grounds stick to your grinder's chute or fly out everywhere. The Ross Droplet Technique (RDT) spritzes water on the beans before grinding to dissipate static. A "blind shaker" is a small sealed cup you load grounds into, shake, and pour out as a clump-free dose.
The reality: RDT (a $5 spray bottle) is genuinely useful if your grinder spits everywhere. Some grinders (DF series, certain Mignons in dry climates) produce visible static spray. RDT solves it.
But — most modern grinders don't have a serious static problem. Eureka Mignon Specialita, Niche Zero, Lagom P64 all produce minimal static in normal home use. If your grinder is one of these and you're not seeing spray, you don't need RDT.
The blind shaker is more of a competition / clarity-obsessive accessory. It's mostly theater for home use.
Skip unless: You have a DF54/DF64 in a dry climate AND you see grounds flying. Otherwise, skip both. Save the $40.
4. Custom Basket Upgrade for a Bambino
The pitch: Replace your stock 54mm Bambino Plus basket with a precision-machined VST or IMS basket. Marketed as "tighter tolerances mean better extraction."
The reality: The Bambino Plus's stock basket is genuinely good. VST baskets exist for 58mm and 53mm, but the 54mm Bambino size has fewer high-end aftermarket options and the difference is small.
More importantly: the Bambino Plus's bottleneck is not the basket. It's the machine's pressure delivery, thermal stability, and pump consistency — none of which are improved by a fancier basket. Spending $40 on a VST basket and pretending it matches a $3,500 Lelit Bianca is fooling yourself.
Better spend: Put the $40 toward the upgrade path — a better grinder, better beans, or saving for a real machine upgrade.
Skip unless: You have a high-tier semi-auto (Lelit, Profitec, ECM, La Marzocco) where the basket actually is a meaningful variable AND you've optimized everything else. Then VST baskets are real.
5. Bottomless Portafilter for a Beginner
The pitch: A bottomless (naked) portafilter shows the underside of the puck during extraction. You can see channeling visually as jets of espresso shoot out from one spot before the rest of the puck wets.
The reality: This is a real diagnostic tool — for users who already know what good looks like. Beginners don't have a baseline. Watching their bottomless shot, they can't tell whether the patterns they see are normal-good, normal-bad, or signs of a specific problem.
The risk: Bottomless portafilters spray grounds and espresso when there's any channeling. Beginners with channeling-prone shots end up with espresso on the counter, the cabinets, the wall. The frustration outweighs the diagnostic value.
The right time: Add a bottomless portafilter in month 3–6 of espresso, after you've pulled hundreds of regular shots and have a sense of what extraction should look like. By then, the visual feedback is interpretable and you can spot specific channeling patterns vs other issues.
Skip unless: You're 6+ months into espresso and want a precision diagnostic tool. For beginners, the regular spouted portafilter is genuinely better.
A Note on "Cult Accessories"
Two more accessories deserve mention because they show up constantly in espresso community discussions but have niche utility:
Tamping mat ($10–$20) — Silicone mat with a portafilter-shaped indent. Useful if you tamp on a counter and want to protect the surface. Genuinely useful for $10. Not a cup-quality accessory.
Espresso machine cleaning tablets (specifically backflush) — As noted above, mandatory long-term but a maintenance category, not an accessory. Buy Cafiza when needed, every 1–2 weeks for daily users.
Smart shot timer (Decent, Acaia Lunar) — Some scales have built-in shot timers that auto-start. Genuinely useful — frees you from juggling phone-timer + scale + portafilter. The Acaia Lunar at $250 has this; cheaper scales (Felicita Arc, ~$140) also have it. Worth the upgrade if you're spending on a scale anyway.
The Total Cost of "What You Actually Need"
Bottom line, here's the math for a complete espresso accessory bench, ignoring the machine and grinder:
| Item | Cost |
|---|---|
| Calibrated tamper (54mm Bambino) | $30 |
| Felicita Arc scale | $140 |
| WDT tool | $10 |
| Rattleware knockbox | $30 |
| Total | $210 |
Compare to a "spent every dollar on accessories" loadout:
| Item | Cost |
|---|---|
| Pesado tamper | $150 |
| Acaia Lunar | $250 |
| Decent dosing funnel | $80 |
| Custom WDT tool | $80 |
| Cafelat knockbox | $50 |
| Puck screen | $25 |
| VST basket | $40 |
| Bottomless portafilter | $80 |
| Magnetic dosing ring | $40 |
| Total | $795 |
The $210 setup pulls espresso indistinguishable from the $795 setup. Spend the $585 difference on a better grinder or better beans.
Frequently Asked Questions
Do I really need a calibrated tamper, or is a regular flat tamper okay?
A regular flat tamper works once you've calibrated your pressure (around 20 lbs). The problem is getting calibrated — for the first month or two, your pressure varies by ±5 lbs between shots, which causes inconsistent extraction. A calibrated tamper removes this variable for $25. Worth it for the learning curve. After a year of espresso, many users go back to a regular tamper because their hands have learned the right pressure.
Why is a single-dose scale so expensive?
The footprint problem (1/4 to 1/2 inch tall) requires precision-machined load cells, splash-resistant enclosure, and waterproofing. Building all that into a small chassis costs more than building a kitchen scale. The Felicita Arc at $140 is the value sweet spot; Acaia Lunar at $250 is the premium tier. Below $80, you're getting underpowered or unreliable scales.
Can I just use my phone scale app?
No. Phone scales (using accelerometer/microphone math to estimate weight) are wildly inaccurate — typically ±1g, sometimes worse. Espresso requires 0.1g precision. Use a real scale.
Is the Acaia Lunar worth $250 over the Felicita Arc at $140?
For most home users: no. The Lunar is more polished — better app, smoother software, marginally better build — but the Arc does 90% of the same work for 60% the price. Buy the Lunar if (1) you're committed to the Acaia ecosystem (other Acaia gear), (2) you want the polish, or (3) money's not the constraint. Otherwise the Arc is the right buy.
What about the milk pitcher? Isn't that a critical accessory?
Yes, but it's part of the "you need this for milk drinks" core, not a peripheral accessory. A 12oz stainless pitcher (any decent brand, $15–$25) is mandatory for steaming milk. Covered in How to Steam Milk Like a Barista.
Where to Spend the Money You Saved
If this guide saved you $200+ on theater accessories, the higher-leverage spends:
- Better beans. $25–$45/bag specialty roasts dramatically outperform supermarket espresso blends. The single biggest cup-quality lever.
- A water filter or Third Wave Water packets. $30 for filtered water; $30/3 months for Third Wave Water packets. Espresso is ruthless about water quality. See Why Water Quality Matters for Coffee.
- A grinder upgrade. If you're underspending on grinder per the 1–1.5x rule (see Best Espresso Grinders for Home 2026), this is the biggest available improvement.
- A milk thermometer for your first month. $10 clip-on. Calibrates your hand to recognize 140°F. After 4 weeks, you don't need it anymore.