Best AeroPress Recipes and Techniques for Amazing Coffee
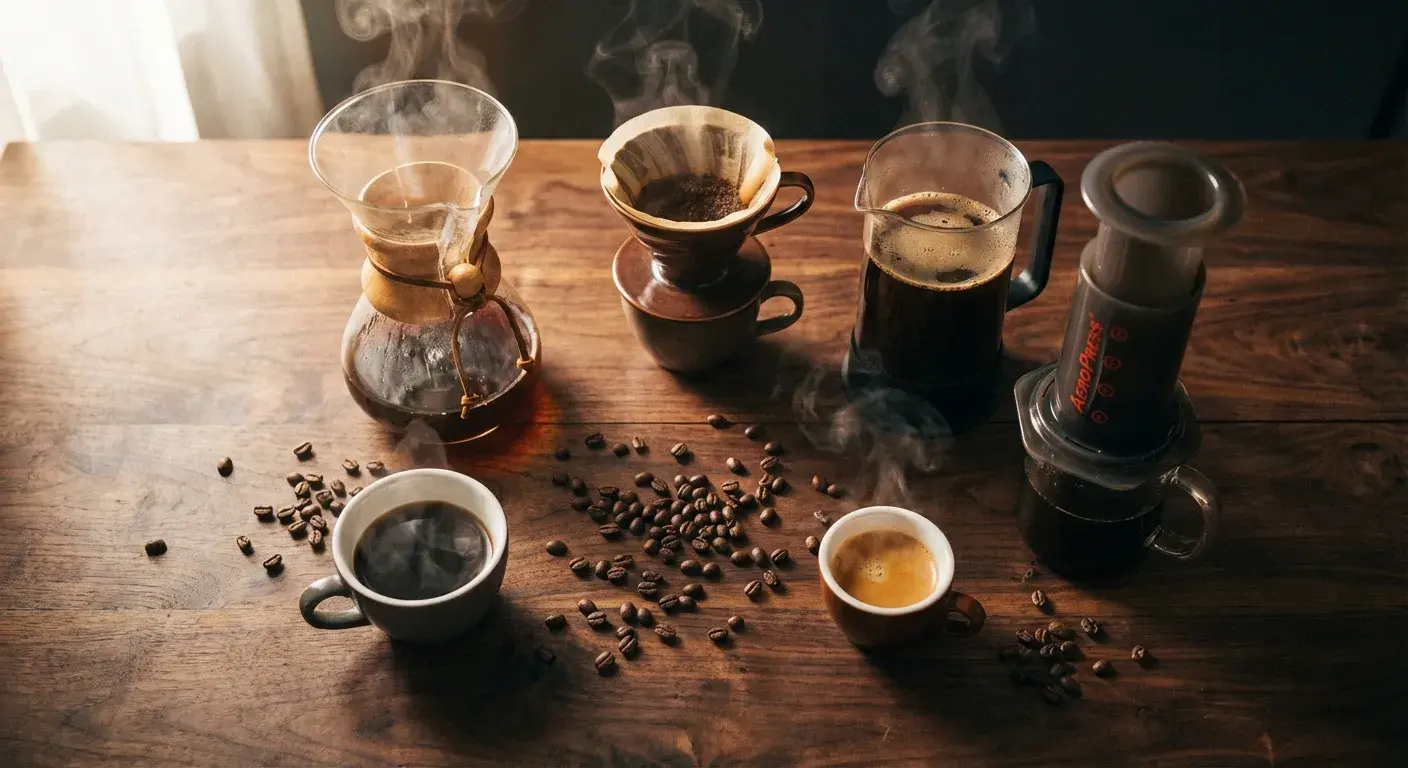
No other brewing device has produced as many passionate debates, experimental recipes, and outright surprises as the AeroPress. Invented in 2005 by Alan Adler — the same engineer who designed the Aerobie flying ring — the AeroPress is a plastic cylinder that uses air pressure to push hot water through coffee grounds. It sounds unremarkable. What it produces is anything but.
The AeroPress is the most versatile brewing tool you can own. With nothing more than small adjustments to grind size, water temperature, steep time, and pressing speed, you can make a clean, pour over-style cup; a rich, French press-style brew; an espresso-style concentrate; cold brew in two minutes; and iced coffee that rivals what you pay $7 for at the café. It is also forgiving, nearly indestructible, and travels anywhere.
This article contains affiliate links. We may earn a commission if you make a purchase through our links, at no extra cost to you.
Six recipes follow, ranging from the classic beginner brew to the championship-style concentrate that now dominates the World AeroPress Championship. Every one of them is built on one of two foundational techniques — standard or inverted — so we start there.
Standard Method vs. Inverted Method
Every recipe below is built on one of these two techniques.
Standard Method (Upright)
In the standard method, you assemble the AeroPress as designed — plunger end down in the cylinder — and place it directly on your cup or carafe. You add coffee, add water, stir, and press. Some water drips through the filter before you press, which limits your ability to steep for long periods. This is the method AeroPress recommends in their instructions.
Best for: Faster brews (90 seconds to 2 minutes), cleaner cups with brighter acidity, beginners learning the device.
Inverted Method
In the inverted method, you flip the AeroPress upside down — plunger end down, filter cap end up — before brewing. This lets you fill the chamber with water without any draining until you are ready. You control the steep time completely, add the filter cap, flip onto your cup, and press. The inverted method gives you full immersion steeping with no bypass — every drop of water passes through your coffee bed at your chosen pace.
Best for: Full immersion brews, longer steep times, richer body, recipes that require precise control over steep duration. Used in the majority of World AeroPress Championship winning recipes.
A note on safety: The inverted method involves flipping a hot-water-filled AeroPress onto your cup. Go slowly and be deliberate. The seal holds securely, but rushing increases the risk of hot coffee spilling. Place your cup or carafe on a stable surface, place your hand firmly over the cap, and flip in one smooth motion.
The Recipes
Recipe 1: Classic AeroPress (Beginner-Friendly)
This is the recipe to start with. It uses the standard method, takes about two minutes, and produces a smooth, balanced cup that works with any coffee in your cabinet.
What you need:
- AeroPress (standard orientation)
- 17g of coffee, ground medium (like coarse sea salt)
- 220ml of water at 85–90°C (185–195°F)
- 1 AeroPress paper filter
- Scale, timer, cup or mug
Steps:
- Boil water and let it cool for 1 to 2 minutes (from boiling to approximately 88°C).
- Wet the paper filter in the filter cap and attach to the AeroPress bottom.
- Place the AeroPress on your cup. Add 17g of ground coffee.
- Start your timer. Pour 220ml of water in a steady stream, covering all the grounds.
- Stir gently 5 times.
- Insert the plunger and press slowly over 30 seconds, applying steady pressure.
- Stop pressing when you hear a soft hissing sound.
- Total brew time: approximately 1:30 to 2:00 minutes.
What to expect: A clean, well-balanced cup with mild acidity and good body. Adjust grind finer for more strength, coarser for more clarity.
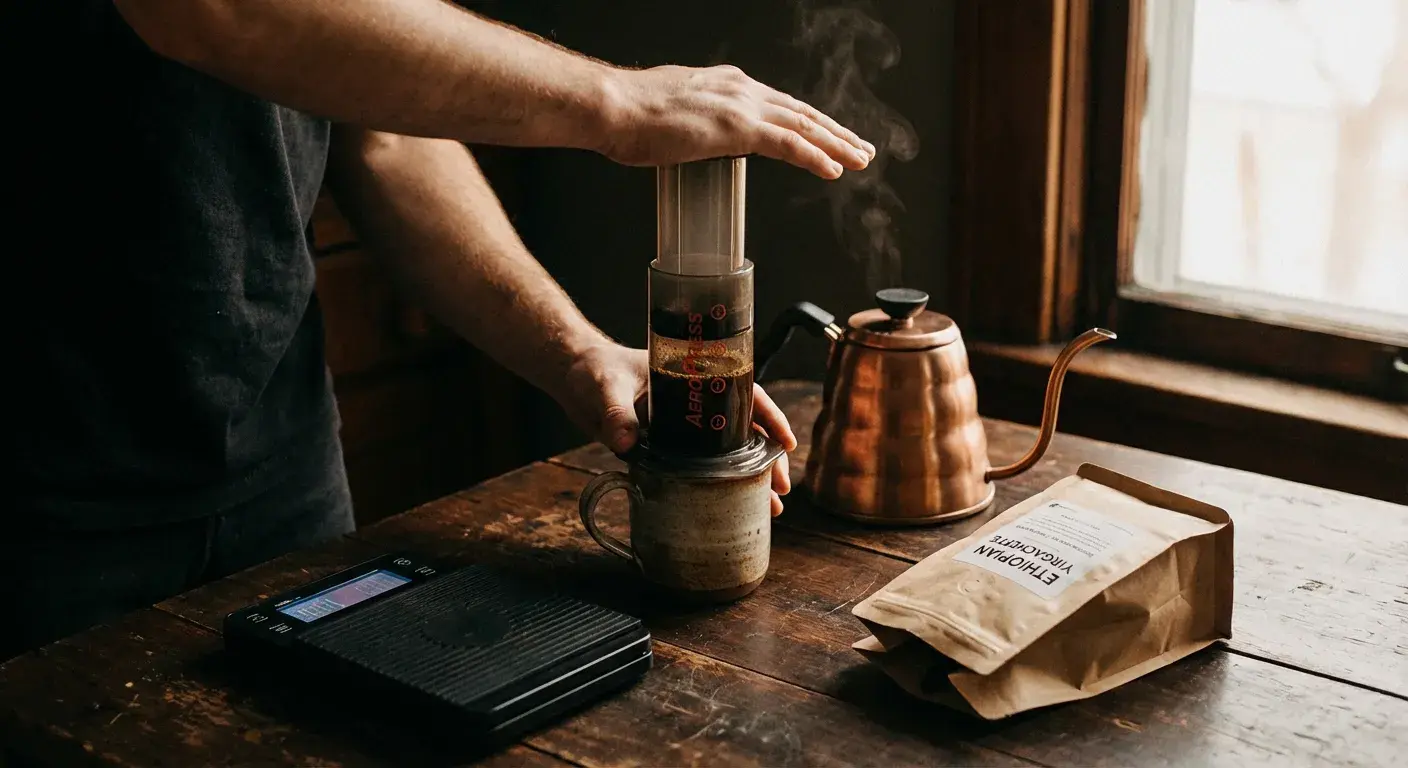
Recipe 2: James Hoffmann's World Champion-Inspired Method
James Hoffmann — 2007 World Barista Champion and one of the most respected voices in specialty coffee — developed an AeroPress recipe that became one of the most widely adopted approaches in the enthusiast community. It uses a coarser grind, higher water volume, and a swirl rather than a stir. The result is a clean, transparent cup that showcases the coffee's character.
What you need:
- AeroPress (inverted orientation)
- 11g of coffee, ground medium-coarse (slightly coarser than table salt)
- 200ml of water at 100°C (just off the boil — yes, boiling)
- 1 AeroPress paper filter
- Scale, timer, stirring implement
Steps:
- Set up AeroPress in the inverted position (plunger at bottom, chamber upright).
- Add 11g of medium-coarse ground coffee.
- Pour 200ml of just-boiled water (100°C) in one go.
- Stir vigorously for 10 seconds — not a gentle fold, an actual stir.
- Attach the damp filter cap. Wait until 2:00 on your timer.
- At 2:00, swirl the AeroPress once to consolidate the coffee bed.
- Flip onto your cup and press slowly over approximately 30 seconds.
- Stop when the plunger meets the grounds. Total brew time: ~2:30.
What to expect: A surprisingly bright, clean cup despite the boiling water. Hoffmann's key insight is that coarser grinds at higher temperatures extract cleanly without producing bitterness, because the coarse grind limits surface area exposure. This recipe rewards high-quality, fresh coffee — it is transparent enough to show off excellent beans and honest enough to show up mediocre ones.
Why 100°C? Conventional wisdom says lower water temperatures (85–90°C) prevent bitterness. Hoffmann's research suggests that coarser grinds combined with shorter extraction windows at high temperatures produce aromatic compounds without extracting bitter ones. The result is counterintuitive but consistently excellent.
Recipe 3: Iced AeroPress
The AeroPress is one of the best tools for making iced coffee at home — not cold brew (which takes 12+ hours), but properly extracted hot coffee immediately chilled to produce a clean, flavorful iced drink in under three minutes.
What you need:
- AeroPress (inverted orientation)
- 22g of coffee, ground medium-fine (slightly finer than usual)
- 130ml of water at 88–92°C (190–197°F)
- A cup or glass with 100–120g of ice (about a full cup)
- Scale, timer
Steps:
- Fill your serving glass with ice (100–120g). Set aside.
- Set up AeroPress inverted. Add 22g of ground coffee.
- Pour 130ml of water at 90°C. Stir 5 times.
- Attach damp filter cap. Wait 1:00 to 1:30 on your timer.
- Flip onto your ice-filled glass and press slowly over 30 seconds.
- The hot concentrate hits the ice and chills immediately.
- Stir briefly to incorporate. Serve immediately.
What to expect: Concentrated coffee that chills on contact with ice — the dilution from the melting ice balances the strength to a normal-strength iced coffee as you drink. No watered-down flavor, no waiting, no separate cold brew batch.
The key: Brew stronger than normal (higher coffee dose, less water) to account for ice dilution. The 22g / 130ml ratio produces a concentrate that becomes a well-balanced iced drink once the ice begins to melt. Adjust coffee dose up if your drink tastes weak, or add more ice if it tastes too strong initially.
Recipe 4: Espresso-Style AeroPress Concentrate
The AeroPress cannot produce true espresso — that requires 9 bars of pressure, and the AeroPress generates roughly 0.35 to 0.75 bars. But it can produce a concentrated, full-bodied brew that behaves like espresso in milk drinks and makes an excellent base for lattes, cappuccinos, and Americanos.
What you need:
- AeroPress (standard orientation)
- 18g of coffee, ground fine (similar to drip, finer than medium — not as fine as espresso)
- 60ml of water at 80–85°C (175–185°F)
- 1 paper filter (or 2 stacked for extra clarity)
- Scale, small cup
Steps:
- Attach two damp, stacked paper filters to the filter cap for a cleaner cup.
- Place AeroPress on your small cup in standard orientation.
- Add 18g of coffee ground fine.
- Pour 60ml of water at 82°C directly onto the grounds.
- Stir briefly — 3 to 5 times.
- Press immediately and steadily. Target a 30-second press time.
- Stop when you hear the hiss. Total brew time: under 1:30.
What to expect: A thick, syrupy 40–50ml of concentrate with crema-like bubbles. The lower water temperature slows extraction and reduces bitterness from the fine grind. Use this as your "shot" in milk drinks — pour over 120ml of steamed or frothed milk for a latte-style drink.
Tip: Use darker roast coffee for this recipe. Darker roasts extract more readily at lower temperatures and produce the caramel, chocolate notes that work best in milk drinks.
Recipe 5: 2-Minute Cold Brew AeroPress
This is the AeroPress trick that surprises people most. You cannot make real cold brew in 2 minutes — cold brew requires 12–24 hours of cold steep. But you can make a cold-brew-style smooth, low-bitterness concentrate in about 2 minutes using cold water and the AeroPress's pressure extraction.
What you need:
- AeroPress (standard orientation)
- 20g of coffee, ground medium
- 100ml of room-temperature or cold water
- A cup with ice
- Scale
Steps:
- Place AeroPress on your cup in standard orientation.
- Add 20g of coffee ground medium.
- Pour 100ml of room-temperature water (not hot).
- Stir for 60 seconds continuously — this replaces the heat-driven extraction that hot water provides.
- Insert the plunger and press slowly over 30–45 seconds, pressing firmly.
- Pour the concentrate over ice.
- Dilute 1:1 with cold water if desired.
What to expect: A smooth, low-acid concentrate that closely approximates cold brew flavor — without the bitterness and heat-driven harsh notes of hot coffee poured over ice. It is not identical to 12-hour cold brew, but it is remarkably close and takes 2 minutes instead of 12 hours. On a hot day when you realize you forgot to start your cold brew the night before, this recipe saves the drink.
The science: Cold water extraction is slow — stirring for a full minute agitates the grounds and forces more surface area contact, partially compensating for the absence of heat. The pressure from pressing drives additional extraction in the final step.
Recipe 6: Championship-Style Concentrate (Advanced)
This recipe is inspired by the approach that has dominated World AeroPress Championship (WAC) competition since the rules changes in 2021, which require competitors to produce enough concentrate for judges to taste. It uses a very high coffee dose and very high water temperature to extract aggressively in a short window.
What you need:
- AeroPress (inverted orientation)
- 30g of coffee, ground medium-coarse
- 100ml of water at 96°C (205°F)
- Scale, timer
Steps:
- Set up AeroPress inverted.
- Add 30g of medium-coarse ground coffee.
- Pour 100ml of water at 96°C in 10 seconds — one fast, confident pour.
- Stir firmly 20 times in 10 seconds.
- Attach damp filter cap immediately.
- Wait 30–40 seconds total steep time from first pour.
- Flip onto cup and press quickly — under 20 seconds.
- Total brew time: ~60–80 seconds.
What to expect: An intensely concentrated shot — approximately 70–80ml — with extraordinary aromatics and sweetness that emerge from the fast, high-temperature extraction. The coarse grind prevents bitterness even at 96°C because surface area is limited. The result is less syrupy than the espresso-style recipe above, but more complex and aromatic. Dilute 1:2 with hot water for a full-sized cup, or drink as a short strong coffee.
Best used with: Single-origin light roasts. This recipe is designed to extract maximum aromatic compounds from high-quality beans. On a grocery store dark roast, it will be strong and slightly harsh. On a fresh Ethiopian natural or Kenyan washed coffee, it will stop you mid-sip.
Technique Tips for Better AeroPress Coffee
Dose and Ratio
A standard starting ratio is 1:16 (coffee to water by weight) — 17g of coffee to 272g of water. This produces a balanced, medium-strength cup. For a stronger brew, move toward 1:12 or 1:10. For a lighter, more delicate cup, 1:18 or 1:20. Use our Brew Ratio Calculator to calculate exact doses for any cup size without math.
Grind Size
The AeroPress is tolerant of grind variation, but grind size still matters:
| Style | Grind Size | Notes |
|---|---|---|
| Standard recipe | Medium | Like coarse sea salt |
| Inverted / Hoffmann | Medium-coarse | Slightly coarser than above |
| Espresso-style | Fine | Similar to drip but not espresso fine |
| Championship recipes | Medium-coarse | Coarse + high temp = no bitterness |
| Cold water method | Medium | Finer grinds over-extract in cold water |
Our Grind Size Guide provides specific dial settings for popular burr grinders matched to AeroPress brewing.
Water Temperature
The AeroPress works across a wide temperature range — 75°C to 100°C — which is unusual among brewing methods. As a rule of thumb:
- Lower temperature (75–85°C): Slower extraction, less bitterness, rounder sweetness. Good for medium and dark roasts.
- Medium temperature (88–92°C): Balanced extraction, good clarity. The standard starting point for most recipes.
- High temperature (95–100°C): Fast, aromatic extraction. Best with medium-coarse grinds to avoid bitterness. Ideal for light roasts and championship-style brewing.
Pressing Speed
Press slowly and steadily. Rushing produces turbulence that increases bitterness. Target a 30-second press for most recipes. Championship recipes press faster (15–20 seconds) but compensate with coarser grinds. Stop when you hear the first hiss — you do not need to press to the very bottom, and doing so forces air through the grounds and produces a slightly harsh note at the end of the cup.
Use the Brew Timer
Timing matters more in AeroPress brewing than it looks. The difference between a 1:00 steep and a 2:00 steep is substantial in the cup. Use our Brew Timer to track your bloom, steep, and press times hands-free — it frees you to focus on technique rather than watching a clock.
Best Accessories for AeroPress
The AeroPress is excellent straight out of the box, but a few accessories meaningfully improve the experience:
Burr grinder — The most important upgrade for any brewing method. Freshly ground coffee transforms AeroPress results. See our coffee grinders under $50 guide for budget-friendly options that work well with AeroPress's medium-to-coarse grind range.
Fellow Prismo or reusable metal filter — The Prismo is a pressure-activated valve that replaces the standard cap, allowing the inverted method without actually inverting the AeroPress. It also includes a fine metal filter that produces richer, sediment-inclusive cups similar to French press. Good for travelers and anyone who finds the invert-and-flip step nerve-wracking.
Acaia Lunar or basic kitchen scale — Consistent coffee weighing is the fastest path to consistent AeroPress cups. A scale accurate to 0.1g costs $10–$20 and eliminates the guesswork from dosing.
Extra paper filters — Standard AeroPress paper filters are available everywhere and cost about $8 for 350 filters. Keep a backup supply. Metal filters are reusable and produce a fuller-bodied cup with more oils and micro-fines — worth trying if you like French press body with AeroPress cleanliness.
Frequently Asked Questions
Is the inverted method better than the standard method?
Not inherently — better for whom and for what. The inverted method gives you more control over steep time and produces a fuller-bodied cup because water cannot bypass the coffee bed. The standard method is faster and easier for beginners. Most experienced AeroPress users prefer the inverted method, but the standard method can produce equally excellent results with the right recipe.
What coffee works best in an AeroPress?
All roast levels work well, which is unusual. Light roasts benefit from higher water temperatures and coarser grinds to unlock their aromatic complexity. Medium roasts are the most versatile and work with any recipe on this list. Dark roasts work best at lower temperatures (80–85°C) to avoid over-extracting bitter compounds. Single-origin specialty coffees genuinely shine in championship-style recipes designed to showcase their character.
How do I clean an AeroPress?
Effortlessly. Unscrew the filter cap, hold the AeroPress over a trash bin, and push the plunger through to eject the grounds puck as a clean, dry-ish disc. Rinse the rubber seal under water, rinse the chamber, and you are done. The entire process takes 20 seconds. This is one of the AeroPress's most underrated advantages over pour over (wet filter, grounds clinging to basket) and French press (messy grounds in the carafe).
How much caffeine is in an AeroPress coffee?
A standard AeroPress recipe using 17g of medium roast coffee produces approximately 90–120mg of caffeine per cup, similar to a standard drip coffee. Espresso-style recipes (18g / 60ml) produce roughly 120–150mg in a small concentrated serving. Championship-style recipes (30g of coffee) can produce 200–250mg or more in a single serving. Use our Caffeine Calculator to estimate your intake based on dose and roast level.
Can I use an AeroPress to make tea?
Yes — the AeroPress works exceptionally well for tea. It brews a clean, sediment-free cup faster than standard steeping because the pressure extraction speeds up the process. Use the same process as the standard coffee method: add loose leaf tea where you would add grounds, steep for 60–90 seconds, and press. The paper filter removes tannin-heavy sediment that can make loose leaf tea harsh.
Where to Go Next
If you've been using one AeroPress recipe since you bought the device, the six above are six genuinely different beverages. Start with the Classic, try Hoffmann's method to see what coarse grind and boiling water together can do, and build toward the Championship-Style Concentrate when you want to taste what your best beans are actually capable of.
For how AeroPress compares against every other major brewing method, see the Complete Guide to Coffee Brewing Methods.