How to Make Perfect Pour Over Coffee: A Step-by-Step Guide
There is a reason specialty coffee shops charge a premium for pour over coffee. It is not theater — though it can feel like it — and it is not elitism. Pour over is simply one of the most transparent brewing methods in existence. When you control every pour, every drop, every second of contact time between water and coffee, you get to taste the bean with almost no interference from the brewing device itself.
Pour over is also a ritual. The five minutes you spend at the kettle, watching the bloom, tracing slow spirals over the coffee bed, waiting for the last drops to fall — it is a different relationship with your morning cup than pressing a button and walking away. Many people who discover pour over say it changes how they think about coffee entirely.
This article contains affiliate links. We may earn a commission if you make a purchase through our links, at no extra cost to you.
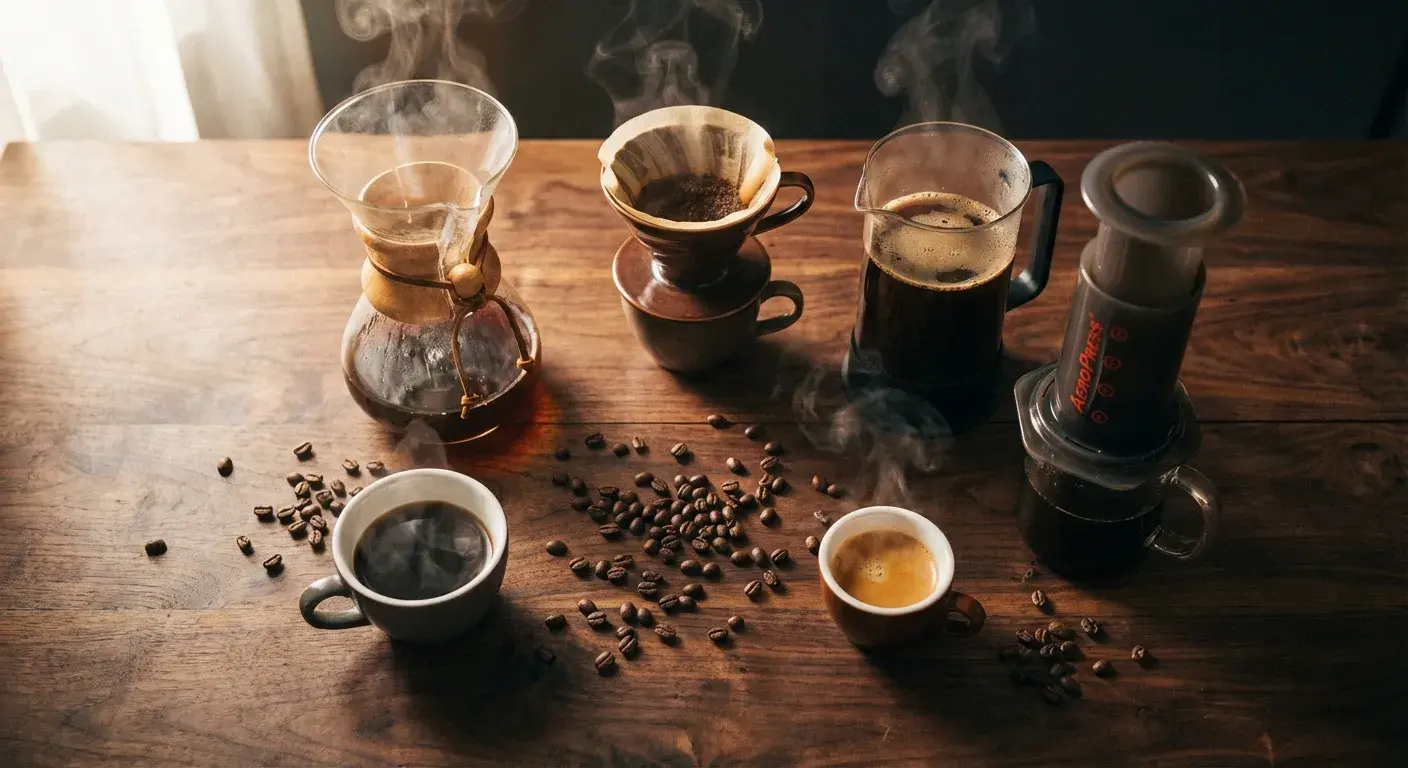
What follows is the recipe, the technique, and the troubleshooting — the exact steps to make consistently good pour over at home. Pour over is also one of eight brewing methods covered in our broader guide if you want to see how it compares to French press, espresso, or AeroPress.
What You Need
Pour over coffee requires a few pieces of dedicated equipment. You do not need to spend a fortune, but skimping on the wrong things will limit your results.
The brewer. The Hario V60 is the most popular and widely studied pour over brewer in the world. Its conical shape, large single hole, and spiral ridges give you enormous control over flow rate. The Chemex is a beautiful alternative that uses a thicker filter and produces a cleaner, slightly more mellow cup. Other good options include the Kalita Wave and the Origami. For a deep comparison and specific product recommendations, see our Best Pour Over Coffee Makers 2026 guide.
A gooseneck kettle. This is not optional if you want real control. The long, narrow spout of a gooseneck kettle lets you direct water precisely and pour at a consistent, slow rate. Standard kettles dump water too aggressively and create turbulence in the coffee bed. Our Best Electric Kettle for Pour Over Coffee guide covers the top options with temperature control.
A burr grinder. Grind quality is arguably the single biggest variable in pour over quality. A burr grinder produces uniform particle sizes that extract evenly. Blade grinders chop coffee into uneven chunks, which over-extract some particles and under-extract others, producing a bitter and muddled cup at the same time. If you are shopping for a grinder at a reasonable price, our Coffee Grinders Under $50 guide has solid options.
A kitchen scale. Measuring by volume (tablespoons) introduces too much inconsistency. A digital scale accurate to 0.1 grams is the single cheapest upgrade you can make to your pour over routine.
Paper filters. Use the filters designed for your specific brewer. Always rinse them before brewing.
Fresh beans. Buy beans roasted within the last 2-4 weeks. Stale coffee produces a flat, thin pour over no matter how good your technique is.
The Recipe
Pour over coffee is built on a few specific numbers. Get these right before worrying about technique.
| Variable | Target |
|---|---|
| Coffee dose | 15–18g |
| Water volume | 250–300ml |
| Ratio | 1:15 to 1:17 (coffee to water) |
| Water temperature | 200°F (93°C) — or near-boiling for light roasts |
| Bloom water | 2× coffee weight (30–36ml) |
| Bloom time | 30–45 seconds |
| Total brew time | 2:30–3:30 |
| Grind size | Medium-fine |
Start here: 15g of coffee to 250ml of water (1:16.7 ratio). This is a widely recommended starting point that produces a balanced, medium-strength cup. Once you have dialed this in, adjust to taste — more coffee for a stronger brew, less for something lighter.
Not sure about ratios for other brewing methods? Our Brew Ratio Calculator handles the math for any brew size instantly.
Step-by-Step Guide
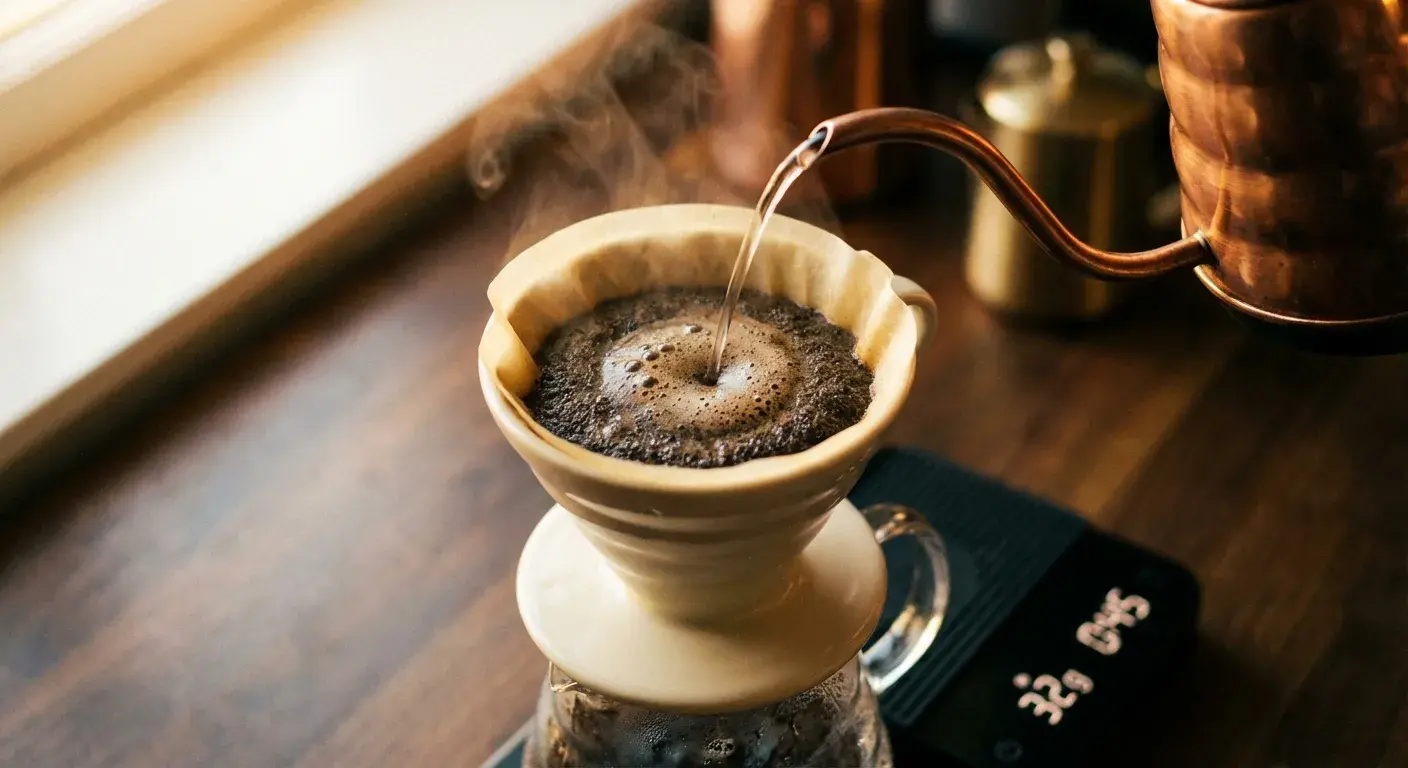
Step 1: Heat Your Water and Rinse the Filter
Heat your water to 200°F (93°C). If you are brewing a light roast, you can go higher — even near-boiling at 205°F — because lighter roasts are harder to extract and benefit from hotter water. Dark roasts do better at 195°F or a bit lower to prevent bitterness.
Place your paper filter in the brewer and set it over your cup or carafe. Rinse the filter with a generous pour of hot water — at least 100ml. This removes any papery taste from the filter and preheats both the brewer and your cup, which helps maintain temperature during brewing. Discard the rinse water.
Step 2: Grind Your Coffee
Grind your coffee to a medium-fine consistency. If you rub it between your fingers, it should feel like granulated sugar — not as coarse as raw sugar, not as fine as powder. On a numbered grinder, this is typically around 15-20 clicks from the finest setting, though every grinder is different.
Grind size is your most powerful adjustment for controlling taste. If your pour over runs too fast and tastes weak or sour, grind finer. If it runs slow and tastes bitter, grind coarser. For a visual reference, our Grind Size Guide shows where each brewing method falls on the spectrum.
Add the freshly ground coffee to the rinsed filter. Tare your scale to zero.
Step 3: The Bloom
Start your timer. Begin by pouring twice the weight of your coffee dose in water — if you are using 15g of coffee, pour 30ml of water. If using 18g, pour 36ml.
Pour slowly and evenly, saturating all the grounds. You will see the coffee bed swell, bubble, and release gas. This is CO₂ off-gassing, and it is a sign your beans are fresh. The CO₂ was trapped in the bean during roasting and needs to escape before extraction can happen evenly. If you skip the bloom and pour all your water at once, the CO₂ physically repels water from the grounds and creates uneven extraction.
Wait 30–45 seconds. Do not rush this step. A longer bloom (45 seconds) is better for very fresh beans that are still off-gassing aggressively. For beans that are 2–3 weeks post-roast, 30 seconds is usually enough.
Step 4: First Pour (Circles to 60% of Total Water)
After the bloom, begin your main pour. Pour in slow, concentric circles starting from the center of the coffee bed and spiraling outward, stopping before you hit the filter paper. Then spiral back inward. The goal is to keep all the grounds evenly saturated and moving gently — not to create a whirlpool, and not to channel all the water through one spot.
Pour slowly and steadily. Your target is to reach 60% of your total water by around 1:15 on your timer. If you are using 250ml total, aim to have 150ml in by 1:15. Maintain the water level so the grounds stay submerged but never overflow the brewer.
Step 5: Second Pour (Fill to Target Weight)
Continue pouring in the same controlled circular motion. Your goal now is to bring the total water to your target weight — 250ml or 300ml depending on your recipe. Try to complete this pour by around 1:45–2:00 on the timer.
Some brewers prefer to do this in two or three smaller pulse pours — adding water each time the previous pour has partially drained — rather than one continuous stream. Both approaches work. Pulse pouring gives you slightly more control and is useful for coffees that tend to channel.
At the end of the pour, you can give the brewer a gentle swirl — just enough to dislodge any grounds stuck to the sides and level the coffee bed. This is a technique James Hoffmann advocates in his Ultimate V60 method, and it noticeably improves consistency.
Step 6: Drawdown
Set down your kettle and let the coffee drain through the filter completely. Watch the water level drop. The total brew time — from first pour to the last drop falling — should be 2:30–3:30.
- If drawdown takes less than 2:30, your grind is too coarse. The water moved through too quickly and under-extracted the coffee.
- If drawdown takes more than 3:30, your grind is too fine. Water is struggling to pass through and the coffee is likely over-extracting.
Remove the brewer, discard the used filter and grounds, and pour your coffee.
Troubleshooting Table
| Problem | Likely Cause | Fix |
|---|---|---|
| Bitter, harsh taste | Over-extracted (too fine grind, too long brew time, too hot water) | Grind coarser, shorten brew time, lower water temp |
| Sour, sharp, thin taste | Under-extracted (too coarse grind, too short brew time, too cool water) | Grind finer, extend brew time, raise water temp |
| Weak, watery cup | Too little coffee or too coarse a grind | Use more coffee (increase dose) or grind finer |
| Muddy or astringent finish | Agitated bed too much, stale beans, or dirty equipment | Pour more gently, use fresher beans, clean your brewer |
| Uneven drawdown | Channeling from uneven pour or pouring too fast | Slow down, use more controlled circular pours, try pulse pouring |
Tips from the Pros
Use a pulse pour if you are struggling with consistency. Instead of one long continuous pour after the bloom, try 2–3 smaller pours, waiting each time for the water level to drop before adding more. This prevents the coffee bed from being disrupted by too much water at once and makes channeling less likely.
Water quality matters more than most people realize. Tap water varies dramatically by location. The minerals in water — specifically magnesium and bicarbonate — interact with coffee acids and affect extraction. If your local tap water is heavily chlorinated or very soft, try filtered water or a bottled water with moderate mineral content. The difference is often noticeable.
Fresh beans are not optional. The bloom step only works with fresh coffee. If your beans do not bloom — they just sit there, flat — they are too old and too much CO₂ has already escaped. The flavor will be flat and stale no matter what your technique is. Buy beans roasted within the last 2–4 weeks and keep them in an airtight container away from light.
Pre-heat everything. Before you start brewing, rinse your filter, preheat your brewer, and preheat your cup. Coffee loses temperature rapidly. A preheated cup keeps your coffee hotter, longer.
Experiment with grind size one step at a time. When troubleshooting, only change one variable at a time — usually grind size first, then dose, then temperature. Changing multiple things simultaneously makes it impossible to know what actually fixed the problem.
Looking for beans that showcase well in a pour over? Our Coffee Bean Finder helps you find single-origin coffees matched to your flavor preferences and brew method.
Frequently Asked Questions
What is the best ratio for pour over coffee?
The most commonly recommended starting ratio is 1:15 to 1:17 (coffee to water by weight). This means 15g of coffee with 240–255ml of water, or 18g with 270–300ml. Lighter ratios (1:17) produce a brighter, more delicate cup. Richer ratios (1:15) produce more body and strength. Try 1:16 first and adjust from there.
Do I need a gooseneck kettle for pour over?
A gooseneck kettle is not strictly required, but it makes a significant difference. The precise, slow pour you get from a gooseneck spout is very difficult to replicate with a standard kettle. If you are pouring from a regular kettle, pour as slowly as possible and consider using a spoon to break the flow rate.
Can I use pre-ground coffee for pour over?
You can, but results will be noticeably worse. Pre-ground coffee begins going stale immediately after grinding. More importantly, commercial pre-ground coffee is typically designed for drip machines — either too coarse or inconsistently sized for pour over. If you have access to a grinder, use it.
How hot should the water be for pour over?
The standard range is 195–205°F (90–96°C). In practice, most specialty coffee guides use 200°F (93°C) as a default. For light roasts, go hotter (200–205°F) to improve extraction of harder-to-dissolve compounds. For dark roasts, try 195°F to avoid accentuating bitterness.
Why does my pour over taste sour?
Sourness in pour over almost always means under-extraction — not enough of the coffee's flavor compounds dissolved into the water. The most common causes are a grind that is too coarse, water that is too cool, or a brew time that is too short. Try grinding finer first. If the brew time is already in the 2:30–3:30 range, try raising your water temperature by 5 degrees.
Where to Go Next
The core recipe to start with: 15g of freshly ground coffee, 250ml of water at 200°F, 30-second bloom, slow circular pours, total brew time of 2:30–3:30. Change one variable at a time — grind first — until the cup tastes the way you want it.
If the next move is new equipment, see our best pour over coffee makers guide. If it's trying another brewing approach entirely, the Complete Guide to Coffee Brewing Methods covers all eight.