How to Make Cold Brew Coffee at Home: The Easy Guide
Cold brew is the easiest brewing method in coffee. There is no temperature to maintain, no pour rate to manage, no bloom to time. You combine coarse coffee grounds with cold water, leave the jar in your fridge overnight, strain it in the morning, and you have a smooth, concentrated coffee that keeps for up to two weeks.
That is really it.
The reason cold brew tastes so different from hot coffee has nothing to do with equipment or technique. It is pure chemistry. Hot water extracts coffee quickly — in 3–5 minutes — and in doing so, it also pulls out many of the bitter compounds and volatile acids that make coffee taste sharp or harsh. Cold water extracts the same coffee over 12–24 hours, pulling mostly the smooth, sweet, chocolatey compounds and leaving behind much of the acidity. The result is a coffee that is naturally sweet, thick, and easy to drink.
This article contains affiliate links. We may earn a commission if you make a purchase through our links, at no extra cost to you.
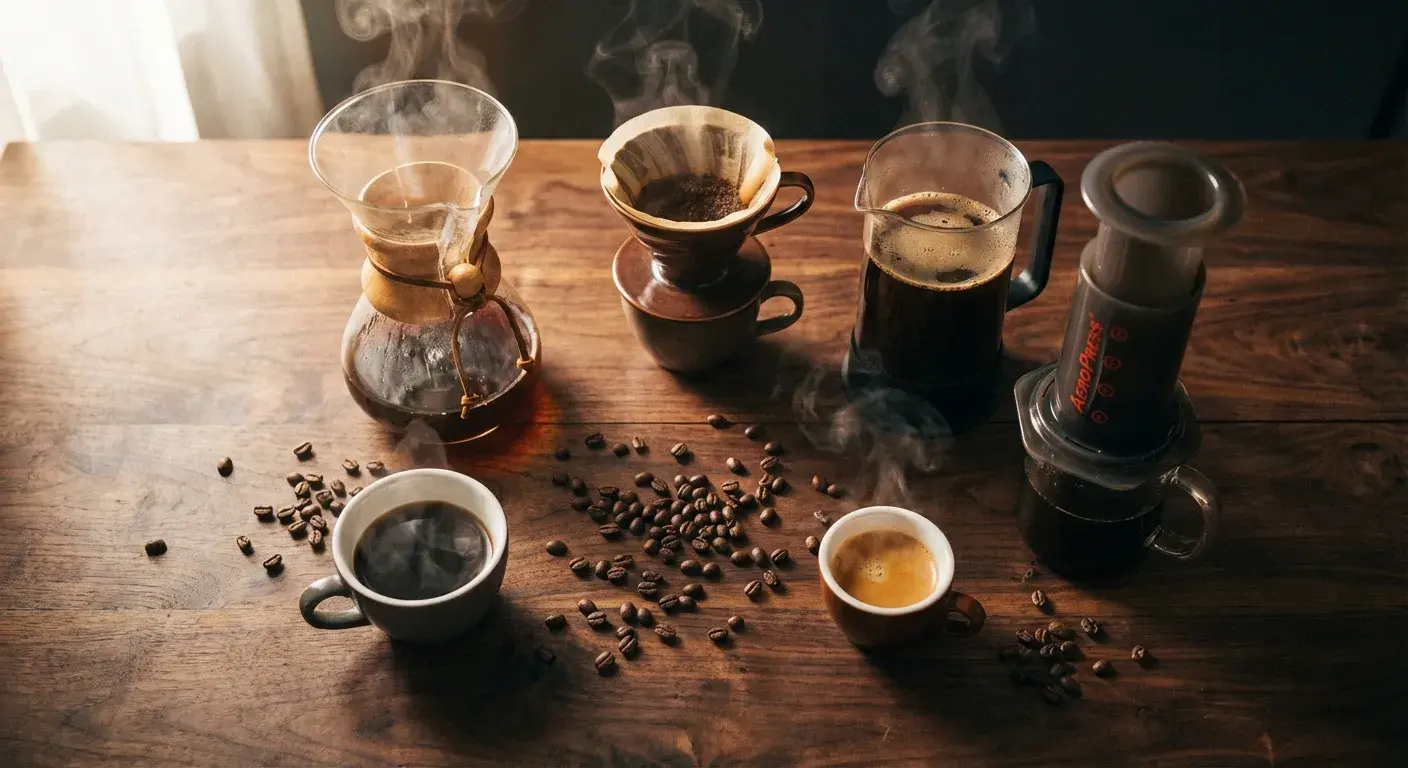
Below is the specific recipe that makes this work — ratios, timing, straining, and serving. Cold brew is also one of the eight methods covered in our broader brewing methods guide if you want to see where it sits against pour over and French press.
What You Need
Cold brew is famously low-tech. You probably already own everything you need.
A large jar or container. A wide-mouth mason jar (32 oz or 64 oz) is the most common cold brew vessel. A pitcher with a lid, a large bowl covered with plastic wrap, or any food-safe container with a lid works equally well. The only requirements are that it is large enough to hold your coffee and water together, and that it can be sealed during steeping.
Coffee grounds. Any coffee works for cold brew. Coarse grounds are strongly preferred — they are easy to strain and produce a cleaner final product. A medium or dark roast tends to shine in cold brew because the low-acidity, chocolatey, and caramel-forward notes that define those roasts come through beautifully at room temperature and over ice.
A strainer or filter. You can use a fine-mesh strainer lined with a paper coffee filter, a piece of cheesecloth, or a dedicated cold brew maker with a built-in filter. If you want a dedicated device, our Best Cold Brew Coffee Makers 2026 guide reviews the best options — including the OXO Good Grips Cold Brew Maker, the Toddy, and the Hario Mizudashi.
Cold water and time. The rest is patience.
The Two Cold Brew Recipes
Cold brew comes in two basic formats: concentrate and ready-to-drink. The difference is the ratio of coffee to water and what you do with it after steeping.
Cold Brew Concentrate (Recommended)
Ratio: 1:5 — 100g coffee to 500ml water Steep time: 16–24 hours Serve: Dilute 1:1 with water, milk, or ice before drinking
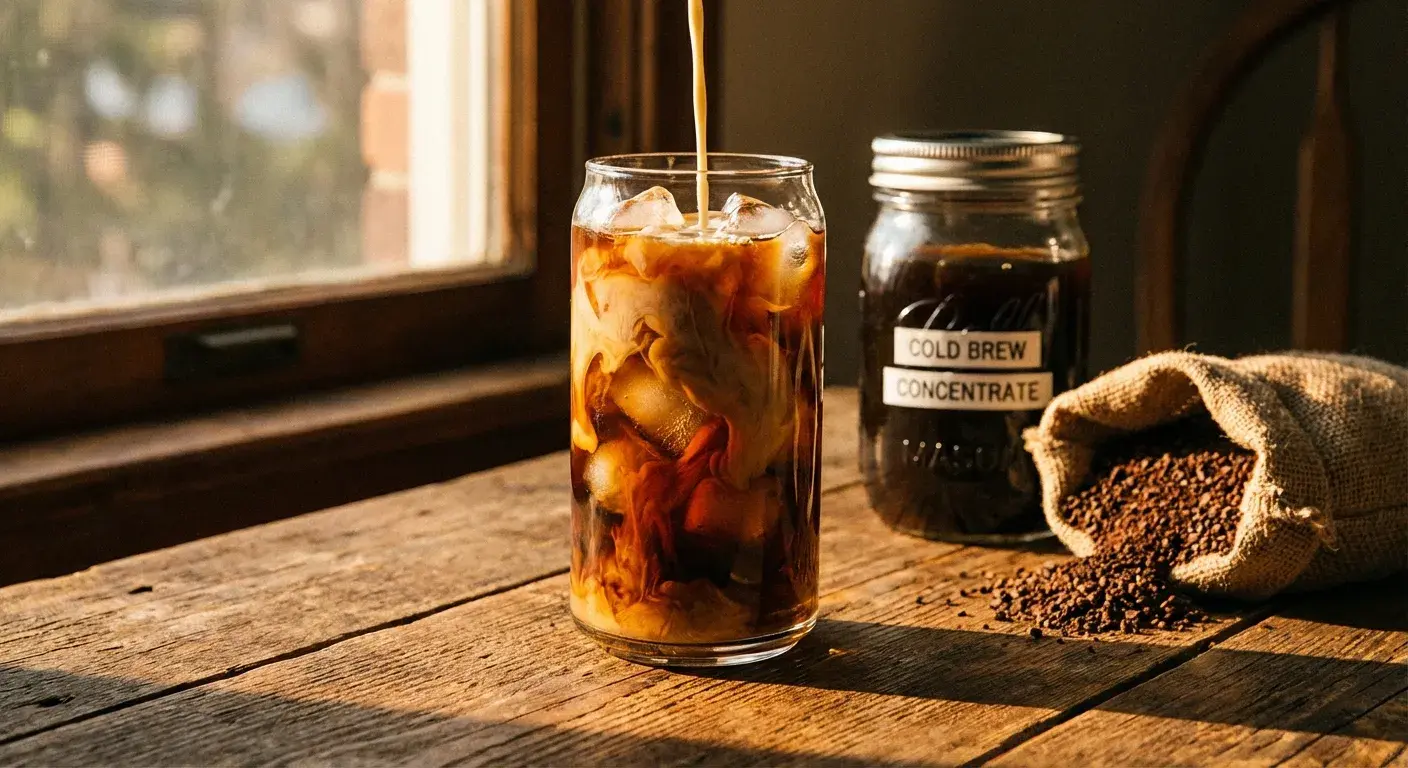
Concentrate is the most practical format for home brewers. A 500ml batch produces enough concentrate for 8–10 drinks when diluted, and it keeps for up to 2 weeks in the fridge. You make it once and drink it all week.
The 1:1 dilution ratio is a good starting point — pour equal parts concentrate and cold water (or milk) over ice. Some people prefer a stronger cup and dilute less (2:1 concentrate to water). Taste and adjust.
Ready-to-Drink Cold Brew
Ratio: 1:8 — 70g coffee to 560ml water Steep time: 12–18 hours Serve: Pour over ice directly, no dilution needed
Ready-to-drink cold brew uses more water and less coffee than concentrate. It is perfect if you want to grab a glass straight from the fridge without any measuring. The downside is that it takes up more fridge space per cup, and it does not keep quite as long (about 1 week vs. 2 weeks for concentrate).
Not sure which ratio is right for your batch size? Our Brew Ratio Calculator scales any cold brew recipe up or down by weight.
Step-by-Step Instructions
Step 1: Grind Your Coffee Coarse
Grind your coffee beans to a coarse consistency — roughly the texture of raw sugar or coarse sea salt. Think of what you use in a French press, then go slightly coarser than that. If you rub the grounds between your fingers, you should feel distinct, gritty particles, not a smooth powder.
Why does grind size matter for cold brew? Fine grounds have much more surface area, which accelerates extraction — even in cold water. Finely ground cold brew tends to taste over-extracted and bitter after 16+ hours, and it is also much harder to strain without a very fine filter. Coarse grounds steep slowly and evenly, and they fall out of suspension easily when straining.
For a visual reference showing exactly what coarse grind looks like, check our Grind Size Guide.
Step 2: Combine Coffee and Water
Add your coffee grounds to your jar or container. Pour in your cold water — filtered tap water or bottled water both work well. Avoid heavily chlorinated water, which can affect flavor.
For concentrate: 100g coffee + 500ml cold water For ready-to-drink: 70g coffee + 560ml cold water
Step 3: Stir to Saturate
Stir the mixture thoroughly to make sure all the grounds are saturated with water. Dry pockets of coffee that never contact water will not extract, leaving you with a weaker brew than expected. Use a long spoon or chopstick to push any dry grounds down into the water. A 30-second stir is enough.
Step 4: Refrigerate for 12–24 Hours
Seal or cover your container and place it in the refrigerator. The ideal steep time depends on your format:
- Concentrate (1:5): 16–24 hours
- Ready-to-drink (1:8): 12–18 hours
The sweet spot for most cold brews is 18 hours. This produces a smooth, balanced cup with good body and no bitterness. Steeping for less than 12 hours tends to produce under-extracted cold brew — thin, slightly sour, lacking richness. Steeping beyond 24 hours can lead to bitterness, though cold water extracts very slowly and forgives over-steeping much better than hot methods.
Can you steep at room temperature? Yes — room-temperature cold brew extracts faster (often 8–12 hours) because even ambient warmth speeds extraction. The risk is bacterial growth if you leave it out too long. The fridge is safer and more forgiving. If you do steep at room temperature, keep it to 8–12 hours maximum and refrigerate immediately after straining.
Step 5: Strain Through a Filter
Set your fine-mesh strainer over a clean jar, pitcher, or carafe. Line it with a paper coffee filter or cheesecloth. Pour your cold brew slowly through the strainer.
Do not press or squeeze the grounds. Let gravity do the work. Pressing the grounds forces finely ground sediment and bitter oils through the filter, which muddies the cup. Be patient — straining a 500ml batch takes 3–5 minutes.
If your finished cold brew looks cloudy, it means some fine grounds passed through. Let it settle for 30 minutes in the fridge and pour carefully, or re-strain through a fresh paper filter.
Step 6: Store and Serve
Transfer your strained cold brew to a clean, sealed container. Cold brew concentrate keeps in the refrigerator for up to 2 weeks. Ready-to-drink cold brew is best within 1 week.
To serve:
- Over ice: Fill a glass with ice, add concentrate plus equal parts water or milk.
- Black: Dilute concentrate 1:1 with cold water.
- With milk: Dilute 1:1 with whole milk, oat milk, or any milk you like.
Serving Ideas
Once you have a jar of cold brew in the fridge, the options go far beyond a glass of iced coffee.
Cold Brew with Milk: The classic. A 1:1 pour of concentrate and whole milk over ice, with a little simple syrup if you want it sweet. Oat milk is an excellent dairy-free choice — its mild sweetness complements cold brew without competing with it.
Cold Brew Tonic: Fill a glass with ice, add 2 oz of cold brew concentrate, and top with sparkling tonic water. The bitterness of the tonic and the sweetness of the cold brew create a surprisingly complex, refreshing drink.
Cold Brew Float: A summer favorite. Scoop a ball of vanilla ice cream into a glass, pour cold brew concentrate over it, and let it melt slightly into the coffee. Dessert and caffeine in one.
Overnight Oats with Cold Brew: Use cold brew instead of milk to soak overnight oats. The coffee flavor infuses gently and makes for a genuinely different morning breakfast.
Cold Brew Cocktails: Cold brew concentrate mixed 1:1 with vodka or bourbon, served over ice, makes a quick and excellent coffee cocktail. No shaker required.
Common Cold Brew Mistakes
Grinding too fine. This is the most common problem with first-time cold brew makers. Fine grounds over-extract, producing a bitter, muddy result even with perfect timing. If your cold brew tastes harsh, grind coarser next time. Our Brew Ratio Calculator can also help you verify whether your ratio is off.
Not steeping long enough. Cold brew at under 12 hours often tastes watery, slightly sour, and lacking depth. The slow cold-water extraction needs time. If you want cold brew ready by morning, start it the night before — not the afternoon before.
Using the wrong ratio. Many recipes online use volume measurements (cups) instead of weight (grams), which leads to inconsistent results because ground coffee density varies by grind size and bean type. Weigh your coffee. A kitchen scale is the most important piece of equipment in cold brew brewing.
Not straining properly. Rushing the straining step or squeezing the grounds produces gritty, bitter cold brew. Use a paper filter and let gravity work. The extra five minutes of patience is worth it.
Storing it too long. Cold brew seems like it should last forever because it is, essentially, refrigerated. But it does go stale. Concentrate after 2 weeks begins to taste flat and slightly fermented. Ready-to-drink after 1 week loses freshness noticeably. Make batches sized to what you will drink within those windows.
Frequently Asked Questions
How long does cold brew last in the fridge?
Cold brew concentrate lasts up to 2 weeks refrigerated in a sealed container. Ready-to-drink cold brew is best within 1 week. After that, flavor degrades — the coffee starts tasting flat, fermented, or stale. For the freshest experience, make smaller, more frequent batches rather than one giant batch every two weeks.
Can I use any type of coffee beans for cold brew?
Yes — any whole bean or pre-ground coffee works for cold brew. That said, medium and dark roasts tend to produce the best results because cold extraction emphasizes the low-acidity, chocolatey, caramel-forward notes those roasts carry. Light roasts can work well too and produce a fruitier, brighter cold brew, but they are less forgiving because their higher acidity can become pronounced if over-extracted.
Should I steep cold brew in the fridge or at room temperature?
The fridge is safer and more forgiving. Cold temperatures slow extraction, which means you have a wider window before the coffee becomes over-extracted. Room-temperature steeping speeds things up (8–12 hours vs. 16–24 hours in the fridge), but it carries a small risk of bacterial growth if left too long, especially in warm climates. For a beginner batch, start in the fridge.
Is there a quick cold brew method using hot water?
Yes — it is sometimes called flash brew or hot bloom cold brew. You brew a very small volume of very strong coffee using hot water (about 60ml at 200°F), then immediately pour it over a full glass of ice to chill it instantly. The result is not technically cold brew — it has more acidity — but it is ready in 5 minutes and can approximate the strength and chill of cold brew. Our Caffeine Calculator can help you estimate caffeine content for both methods, since cold brew is often stronger than people expect.
Where to Go Next
Start with 100g of coarsely ground coffee in 500ml of cold water, refrigerated for 18 hours. Strain, dilute 1:1 with water or milk, pour over ice. Once that is dialed in, experiment with steep time and ratio to match your taste.
For equipment recommendations, see our best cold brew coffee makers guide. For how cold brew compares against hot methods, the Complete Guide to Coffee Brewing Methods covers every approach side by side.