What Is the Coffee Bloom and Why Does It Matter?
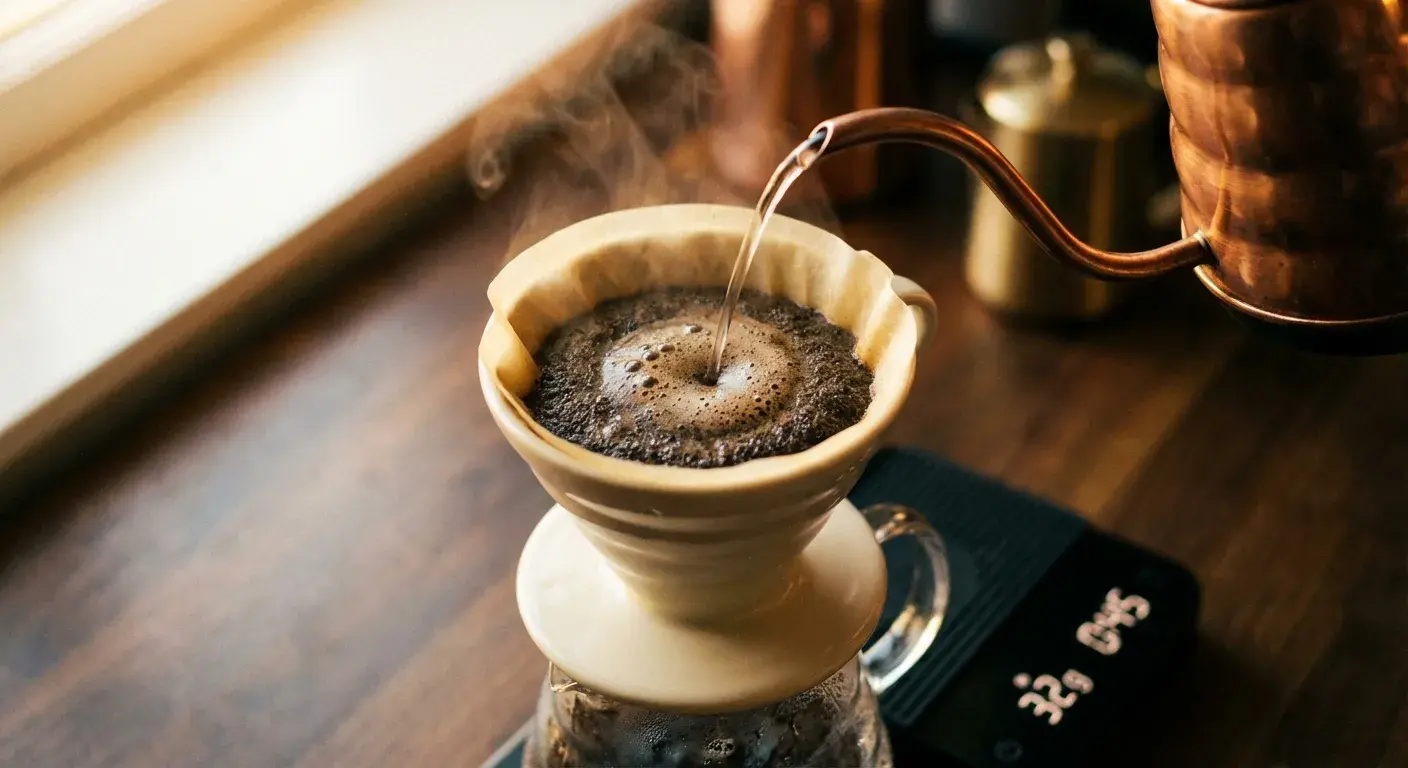
That first pour over fresh coffee grounds is one of the most satisfying moments in brewing. Hot water hits the grounds, the bed swells and puffs up, and tiny bubbles race to the surface as a small dome of brown foam forms above the filter. It is beautiful — and most people who see it for the first time assume it is decorative.
It is not.
What you are watching is trapped carbon dioxide escaping from freshly roasted coffee. And if you skip this step, or rush past it, your extraction suffers in ways that show up in the cup as sourness, unevenness, and muted flavor. That first pour is not a ritual. It is chemistry.
This article contains affiliate links. We may earn a commission if you make a purchase through our links, at no extra cost to you.
Here's what the bloom actually does, why skipping it costs you flavor, and how to bloom correctly across every brewing method.
What Is the Bloom?
The bloom (also called pre-infusion) is the initial small pour of hot water over coffee grounds before the main brew begins. When hot water contacts freshly roasted and ground coffee, it triggers a rapid release of carbon dioxide (CO₂) gas that has been trapped inside the bean since roasting.
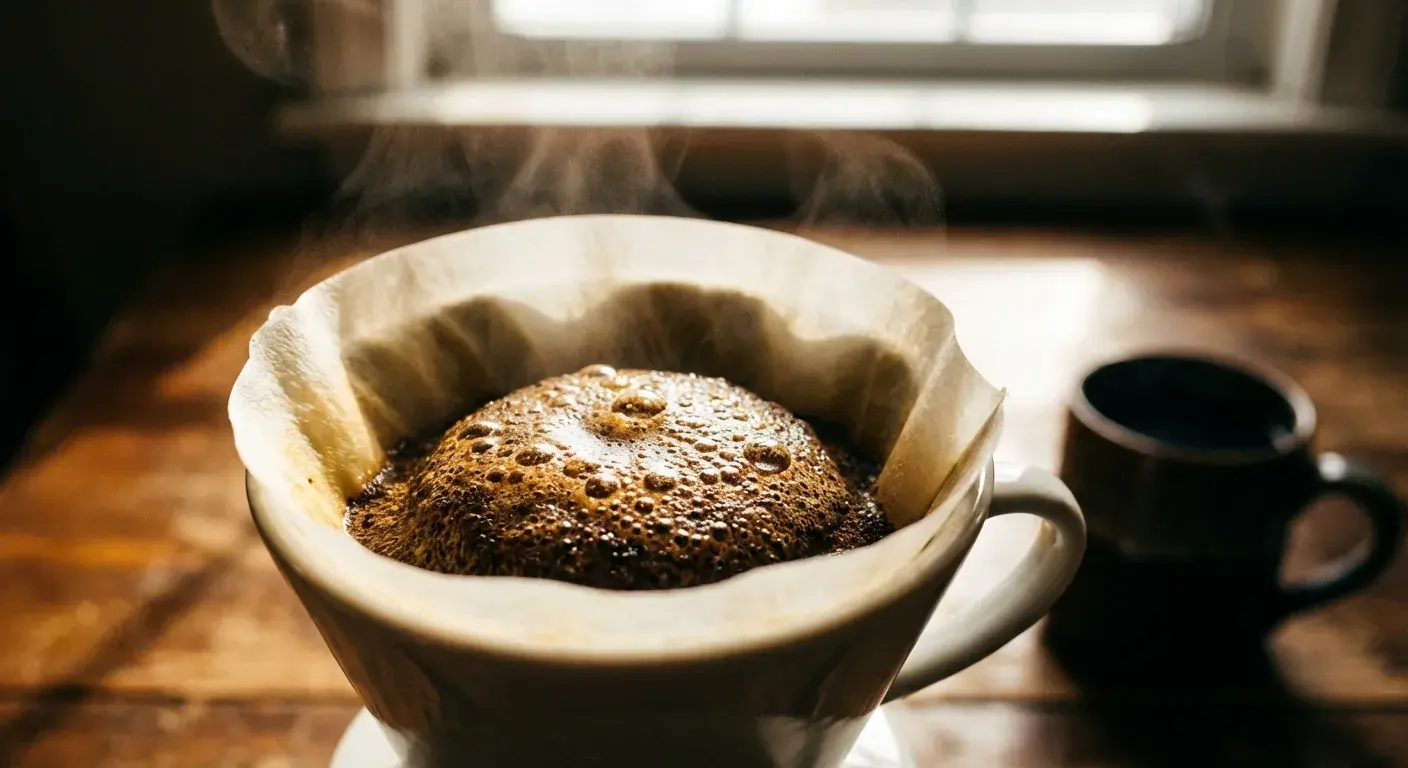
You can see this process happen in real time: the grounds visibly swell and expand, a dome or crust forms above the filter basket, and small bubbles rapidly pop on the surface. This visible activity is CO₂ escaping.
The bloom pour is typically held for 30–45 seconds before continuing with the main brew. That window is enough time to release the bulk of the CO₂ that would otherwise interfere with extraction.
The Science: Why CO₂ Is in Your Coffee
During roasting, green coffee beans undergo a process called pyrolysis — a chemical transformation triggered by heat. One byproduct of pyrolysis is significant amounts of carbon dioxide gas, which becomes trapped inside the cellular structure of the bean.
After roasting, CO₂ continues to escape from the beans naturally in a process called degassing. This release is most intense immediately after roasting — in the hours immediately following the roast — and slows over the following days and weeks. Most of the active degassing occurs within the first two weeks post-roast, after which CO₂ levels drop substantially and the bean becomes more stable.
When you grind coffee, you shatter that cellular structure and dramatically increase the surface area exposed. Grinding accelerates degassing enormously — ground coffee degasses in minutes compared to hours or days for whole beans. This is why grinding just before brewing produces the most noticeable bloom.
The Problem CO₂ Creates During Brewing
CO₂ does two things that undermine extraction when it is present in large amounts:
1. It repels water. CO₂ actively resists water penetration into the coffee bed. This creates an uneven saturation problem — some grounds get properly wet while pockets of grounds surrounded by CO₂ remain dry or under-wetted.
2. It adds sour flavor. Carbon dioxide dissolved in water forms carbonic acid. If you brew without blooming, the CO₂ that escapes during brewing infuses a sharpness and sourness into the cup that does not come from the coffee itself. It is a false sourness — CO₂ contamination rather than natural acidity.
Releasing the CO₂ before the main brew addresses both problems simultaneously.
How to Bloom Coffee Properly
The technique is simple. The key details are the ratio of bloom water to coffee and the wait time.
Step-by-Step
1. Weigh your coffee and prepare your brewer. Grind your beans just before brewing. Rinse your filter with hot water to remove papery taste and pre-heat the vessel.
2. Start your timer. Use our Brew Timer to track your bloom and total brew time precisely.
3. Add bloom water. Pour 2–3 times your coffee weight in water over the grounds. For 20g of coffee, that is 40–60g of water. Pour slowly and evenly, ensuring all the grounds get wet. The goal is complete saturation, not flooding.
4. Wait 30–45 seconds. You should see visible bubbling and swelling. The grounds will puff up noticeably. Let this run its course. Do not rush to the next pour.
5. Optional: gentle stir or swirl. After pouring, you can give the brewer a gentle swirl or stir with a spoon to ensure all grounds are fully saturated. This is especially useful if any dry clumps remain. Keep it gentle — aggressive stirring can disrupt the grounds unevenly.
6. Continue with the main brew. Once the bloom phase is complete, proceed with the rest of your recipe as normal.
Key Parameters
- Bloom water ratio: 2–3x coffee weight (most recipes use 2x as a baseline)
- Bloom time: 30–45 seconds
- Water temperature: 195–205°F (90–96°C) — the same temperature as your main brew
The bloom phase water is counted as part of your total water. If your recipe calls for 300g of water total and you use 40g for the bloom, you use 260g for the remaining pours.
Bloom as a Freshness Indicator
One of the most useful things about the bloom is what it tells you about your beans before you even taste the coffee.
A vigorous, active bloom — lots of bubbling, rapid puffing, a tall dome — is a sign of fresh coffee. The more CO₂ still trapped in the bean, the more activity you see during the bloom. Fresh-roasted coffee, typically within 4–14 days of the roast date, produces the most dramatic blooms.
A flat or weak bloom — minimal bubbling, little expansion, quick collapse — is a sign of older or stale coffee. Once most of the CO₂ has degassed from the bean over time, there is nothing left to drive the bloom. You can still brew the coffee, but the bloom phase becomes largely ceremonial.
As a general guide:
- 4–14 days post-roast: Peak bloom activity; CO₂ content is highest
- 2–4 weeks post-roast: Good bloom; still plenty of activity
- 4–8 weeks post-roast: Reduced bloom; coffee is past peak freshness but still drinkable
- Beyond 8 weeks: Minimal or no bloom; beans are stale
If you consistently see a flat bloom, check your roast date. This is a faster diagnostic than taste alone.
Does Every Brewing Method Need a Bloom?
Not every method handles the bloom the same way. Here is how it applies across common brewing approaches:
Pour Over — YES, essential
Pour over is where the bloom matters most. Because water flows by gravity through the grounds in one direction, any CO₂ disruption to even saturation directly affects extraction quality. The bloom is a non-negotiable step for V60, Chemex, Kalita Wave, and all other pour over methods. See our full How to Make Perfect Pour Over Coffee guide for step-by-step technique.
AeroPress — Recommended
The AeroPress's shorter brew time means CO₂ has less opportunity to cause problems than in a pour over. But a 30-second bloom before adding the remaining water still improves consistency and reduces sourness from CO₂. Most AeroPress champion recipes include a bloom phase.
French Press — Optional, but helpful
In French press, grounds steep fully submerged in water for 4 minutes. CO₂ escapes during the steep regardless, and the immersion method is more forgiving of uneven saturation than pour over. A bloom is not necessary, but adding a small initial pour, waiting 30 seconds, then adding the rest of the water can produce a slightly more even extraction.
Automatic Drip Machine — Built in (sometimes)
Many higher-quality automatic drip machines include a pre-infusion or bloom setting that wets the grounds before the main brewing cycle begins. If your machine has this feature, it is doing the bloom for you. Budget drip machines without this feature skip the bloom entirely — one of several reasons manual methods can outperform them for coffee quality.
Espresso — Pre-infusion is the equivalent
Espresso machines don't bloom the way pour over does, but pre-infusion — a low-pressure initial water contact with the puck before full pressure is applied — serves the same purpose. It allows CO₂ to escape and the grounds to hydrate evenly before full extraction begins. Better espresso machines have programmable pre-infusion. The principle is identical to the bloom.
Cold Brew — Not needed
Cold brew uses room-temperature or cold water, which does not trigger CO₂ release from the grounds. No CO₂ escapes during cold brew steeping, so there is nothing to pre-release. Skipping the bloom in cold brew is correct.
Frequently Asked Questions
What happens if I skip the bloom?
The CO₂ that would have been released during the bloom instead escapes during brewing, creating uneven water penetration through the grounds and introducing a sharp, slightly sour carbonic note into the cup. The effect is most noticeable with very fresh beans — older beans have already lost most of their CO₂ through natural degassing, so skipping the bloom on older beans has less impact.
Should I bloom if I'm using pre-ground coffee from the store?
Pre-ground coffee from a grocery store is typically several weeks to months old by the time it reaches you, and it has been degassing since it was ground. You can bloom it, but do not expect a dramatic visual display. The bloom will be minimal. The coffee will still benefit from a 30-second wait, but mainly as a saturation step rather than a CO₂ release.
Can beans be too fresh to brew well?
Yes. Coffee roasted within the last 24–48 hours can actually be difficult to brew well because the CO₂ content is extremely high. Even with a proper bloom, so much gas is escaping during brewing that extraction becomes erratic. Most specialty roasters recommend waiting at least 3–7 days after the roast date before brewing. This "resting" period allows enough CO₂ to escape naturally that brewing becomes more controlled.
Where to Go Next
The bloom is also a freshness indicator you already own. A vigorous bloom means fresh coffee. A flat bloom means your beans are aging — a faster diagnostic than taste alone.
For how the bloom fits alongside grind, ratio, and temperature across every method, visit the Complete Guide to Coffee Brewing Methods.