How to Make Cold Foam at Home (With or Without a Frother)
 Tommie Chaney·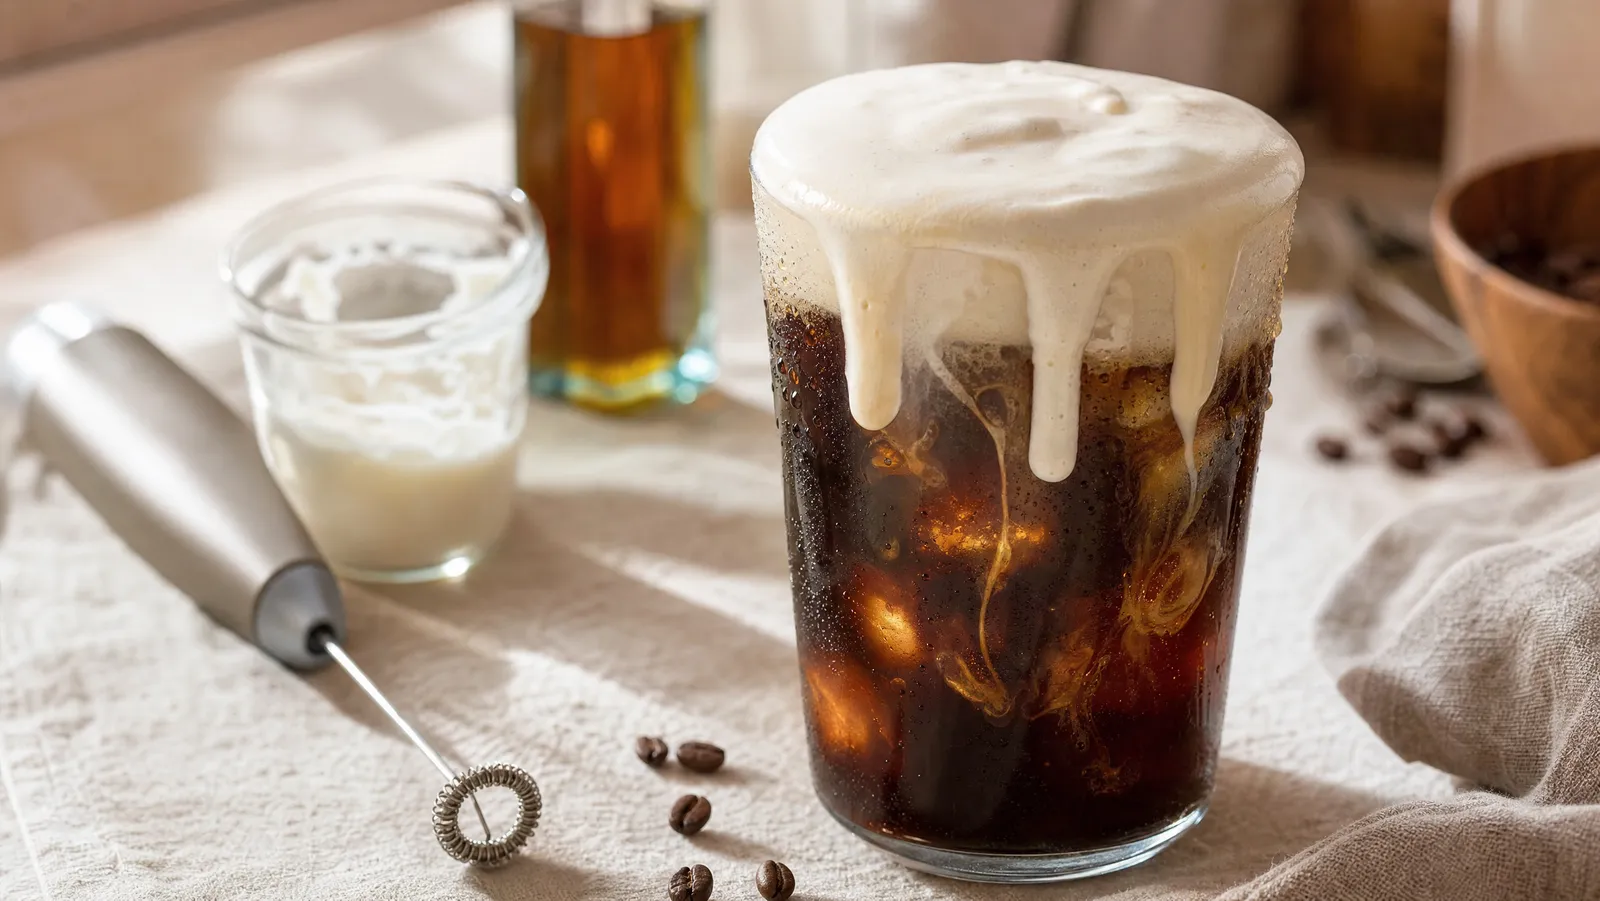
Affiliate disclosure: Sweeter Grind is a participant in the Amazon Services LLC Associates Program. We may earn commissions on qualifying purchases at no extra cost to you.
The milk you would reach for to make a good latte is the wrong milk for cold foam.
To make cold foam at home, froth 1/4 cup of cold skim or 1% milk — sweetened first, with syrup or powdered sugar — for 20 to 30 seconds, until the volume roughly triples and the texture pours like wet paint. Then pour it over a full glass of iced coffee. No heat, no espresso machine, no steam wand.
That is the whole drink. The rest of this is the part that goes wrong: the milk choice everybody gets backwards, the ten seconds that turn good foam into a stiff lump, and four ways to do it with gear you already own. Cold foam is the cheapest upgrade in making café drinks at home — a quarter cup of milk and thirty seconds.
Why Cold Foam Needs Low-Fat Milk, Not Cream
Foam is air held in place by milk protein. Fat is what gets in the way.
PureWow puts it directly: whole milk "won't do," because it has a higher ratio of fat to protein, and the fat weighs the proteins down so they cannot expand into a stable froth. The same piece calls non-fat milk the choice for "heat-free frothing." Tasting Table agrees in its comparison of hot and cold foams: non-fat works best, because "milk fat is heavy and will weigh down a cold foam quickly."
The lab work points the same way. A 2024 study in Food and Bioprocess Technology found that skim milk powder dispersions produced 16 times the foam volume of whole milk at matched protein (0.5%), and a more stable foam, concluding that the protein-to-fat ratio has a substantial influence on milk's foaming properties. A review of milk foaming in the International Journal of Dairy Technology (Huppertz, 2010) reports that lipids can be detrimental to both the formation and the stability of milk foams, particularly at temperatures where the milk fat is partially crystalline — the review's example is 20°C, which is milk left on the counter, not milk out of the fridge. Instrument testing across 5–60°C (Oetjen et al., Colloids and Surfaces A, 2014) gives the kitchen version: at low temperature, semi-skimmed milk foams better than whole milk, low-fat products are "more favorable than whole milk" for foaming cold milk, and milk at room temperature "is not suitable at all." Fridge-cold or hot. Room temperature is the dead zone.
Here is the useful way to hold all of that: heat is what lets whole milk foam well. By about 40°C the fat is fully liquid and stops fighting the foam — in the Oetjen testing, fat at that temperature was actually stabilizing, and the most stable, smallest-bubble foam in the whole study was UHT whole milk at 40°C. That is why a steam wand turns whole milk into glossy microfoam — the mechanics we cover in how to steam milk like a barista. Take the heat away and the fat goes from an asset to a liability. Cold foam is a protein game, so you want the milk with the most protein per gram of fat.
In practice:
| Milk | Cold foam result |
|---|---|
| Skim (non-fat) | Best volume and hold. Default choice. |
| 1% | Nearly as good. Slightly softer, slightly richer. |
| 2% | Workable. Noticeably less volume, fades faster. |
| Whole | Thin, loose, short-lived. |
| Half-and-half | Dense, low-volume foam rather than an airy cap — the sweet cream exception below. |
| Heavy cream | Not foam. You are making whipped cream. |
That last row is not a guess. In a side-by-side test at Cheat Day Design, 1/4 cup of skim milk frothed up into about a cup of foam stiff enough to eat with a spoon, while heavy cream in the same handheld frother simply became whipped cream.
The Stop Point: Pourable, Not Peaked
Cold foam has a narrower window than steamed milk, and the failure is overshooting, not undershooting.
Published times cluster around 20 to 30 seconds with a handheld frother — that is the window Cheat Day Design's recipe gives, and Tasting Table's sweet cream copycat puts the whole job at "under a minute." In our experience the last ten to fifteen seconds is where the decision gets made. Foam that poured like heavy cream at 20 seconds can set into a dull, matte, meringue-like mass by 35, and then it sits on the coffee in a lump instead of spreading into a layer.
Two cues beat the clock:
- The ribbon test. Lift the frother out. The foam should fall off the whisk in a ribbon that sinks back in. If it stands up in a peak, you went too far.
- The shine. Good cold foam is glossy. Over-whipped cold foam looks dry.
If you overshoot, stir in a teaspoon of cold milk and swirl. It loosens back up most of the way.
How to Make Cold Foam at Home: Step by Step
This is the handheld-frother method, the fastest and most repeatable. No-frother methods are in the next section.
Step 1: Chill the milk and the vessel
Use milk straight from the fridge. Tasting Table notes that cold foam is made while the milk is still cold, and the temperature testing above is blunt about the alternative: milk at room temperature "is not suitable at all" for foaming. Fridge-cold or steamed, nothing in between. A narrow cup helps; a wide bowl gives the frother nothing to work against.
Step 2: Measure a small amount of milk
Start with 1/4 cup (about 60 ml) for a 16 oz drink. It looks like too little. It is not — Cheat Day Design's test turned that same 1/4 cup of skim into roughly a full cup of foam.
Step 3: Sweeten before you froth, not after
Stir in 1 to 2 teaspoons of syrup, or 1 tablespoon of powdered sugar, before any air goes in. Tasting Table points out that powdered sugar carries a little cornstarch, which both sweetens and thickens the foam. Sweetener stirred into finished foam just knocks it down. For the drink underneath, see how to sweeten iced coffee.
Step 4: Froth 20 to 30 seconds, watching volume not the clock
Submerge the whisk fully, turn it on, then raise it to just below the surface so it pulls air in. Small circles. Keep the whisk under the surface or you will spray milk across the counter.
Step 5: Stop at the pourable stage
Stop when the volume has roughly tripled and the foam still falls off the whisk in a ribbon. Glossy, not matte. This is the step that separates cold foam from cold lump.
Step 6: Tap and swirl to tighten the texture
Tap the cup once on the counter to pop the largest bubbles, then swirl three or four seconds. Bubbly becomes smooth, the same way swirling tightens steamed milk.
Step 7: Pour over a full glass of iced coffee
Fill the glass with ice and coffee to within half an inch of the rim, then pour the foam over the back of a spoon. Pouring into a half-empty glass is what makes foam sink.
Four Ways to Make Cold Foam Without a Frother
Every one of these works with gear already in your kitchen. Ranked on texture, best first.
1. French press. Put the cold sweetened milk in the press — enough depth to cover the mesh — and work the plunger up and down fast for 20 to 30 seconds, the time Cheat Day Design gives for this method. The mesh screen does the same job as a frother whisk, so the texture comes out closest to café foam. It wants volume, so this is the right choice for two or three drinks. The same press you use for cold brew coffee at home does both jobs.
2. Immersion blender. Ten to fifteen seconds in a narrow cup, blade just under the surface. Fastest, loudest, easiest to overshoot. A countertop blender works on high for 1 to 2 minutes per Cheat Day Design, but it coats the whole jar for a quarter cup of milk.
3. Mason jar shake. Fill a sealed jar no more than a third full and shake hard for about a minute — the duration Cheat Day Design gives for this method. Honest assessment: this gives frothy milk, not stiff foam, and it mixes into the coffee within a minute or two. Fine for a drink you were going to stir anyway.
4. Whisk or fork. A small balloon whisk in a narrow cup, 60 to 90 seconds of hard work, gets a loose foam. A fork gets bubbles. We would skip the fork and shake a jar instead.
| Method | Time | Texture | Worth it? |
|---|---|---|---|
| Handheld frother | 20–30 sec | Thick, spoonable | Yes, for single drinks |
| French press | 20–30 sec | Closest to café | Yes, for 2+ drinks |
| Immersion blender | 10–15 sec | Thick, easy to overdo | If you own one |
| Mason jar | 45–60 sec | Frothy, not stiff | Good enough |
| Whisk | 60–90 sec | Loose | Only if nothing else |
A dedicated cold-foam frother — flat disc instead of spiral whisk — in our experience makes denser cold foam, apparently because the disc shears rather than stirs. We would call it a real improvement and a narrow one. We would not buy one before trying the French press already in your cupboard.
Vanilla Sweet Cream Cold Foam: The Deliberate Exception
Now the contradiction. The most-searched cold foam on the internet is built on cream, which is exactly what the section above told you not to use.
That is intentional, because vanilla sweet cream foam is not trying to be light. It is supposed to be dense and slow, a sweet layer that sinks gradually into cold brew rather than a cap of airy bubbles. A little fat gives it that drape. You are trading volume for body on purpose.
Worth being precise about what the café version is. Starbucks' own at-home recipe for Vanilla Sweet Cream Cold Foam is simpler than the lore: 1/4 cup of 2% milk, 1 tablespoon of powdered sugar and 1/4 teaspoon of vanilla extract, frothed and poured over 8 oz of double-strength coffee. Chowhound reports that the widely repeated "2% milk plus heavy cream" formula comes from baristas and self-described store employees on social media rather than from Starbucks, and notes that a Vanilla Sweet Cream recipe on the Starbucks site calls for a 4-to-1 ratio of heavy cream to vanilla-flavored syrup.
The home ratio we would start with is Tasting Table's 3-2-1: 3 tablespoons heavy cream, 2 tablespoons reduced-fat milk, 1 tablespoon vanilla syrup, worked with a milk frother, an immersion blender or a French press, or shaken in a sealed jar until fluffy — Tasting Table puts the whole thing at under a minute, and in our experience 20 to 30 seconds with a handheld frother is the stopping point. More cream for a thicker drape, more milk for more volume. Use real vanilla syrup rather than extract plus sugar — extract alone tastes thinner — and make the syrup yourself in five minutes with our homemade syrup recipes.
Flavor Variations That Actually Work
Same base, different flavoring, all stirred in before frothing:
- Salted caramel. 1 tablespoon caramel sauce and a pinch of fine salt into 1/4 cup skim. Thick sauces weigh foam down, so thin them with a teaspoon of milk first.
- Pumpkin. 2 teaspoons purée, 1 tablespoon syrup, 1/4 teaspoon pumpkin pie spice. Purée is heavy — expect about two-thirds the usual volume, and strain it for a smooth layer. More seasonal builds in holiday coffee drinks at home.
- Matcha. 1/2 teaspoon matcha, sifted and whisked with a teaspoon of warm water into a paste first. Dry powder dumped straight in leaves clumps that never break up.
- Chocolate. 2 teaspoons chocolate syrup, or 1 teaspoon cocoa made into a paste with syrup. Cocoa clumps like matcha.
- Brown sugar cinnamon. 1 tablespoon brown sugar syrup and a pinch of cinnamon. Cinnamon floats, so sprinkle it after pouring.
How to Pour Cold Foam So It Floats
Three things decide whether the layer holds, and none of them are the foam:
- Fill the glass first. Foam needs to land on liquid, not fall through air. Coffee to within half an inch of the rim.
- Pour over the back of a spoon. Hold it against the inside of the glass just above the coffee line and pour onto it. That spreads the stream instead of punching a hole.
- Do not stir. Cold foam is a layer, and the drink is built to be drunk through it.
In our experience cold brew holds a foam layer better than heavily diluted iced coffee, which we would put down to the denser liquid underneath. If your foam sinks every time with the same technique, the drink underneath is too watery.
Troubleshooting Cold Foam
| Problem | Likely cause | Fix |
|---|---|---|
| Barely foams | Milk too fatty, or not cold | Switch to skim or 1%, straight from the fridge |
| Foams then collapses in a minute | Fat content, or under-frothed | Lower-fat milk; froth to triple volume, not double |
| Stiff lump that sits on top | Over-frothed | Stop at the ribbon stage; stir in a teaspoon of cold milk to loosen |
| Sinks into the coffee | Glass not full, or foam poured straight in | Fill to half an inch from the rim, pour over a spoon |
| Grainy or clumpy | Cocoa, matcha or spice added dry | Make a paste with liquid first |
| Too sweet | Syrup in the foam and the coffee | Sweeten one or the other, not both |
| Tastes flat | Sweetener added after frothing | Sweeten the milk first |
Frequently Asked Questions
Can I make cold foam without a frother?
Yes, four ways. A French press plunged up and down for 20 to 30 seconds gives the closest texture to a café. An immersion blender takes 10 to 15 seconds. A sealed jar shaken for about a minute gives frothy milk rather than stiff foam, which is still fine in a drink you are not photographing. A balloon whisk works with 60 to 90 seconds of effort. The press is what we reach for when the frother is in the dishwasher.
Why won't my whole milk foam when cold?
Because the fat is working against you and heat is not there to help. PureWow explains that whole milk's higher fat-to-protein ratio means the fat weighs the proteins down so they cannot expand into stable froth, and Tasting Table adds that milk fat is heavy enough to pull a cold foam apart quickly. Switch to skim or 1% and the same frother behaves completely differently.
How long does cold foam last, and can I make it ahead?
Use it immediately. Good skim foam holds a visible layer for a few minutes and softens from there; jar foam can start mixing in within a minute or two. What you can prep is the sweetened milk base — mix it a day ahead and froth at the last second, which is what we do for more than two drinks. Keep that base refrigerated: the National Dairy Council's guidance is that perishable foods like milk should not sit out of the refrigerator or cooler longer than two hours, and the FDA's own rule is a refrigerator at 40°F or below, with the two-hour limit dropping to one hour when the air temperature is above 90°F.
Is cold foam the same as whipped cream?
No, and the difference is fat. Cold foam is air whipped into low-fat milk, held up by protein, thin enough to pour. Whipped cream is air whipped into high-fat cream, held up by partially solidified fat, stiff enough to hold a peak. Cheat Day Design's test makes the boundary concrete: heavy cream put through a handheld milk frother does not give cold foam, it gives whipped cream.
What non-dairy milk works for cold foam?
Barista-formulated oat is the best bet and plain almond is the weakest of the common options, and the reason is protein again. A report on baristas' rankings of dairy-free milks puts oat first — "the closest plant-based equivalent to dairy milk for texture and foam" — then soy, on the strength of its protein, and notes almond milk's lower protein content produces larger, less durable bubbles. Complete Home Barista's numbers show the size of the gap: 1 g of protein per 8 oz in standard almond milk and 1–2 g in barista almond against 8 g in 2% dairy, with foam stability rated poor, good and excellent respectively. It also has oat generally outperforming almond, and notes barista versions add pea protein, sunflower lecithin or gellan gum to narrow the gap without closing it. Cheat Day Design's test matches that: unsweetened almond barely frothed, while an almond-cashew blend with added pea protein frothed significantly better.
Start Tonight
The short version: 1/4 cup of cold skim or 1% milk, sweetened before it is frothed, 20 to 30 seconds of air, stopped while it still pours, over a glass of cold brew filled to the rim. For sweet cream, break the low-fat rule on purpose with 3 tablespoons cream, 2 tablespoons milk, 1 tablespoon vanilla syrup, and take the denser layer as the trade.
Make it once with skim and once with whole milk back to back. The difference is obvious enough that you will not need to be told again. For the drinks to put it on, see Sweeter Grind's café drinks guide.
Related reading
- How to sweeten iced coffee — which sweeteners dissolve cold, and which do not
- Homemade syrup recipes — vanilla, caramel, brown sugar and more in five minutes
- Holiday coffee drinks at home — seasonal drinks that want a foam layer